- workflow
- /
Execute Workflow
- /
- Trigger Workflow via HTTP request
¶ Call Workflow via an API interface
Just like you would normally request an API interface, Authing workflow can expose a public service API address, and after calling it, you can get the workflow execution result via an HTTP response.
When selecting a trigger, select Trigger by HTTP Request:
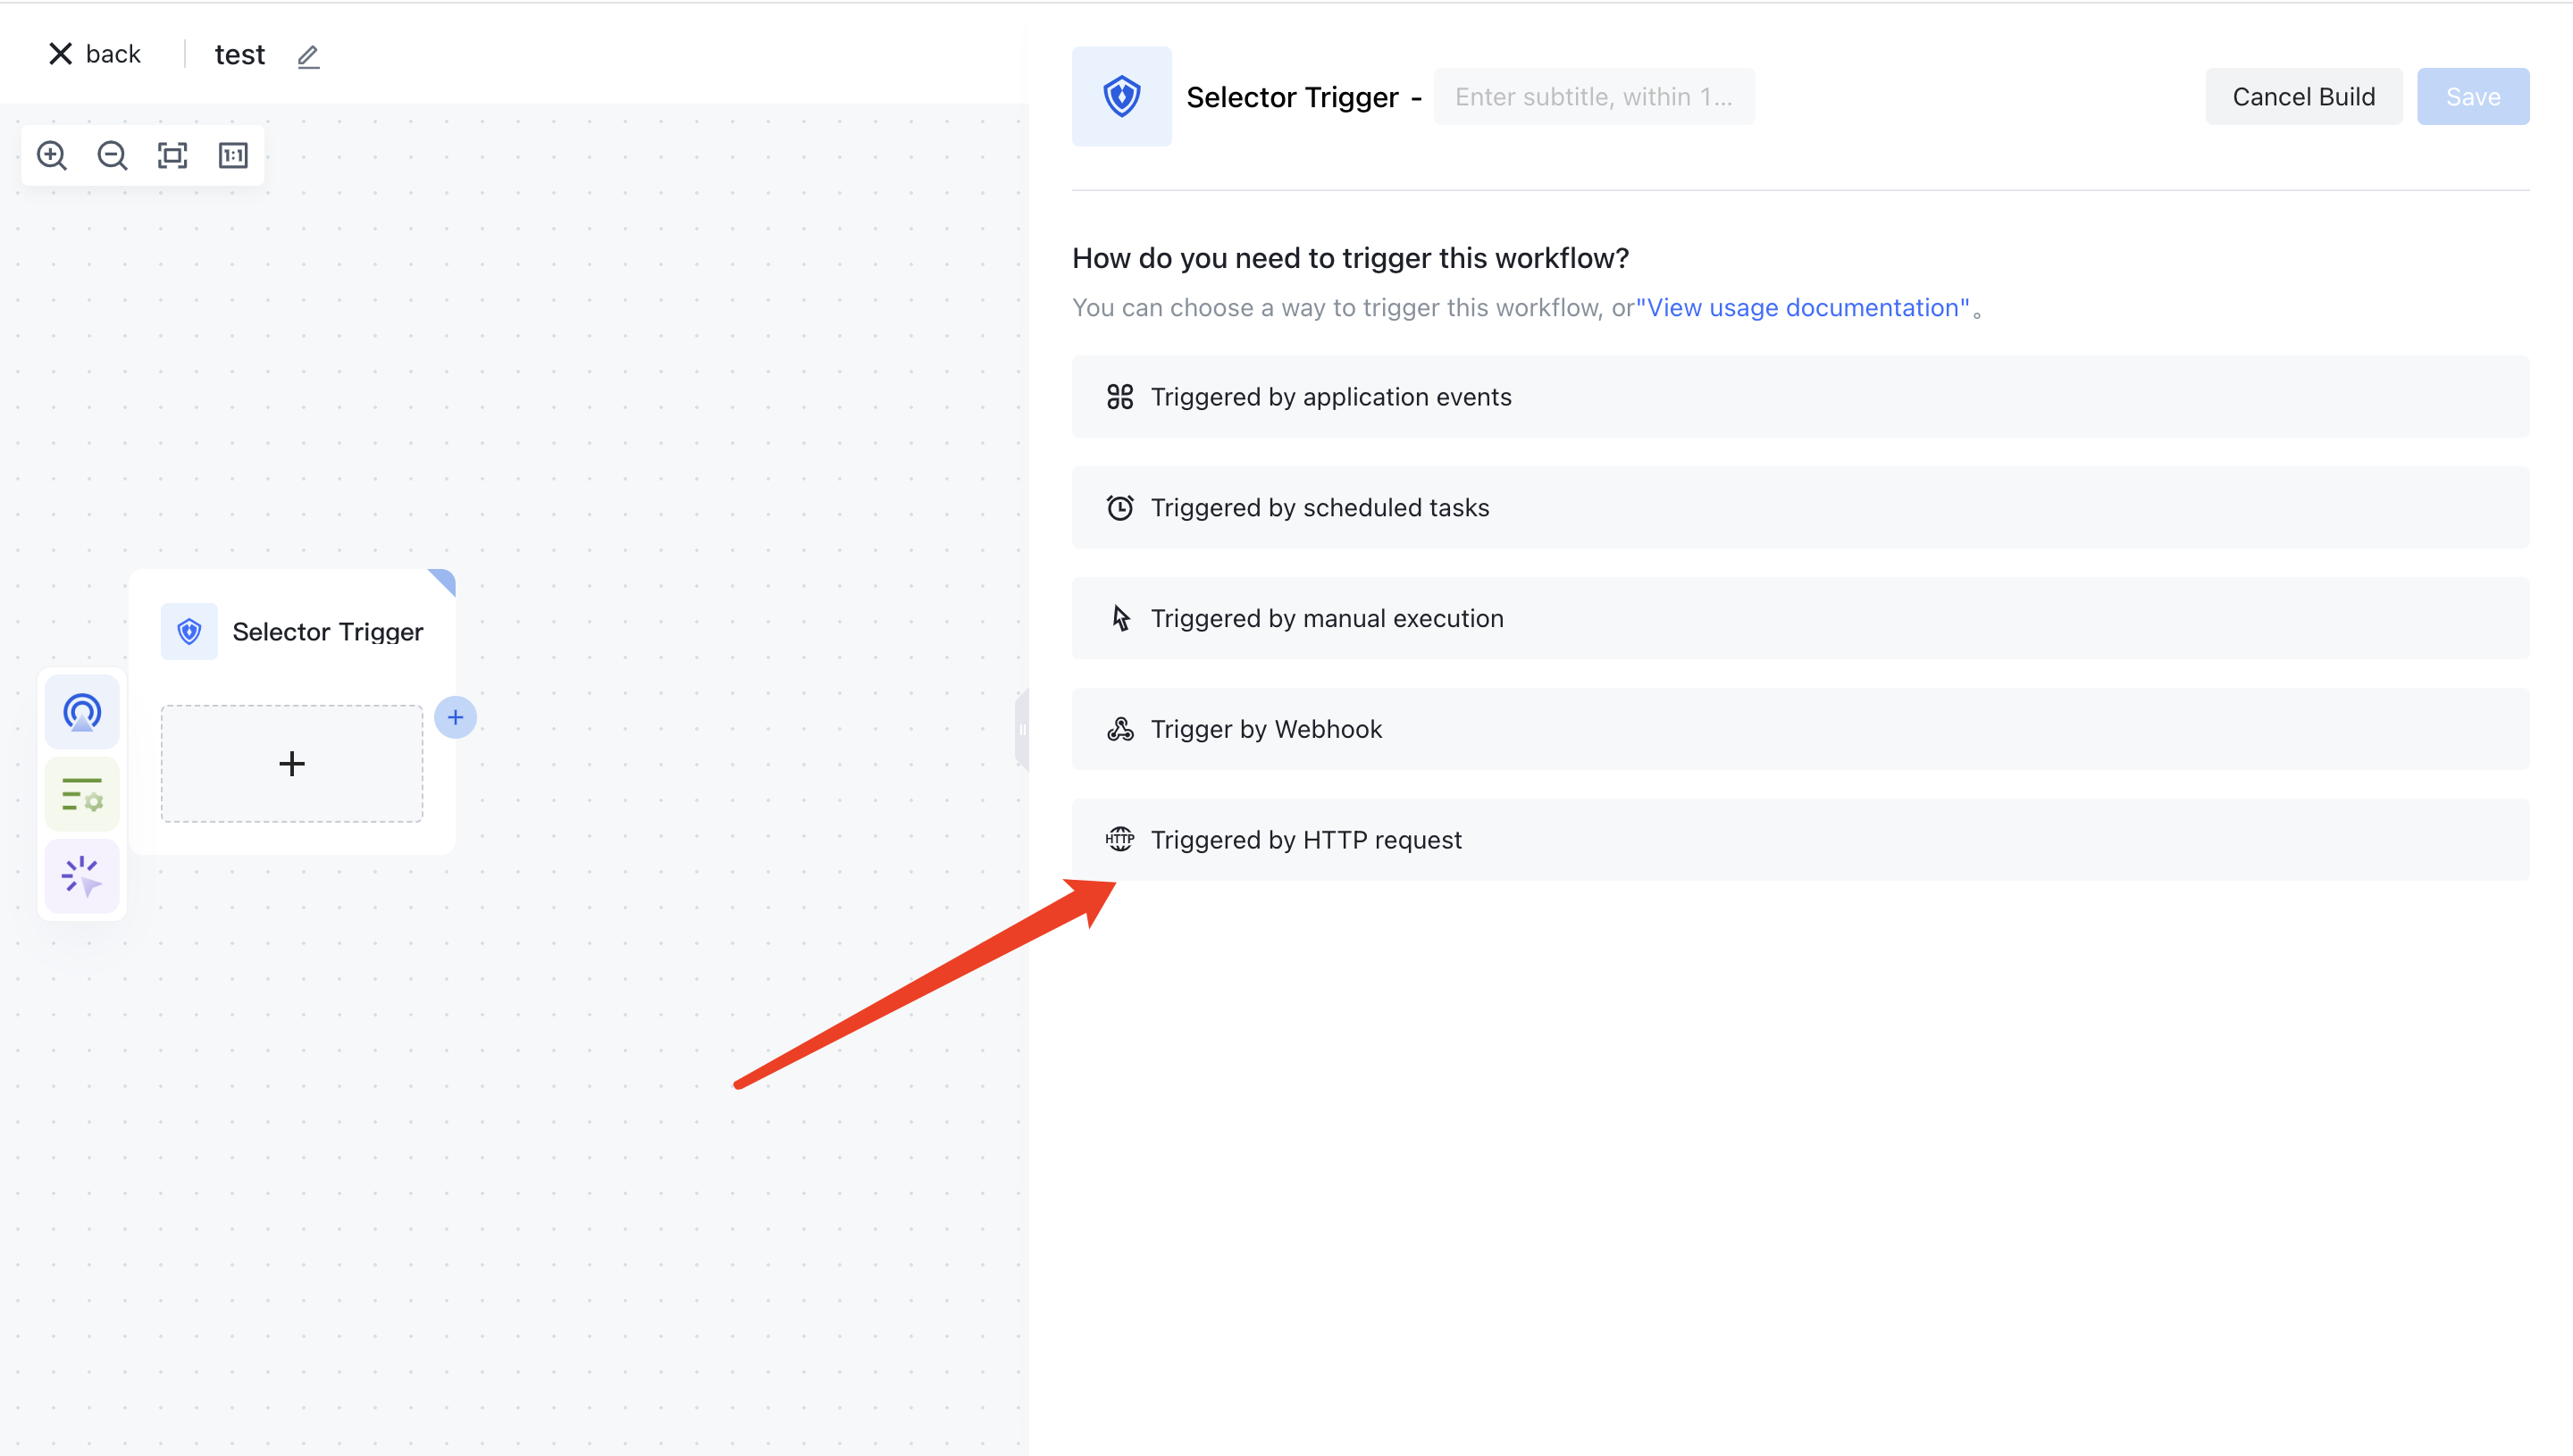
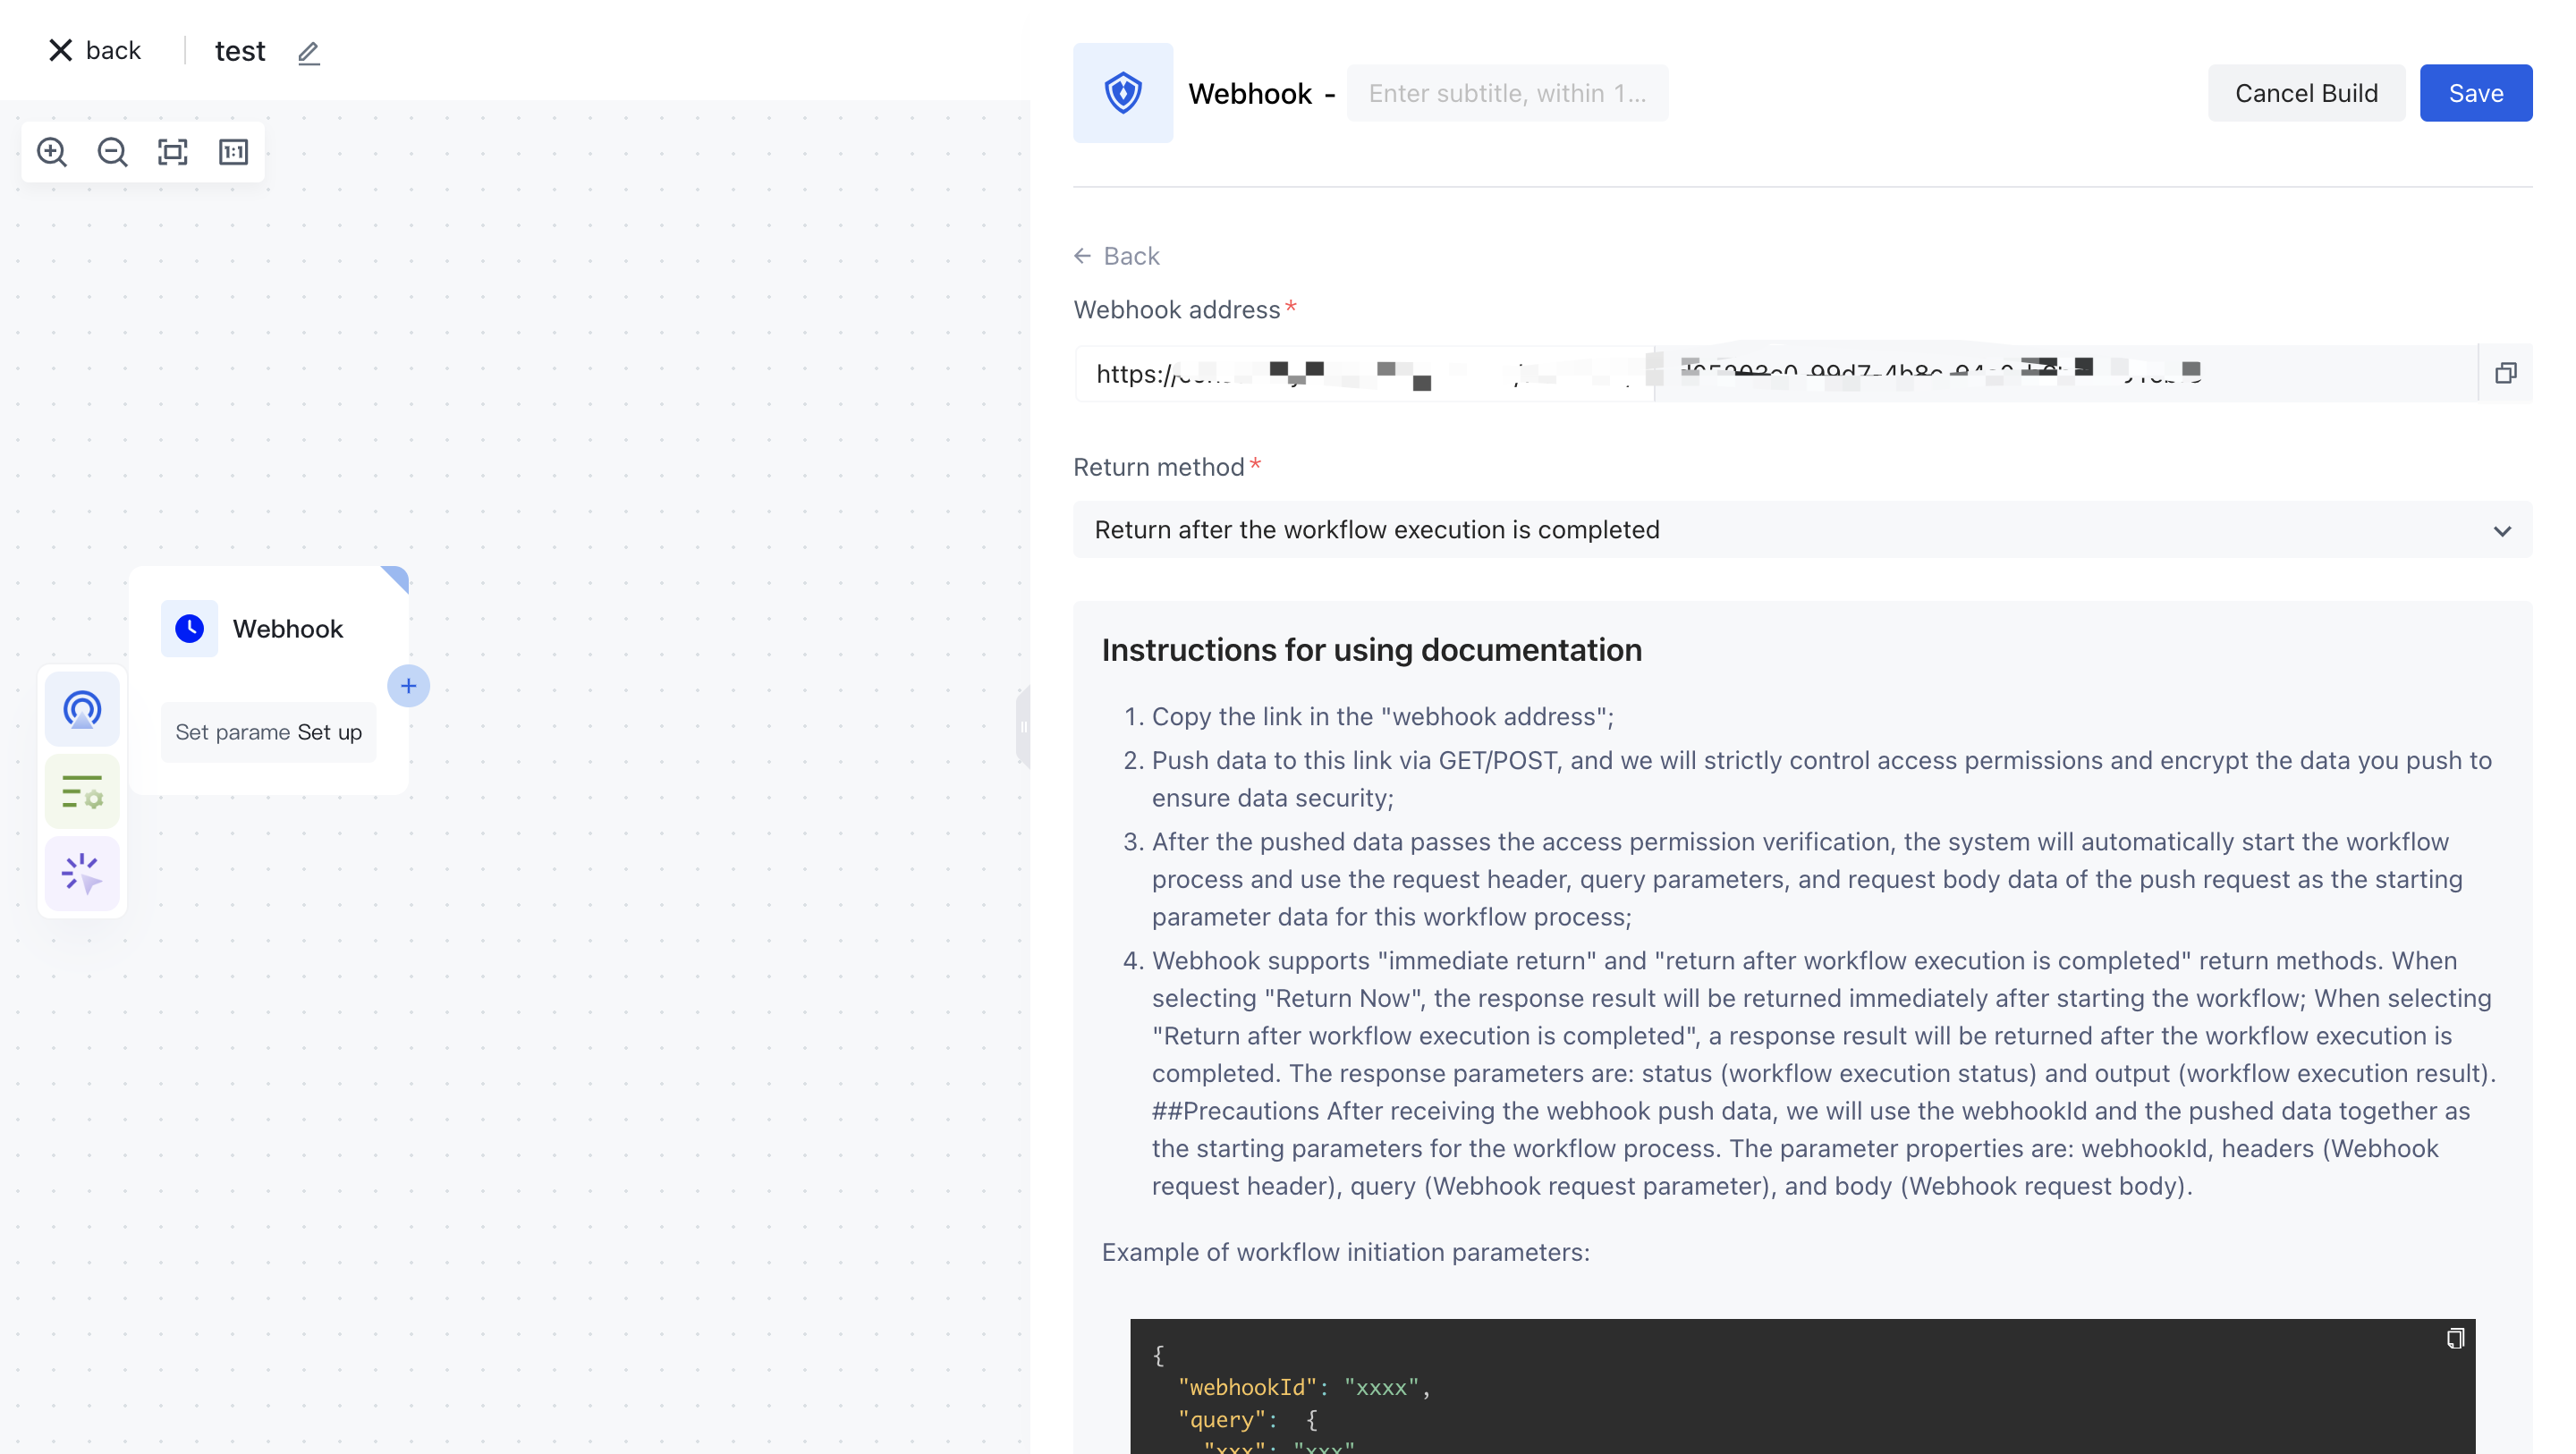
You can copy the request address in the API address item, and you can also configure the HTTP request invocation method:
- Request mode: HTTP request modes of GET, POST, PUT, DELETE, HEAD, and PATCH are supported
- Authentication mode: Supports non-authentication, Basic authentication, and request header authentication
- No authentication: In this case, no authentication mode is set, and any third party that gets this API address can call this interface.
- Basic authentication: Through HTTP Basic authentication, you need to configure the user name and password, the client call method see below.
- Request header authentication: It is necessary to configure the key and key values of the request header, such as passing an x-api-key request header when requiring customers to request, and the content is the key configured for you
- Return method:
- Immediate return: The client returns the request immediately after triggering workflow execution. The client can obtain the workflow execution instance ID and asynchronously obtain the execution result.
- Return after workflow execution: Blocking wait until workflow execution is completed and then return, similar to our usual call API interface, you can synchronize to get workflow execution results. Where the execution result of workflow is the output value of your last node .
- HTTP status code: Specifies the status code that controls the HTTP request response. The default value is 200.
¶ Quick example
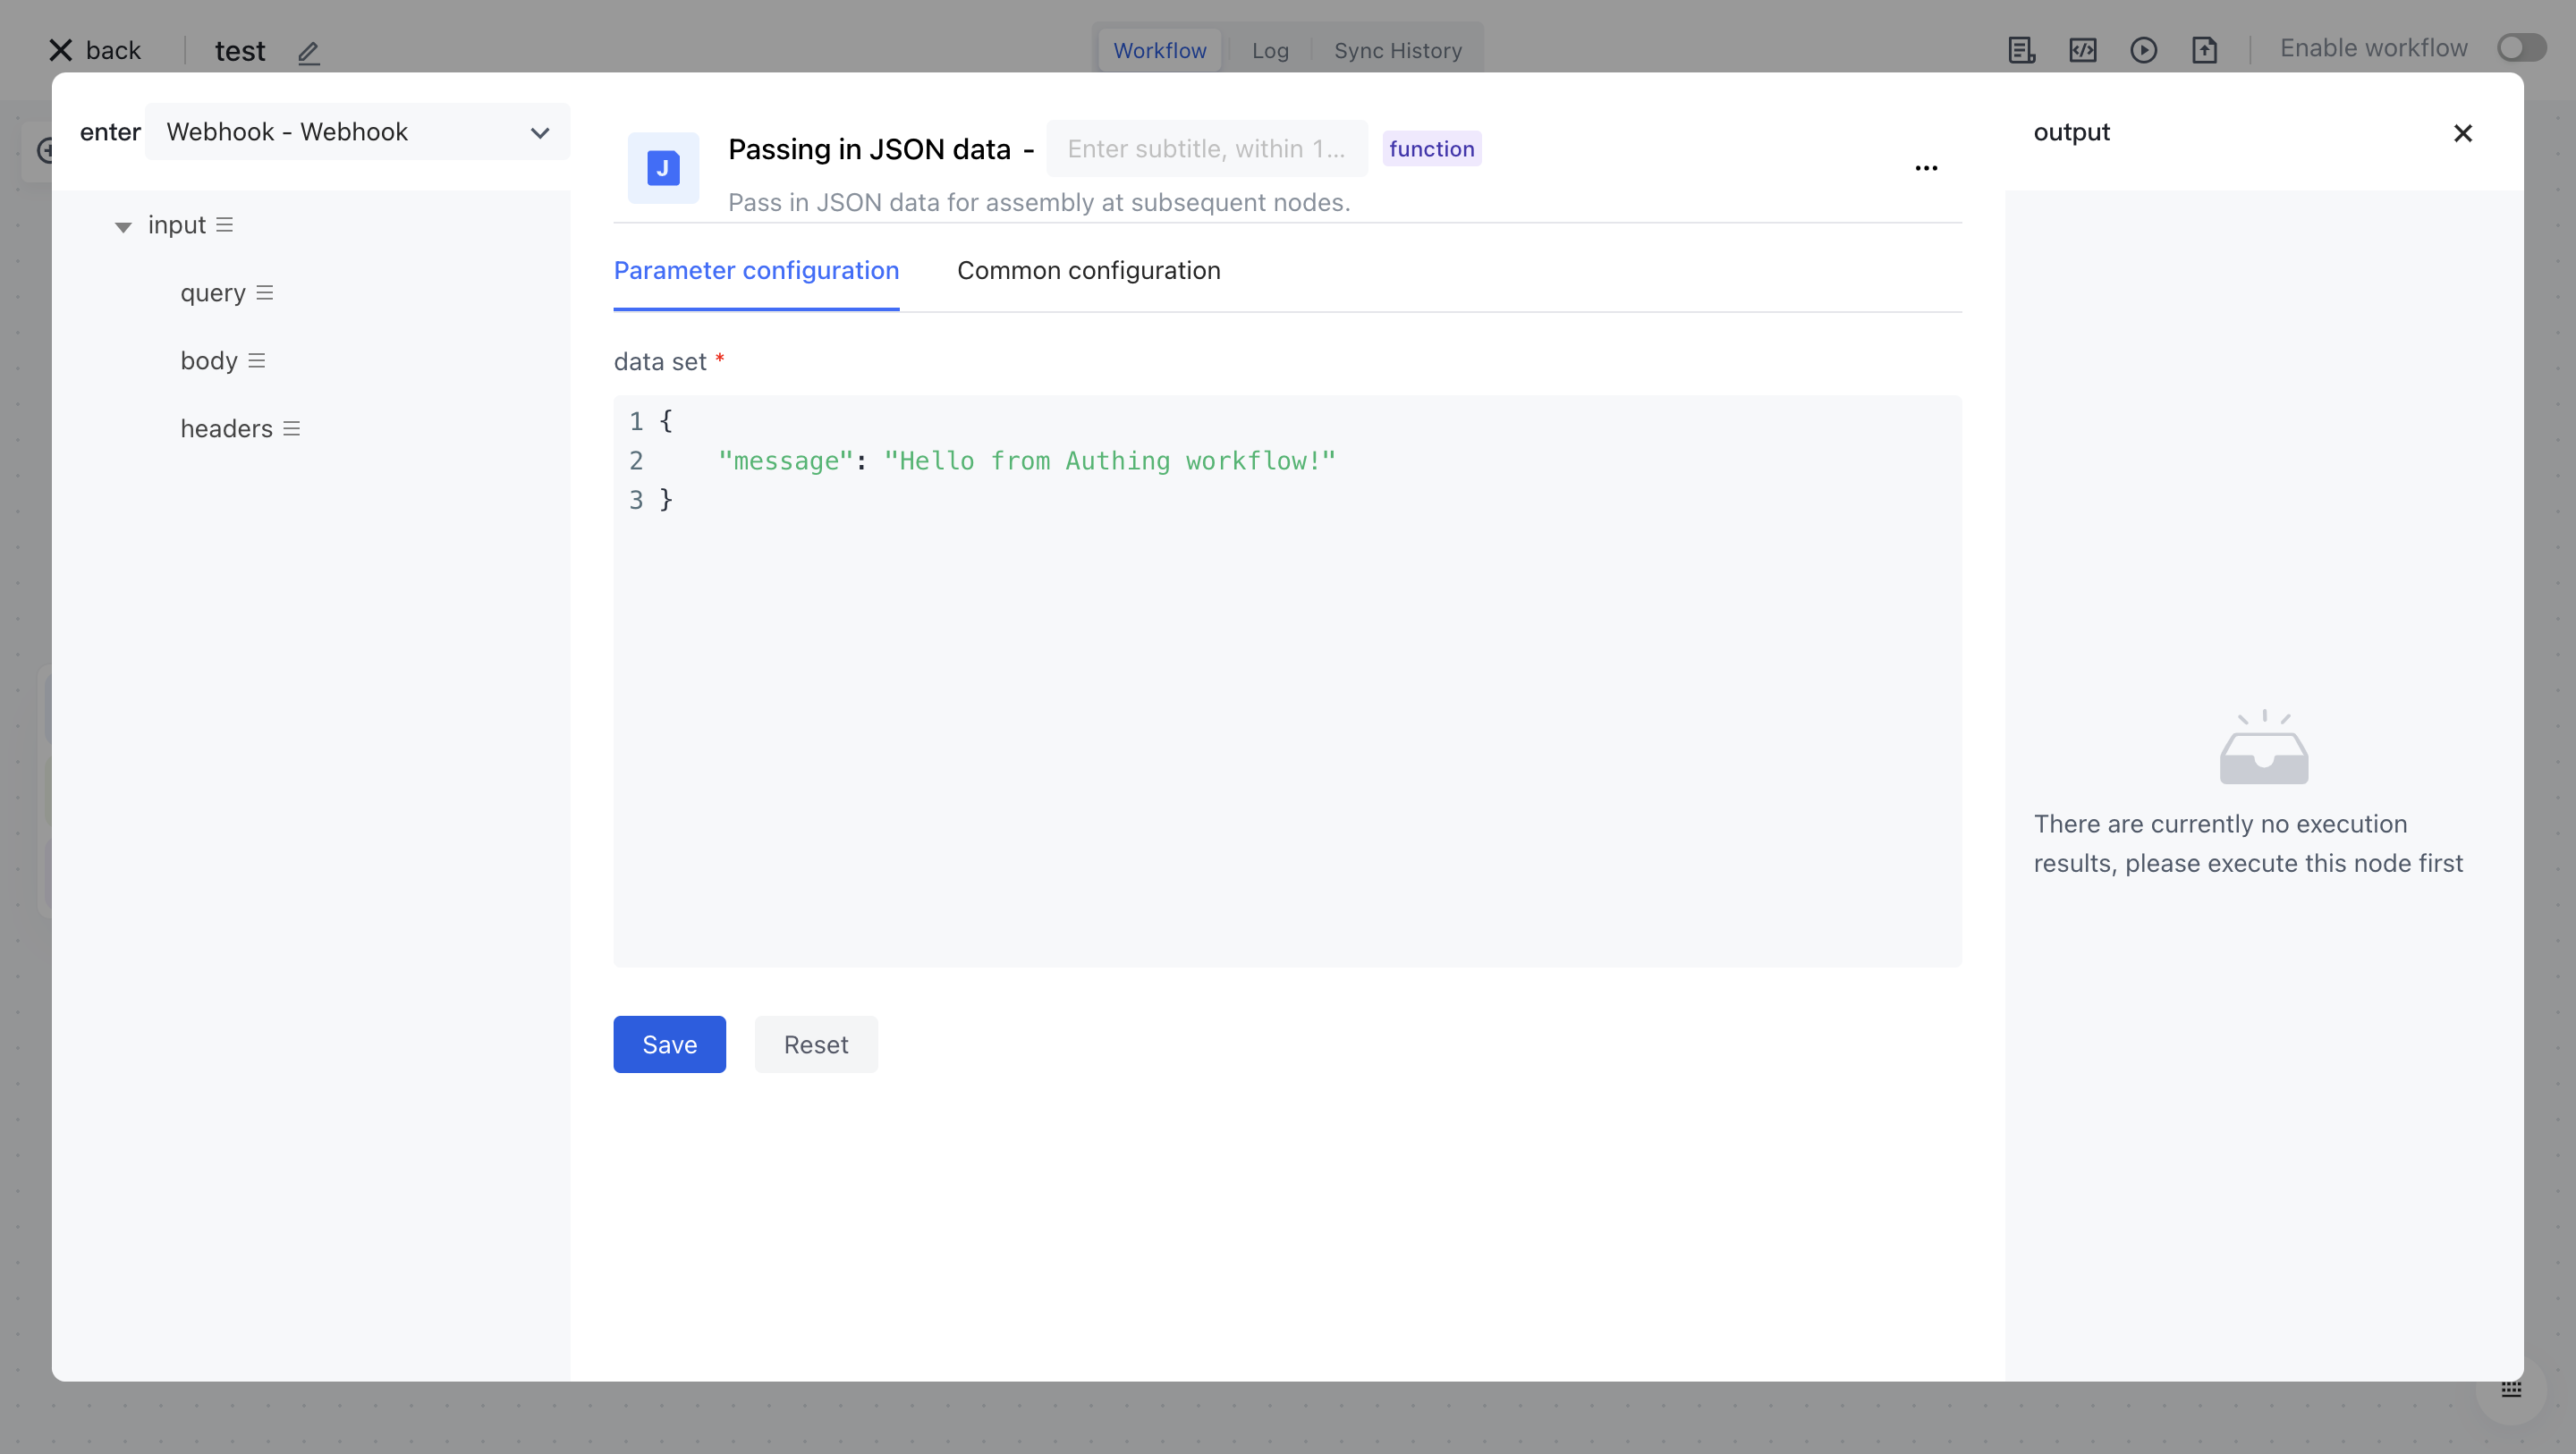
We use the default configuration here: we use a GET request without any authentication, and wait for workflow to complete and return. Add a JSON node to workflow to return test data:
{
    "message": "Hello from Authing workflow!"
}
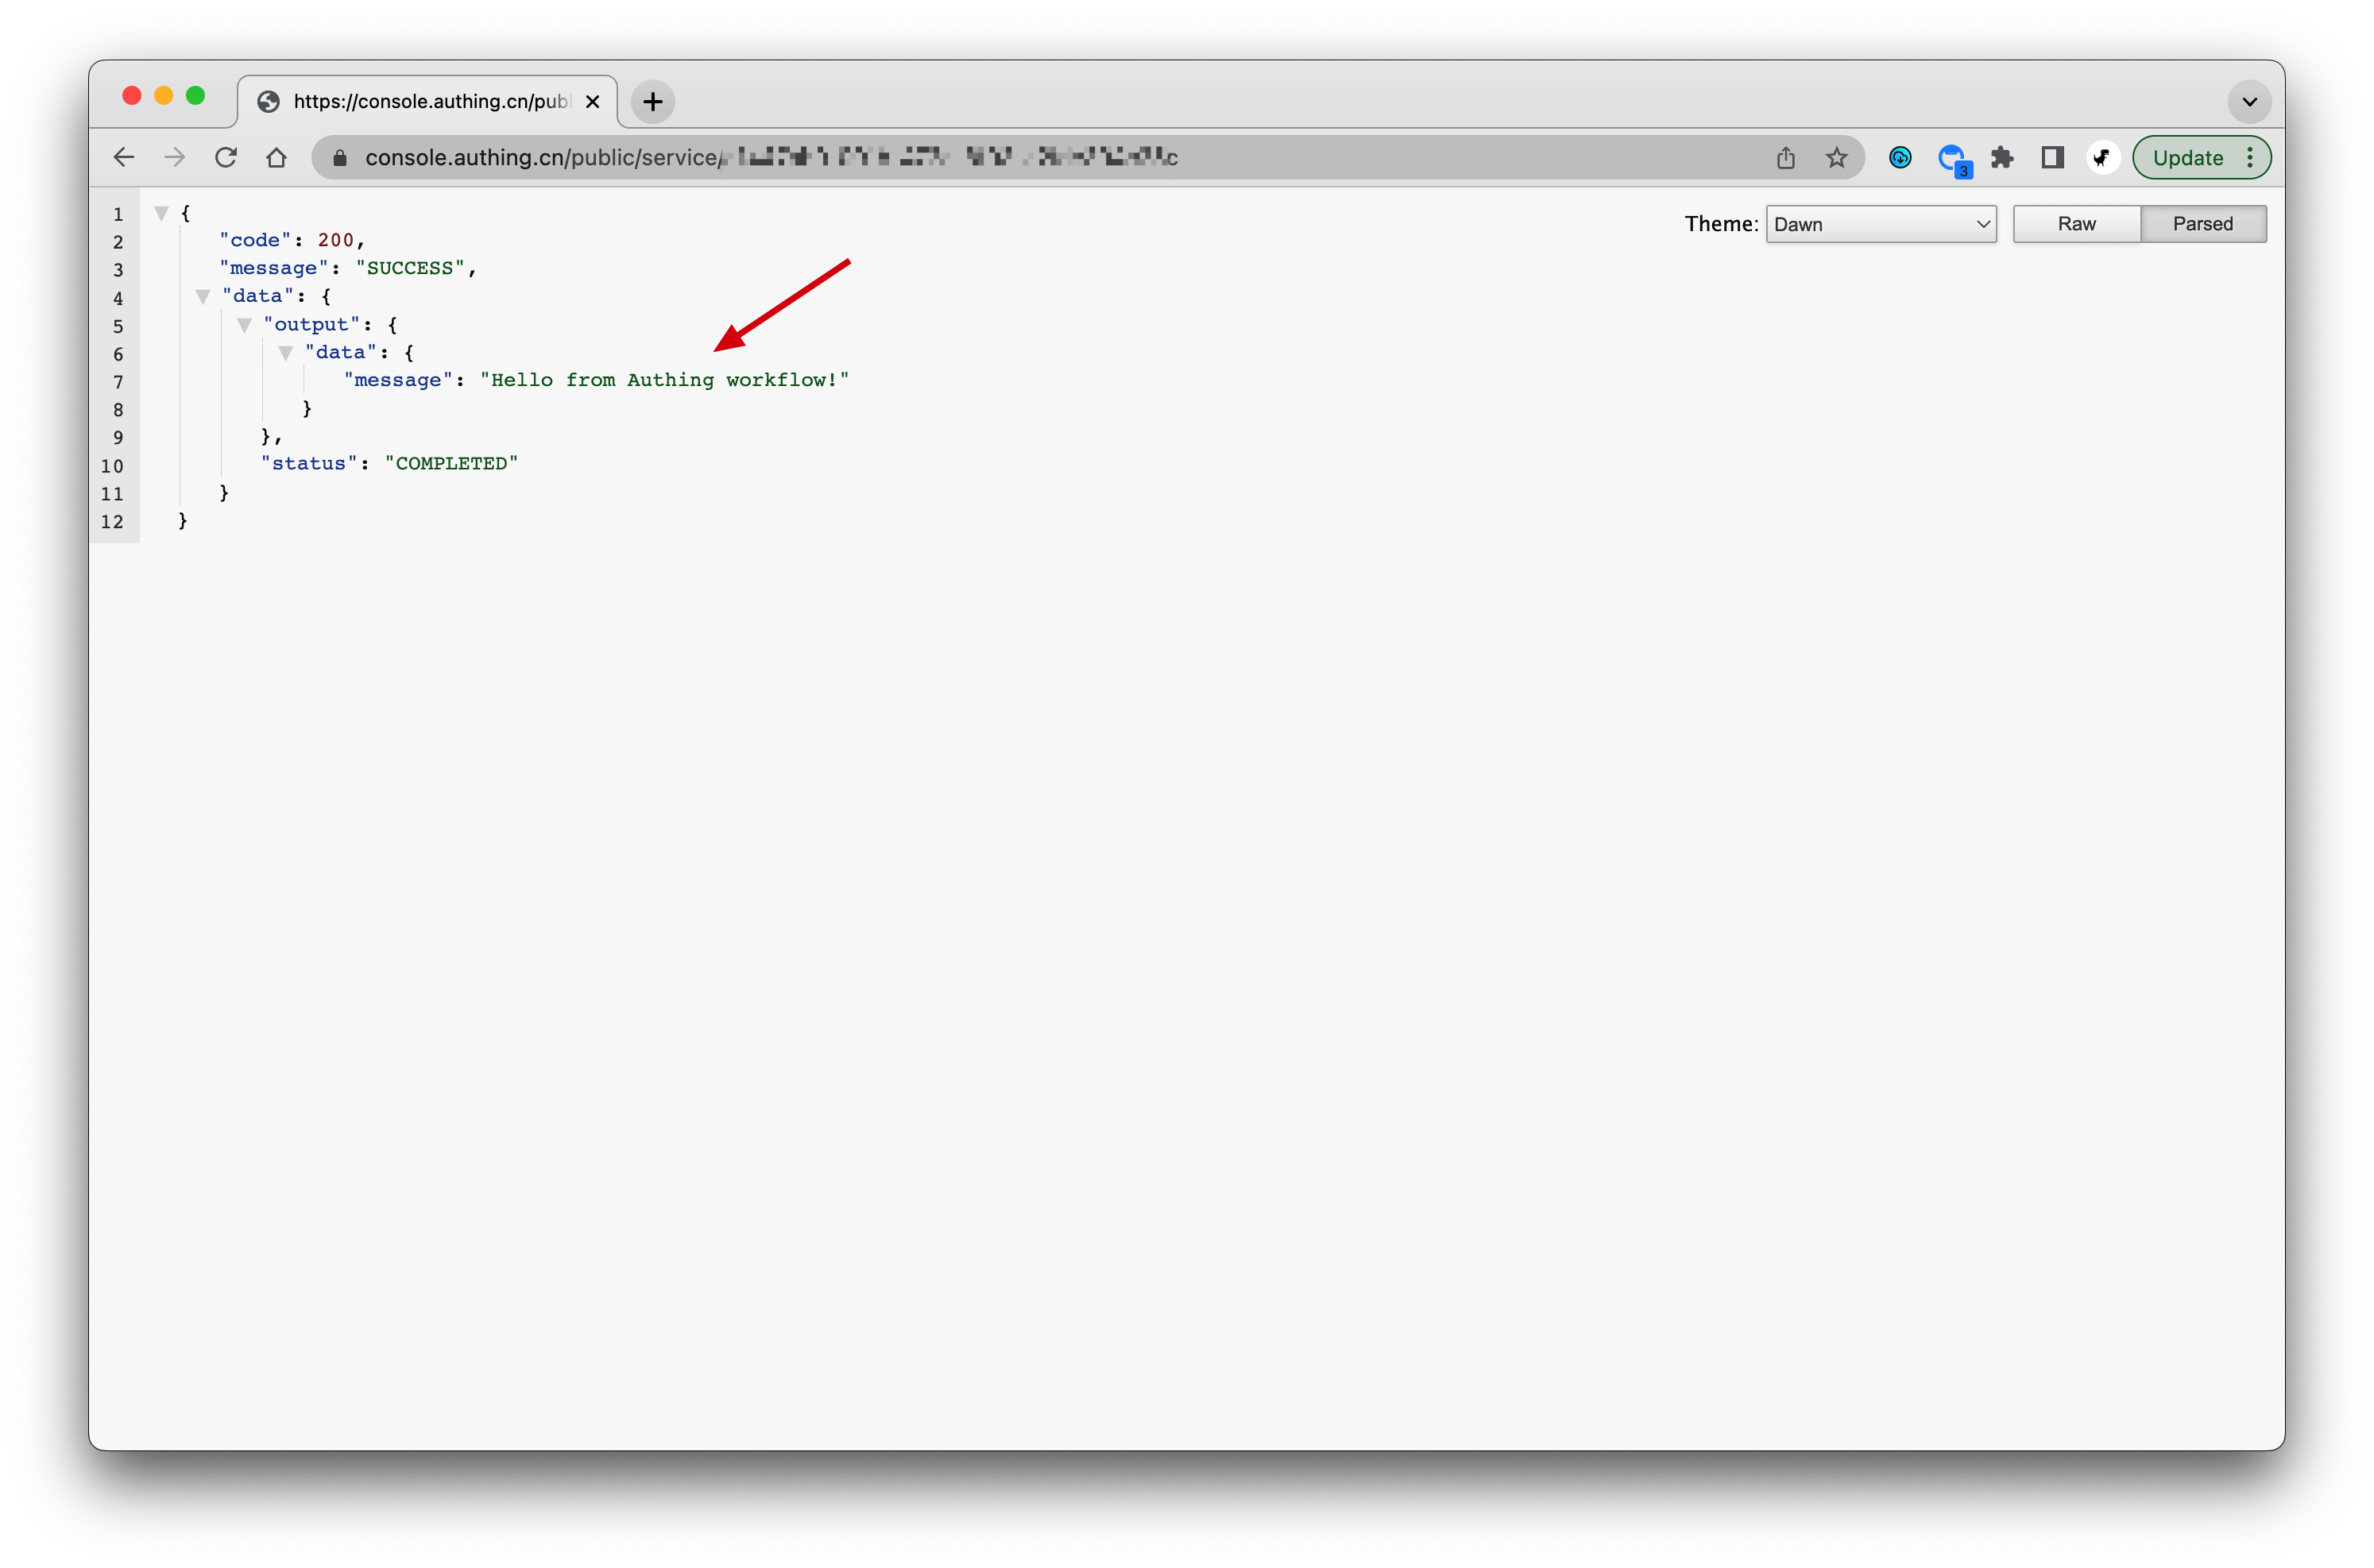
Next we copy the API address, access it in a browser, and see that the workflow execution result is returned directly:
¶ HTTP Basic authentication mode
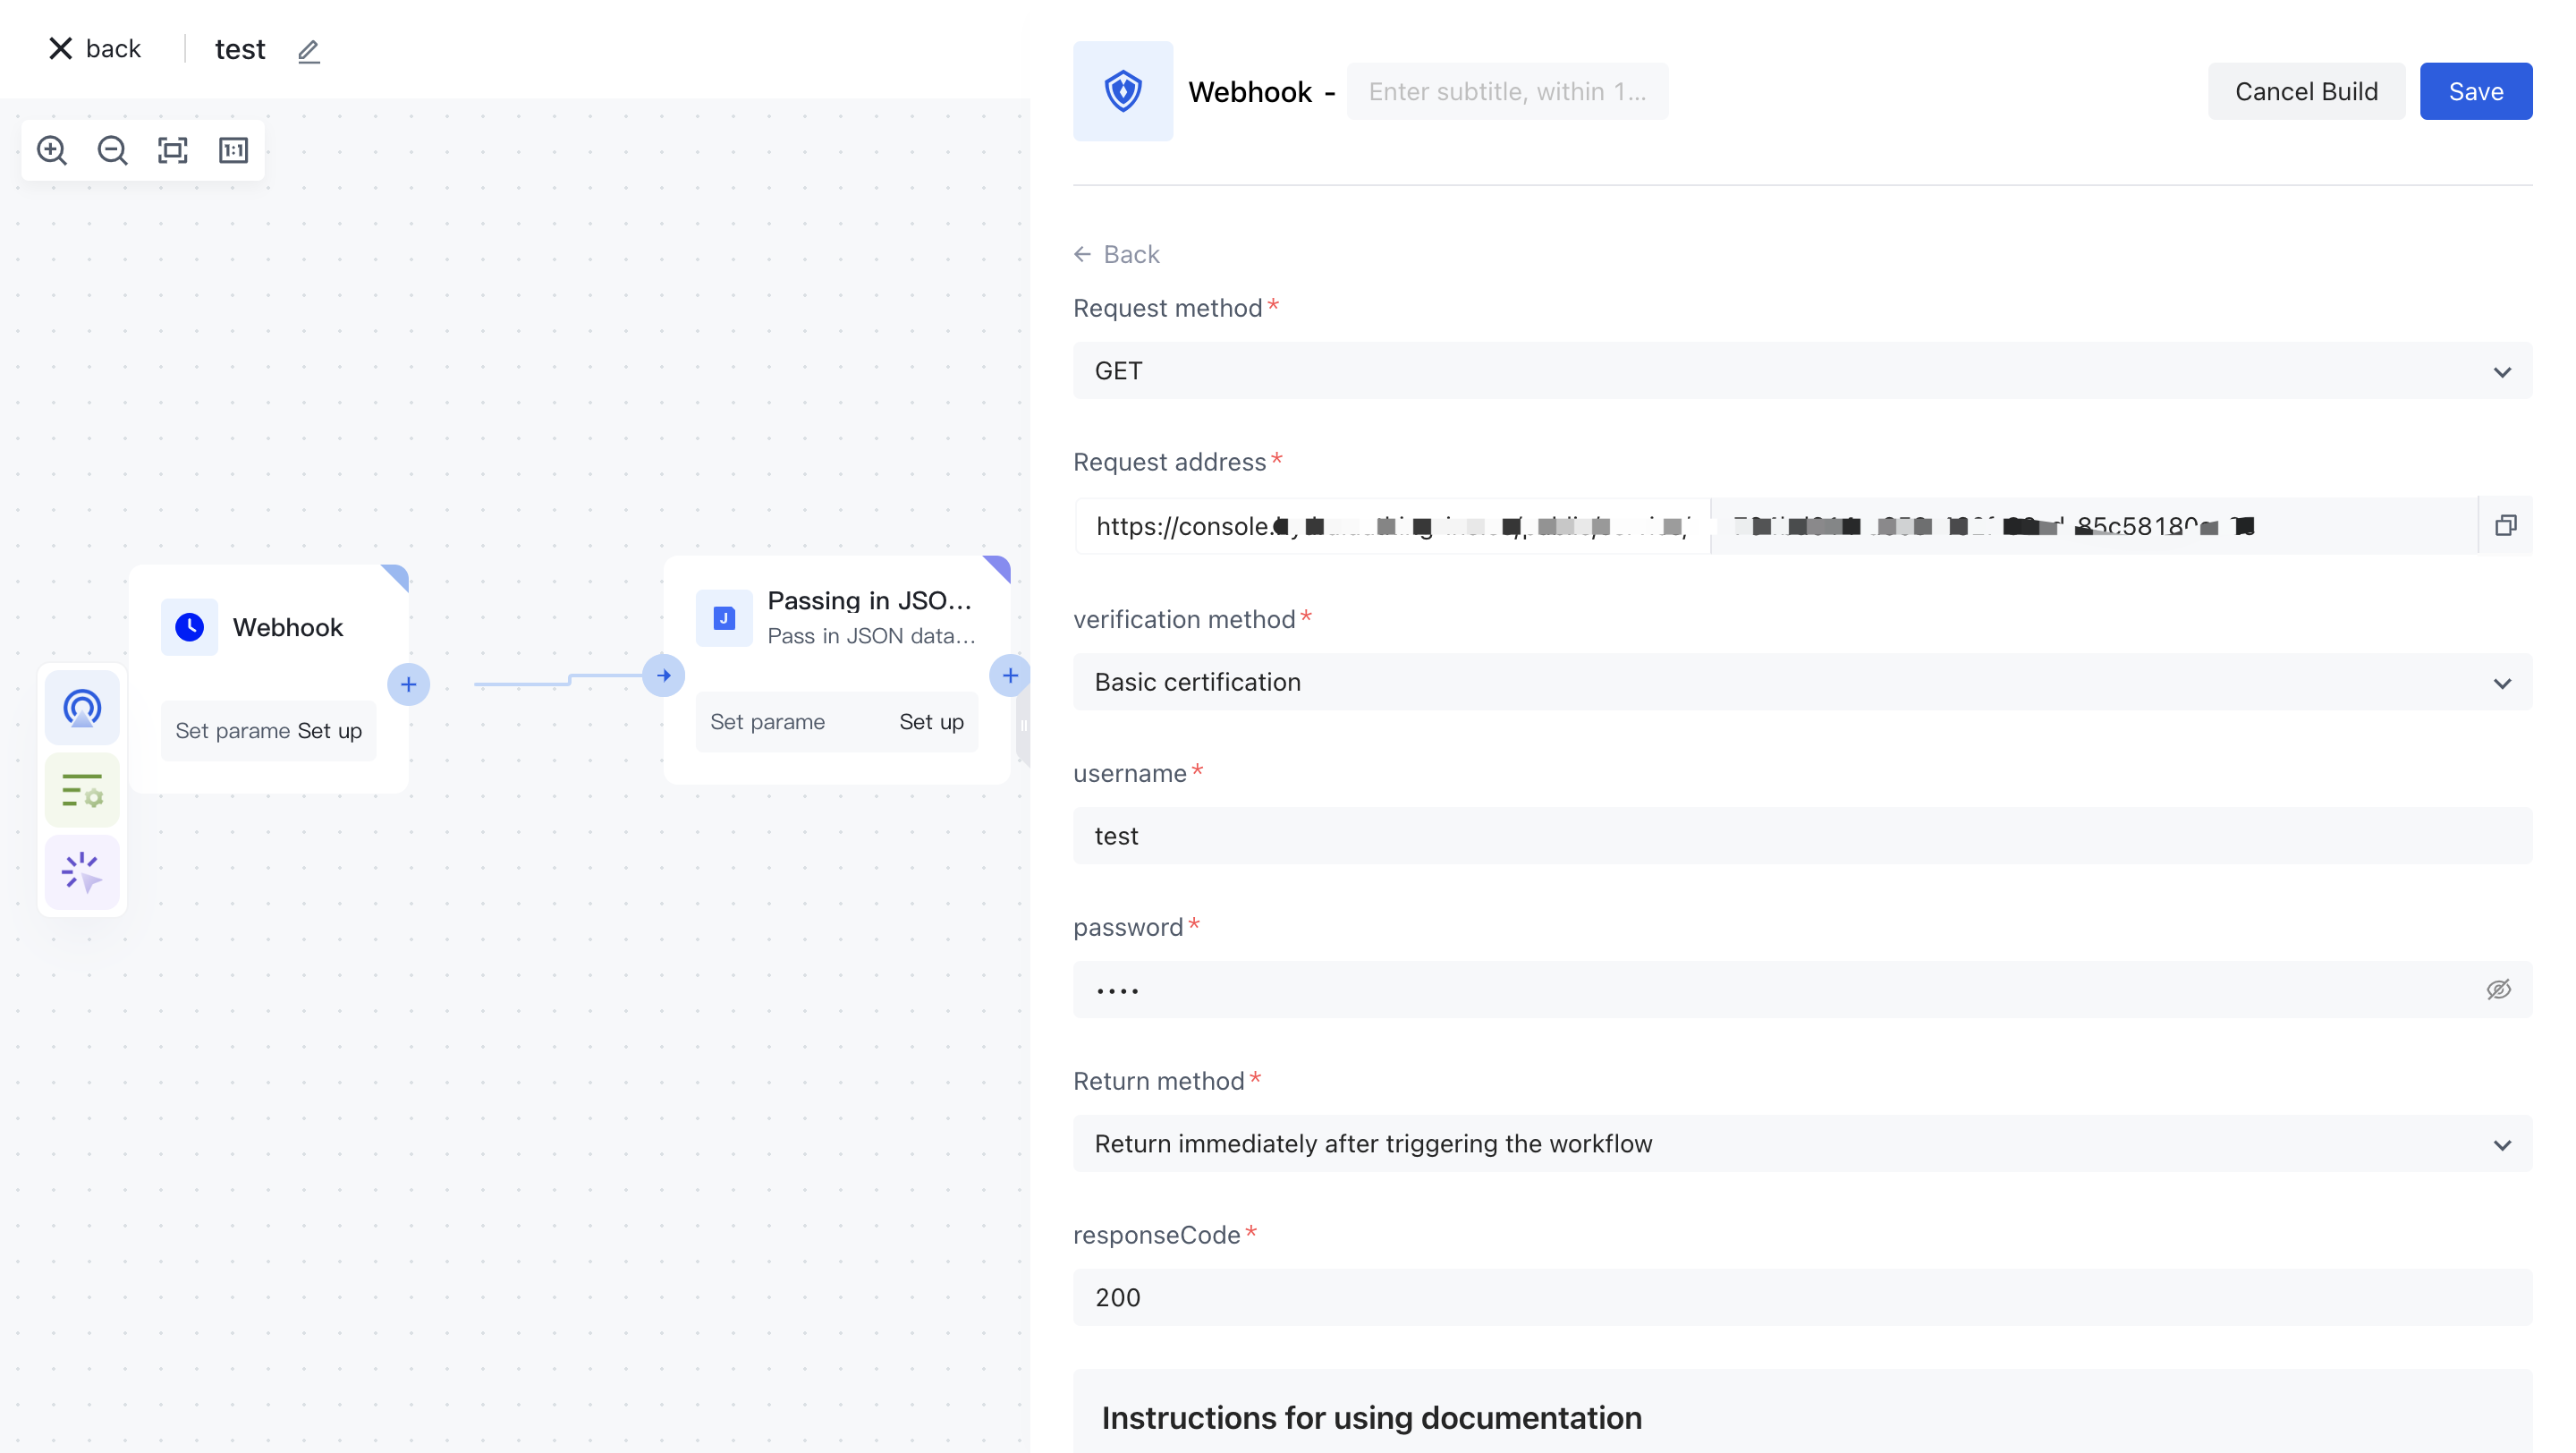
Based on the previous example, we set the authentication mode to Basic authentication , and set the BASIC authentication user name and password to test and test.
Convenient to test, here we use http://web.chacuo.net/safebasicauth (opens new window) this web site to generate Basic request header value:
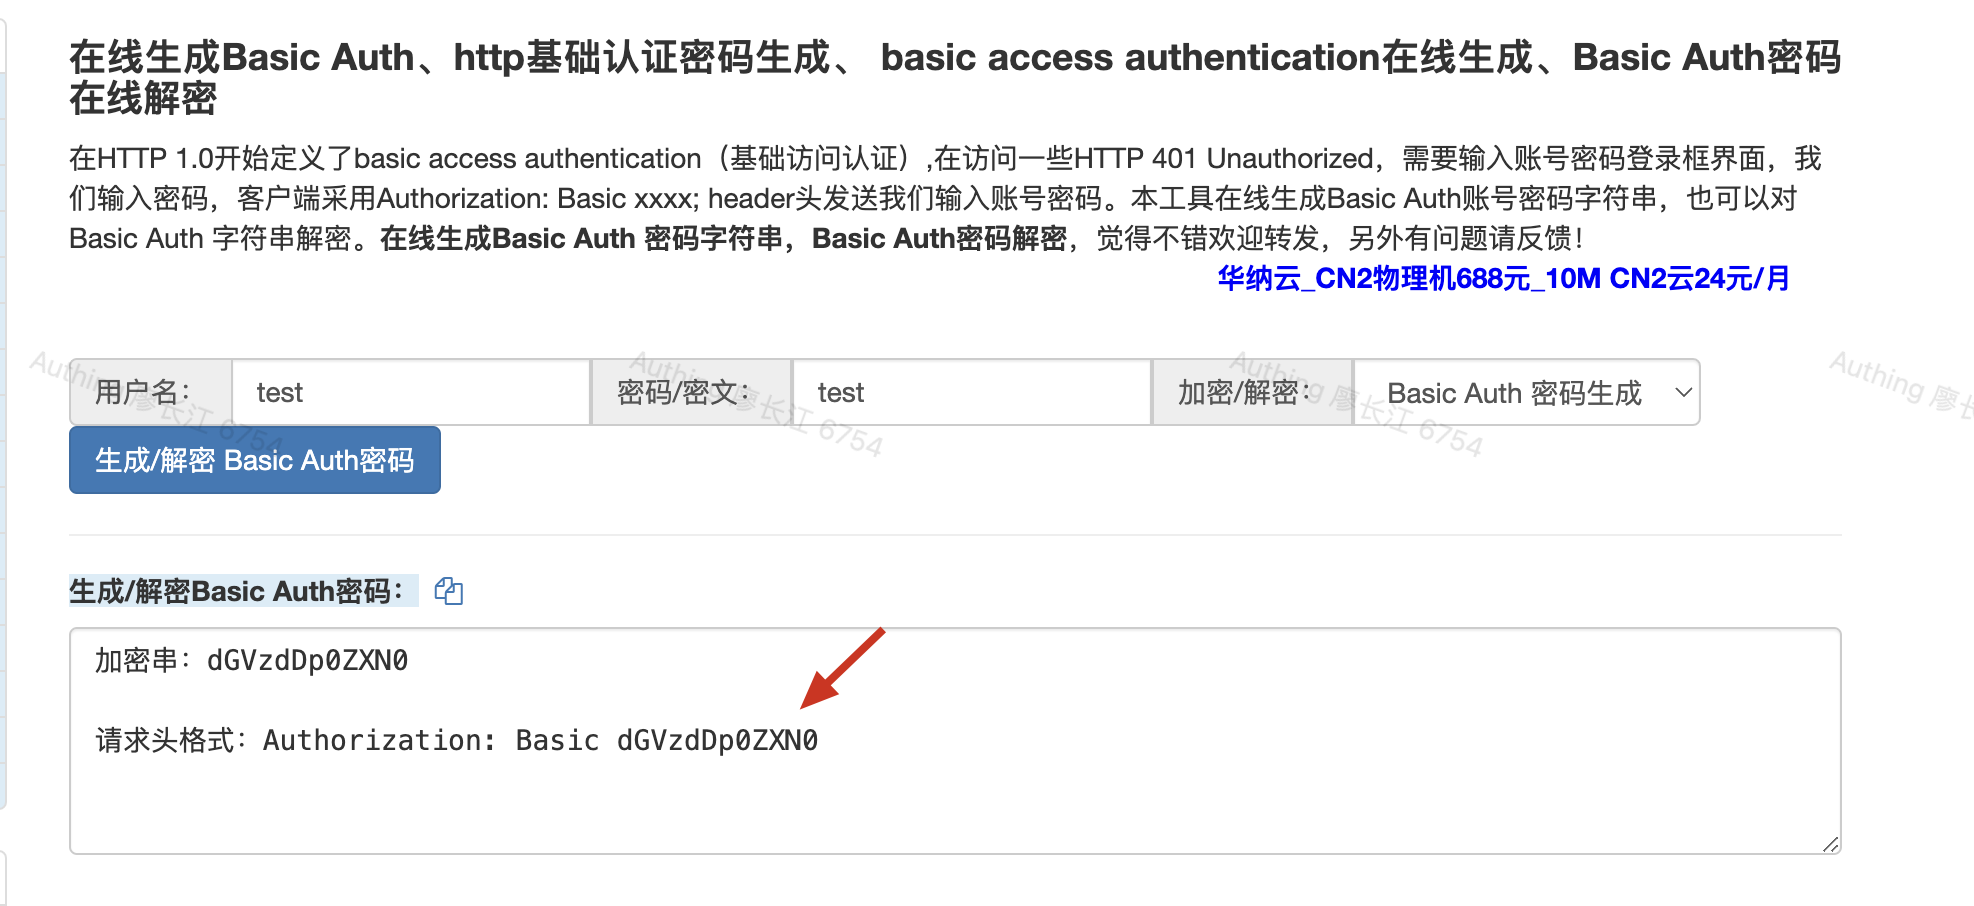
Then use a development tool such as Postman or curl to request this interface:
You need to replace the API address and Authorization values in the following example with your own.
curl --location --request POST 'https://console.authing.cn/public/service/xxxxxx-xxxx-xxxxx-xxxxxx' \
--header 'Authorization: Basic xxxxxxxxx'
After execution, you can also get the correct result:
{
  "code": 200,
  "message": "SUCCESS",
  "data": {
    "output": {
      "data": {
        "message": "Hello from Authing workflow!"
      }
    },
    "status": "COMPLETED"
  }
}
¶ HTTP Header authentication mode
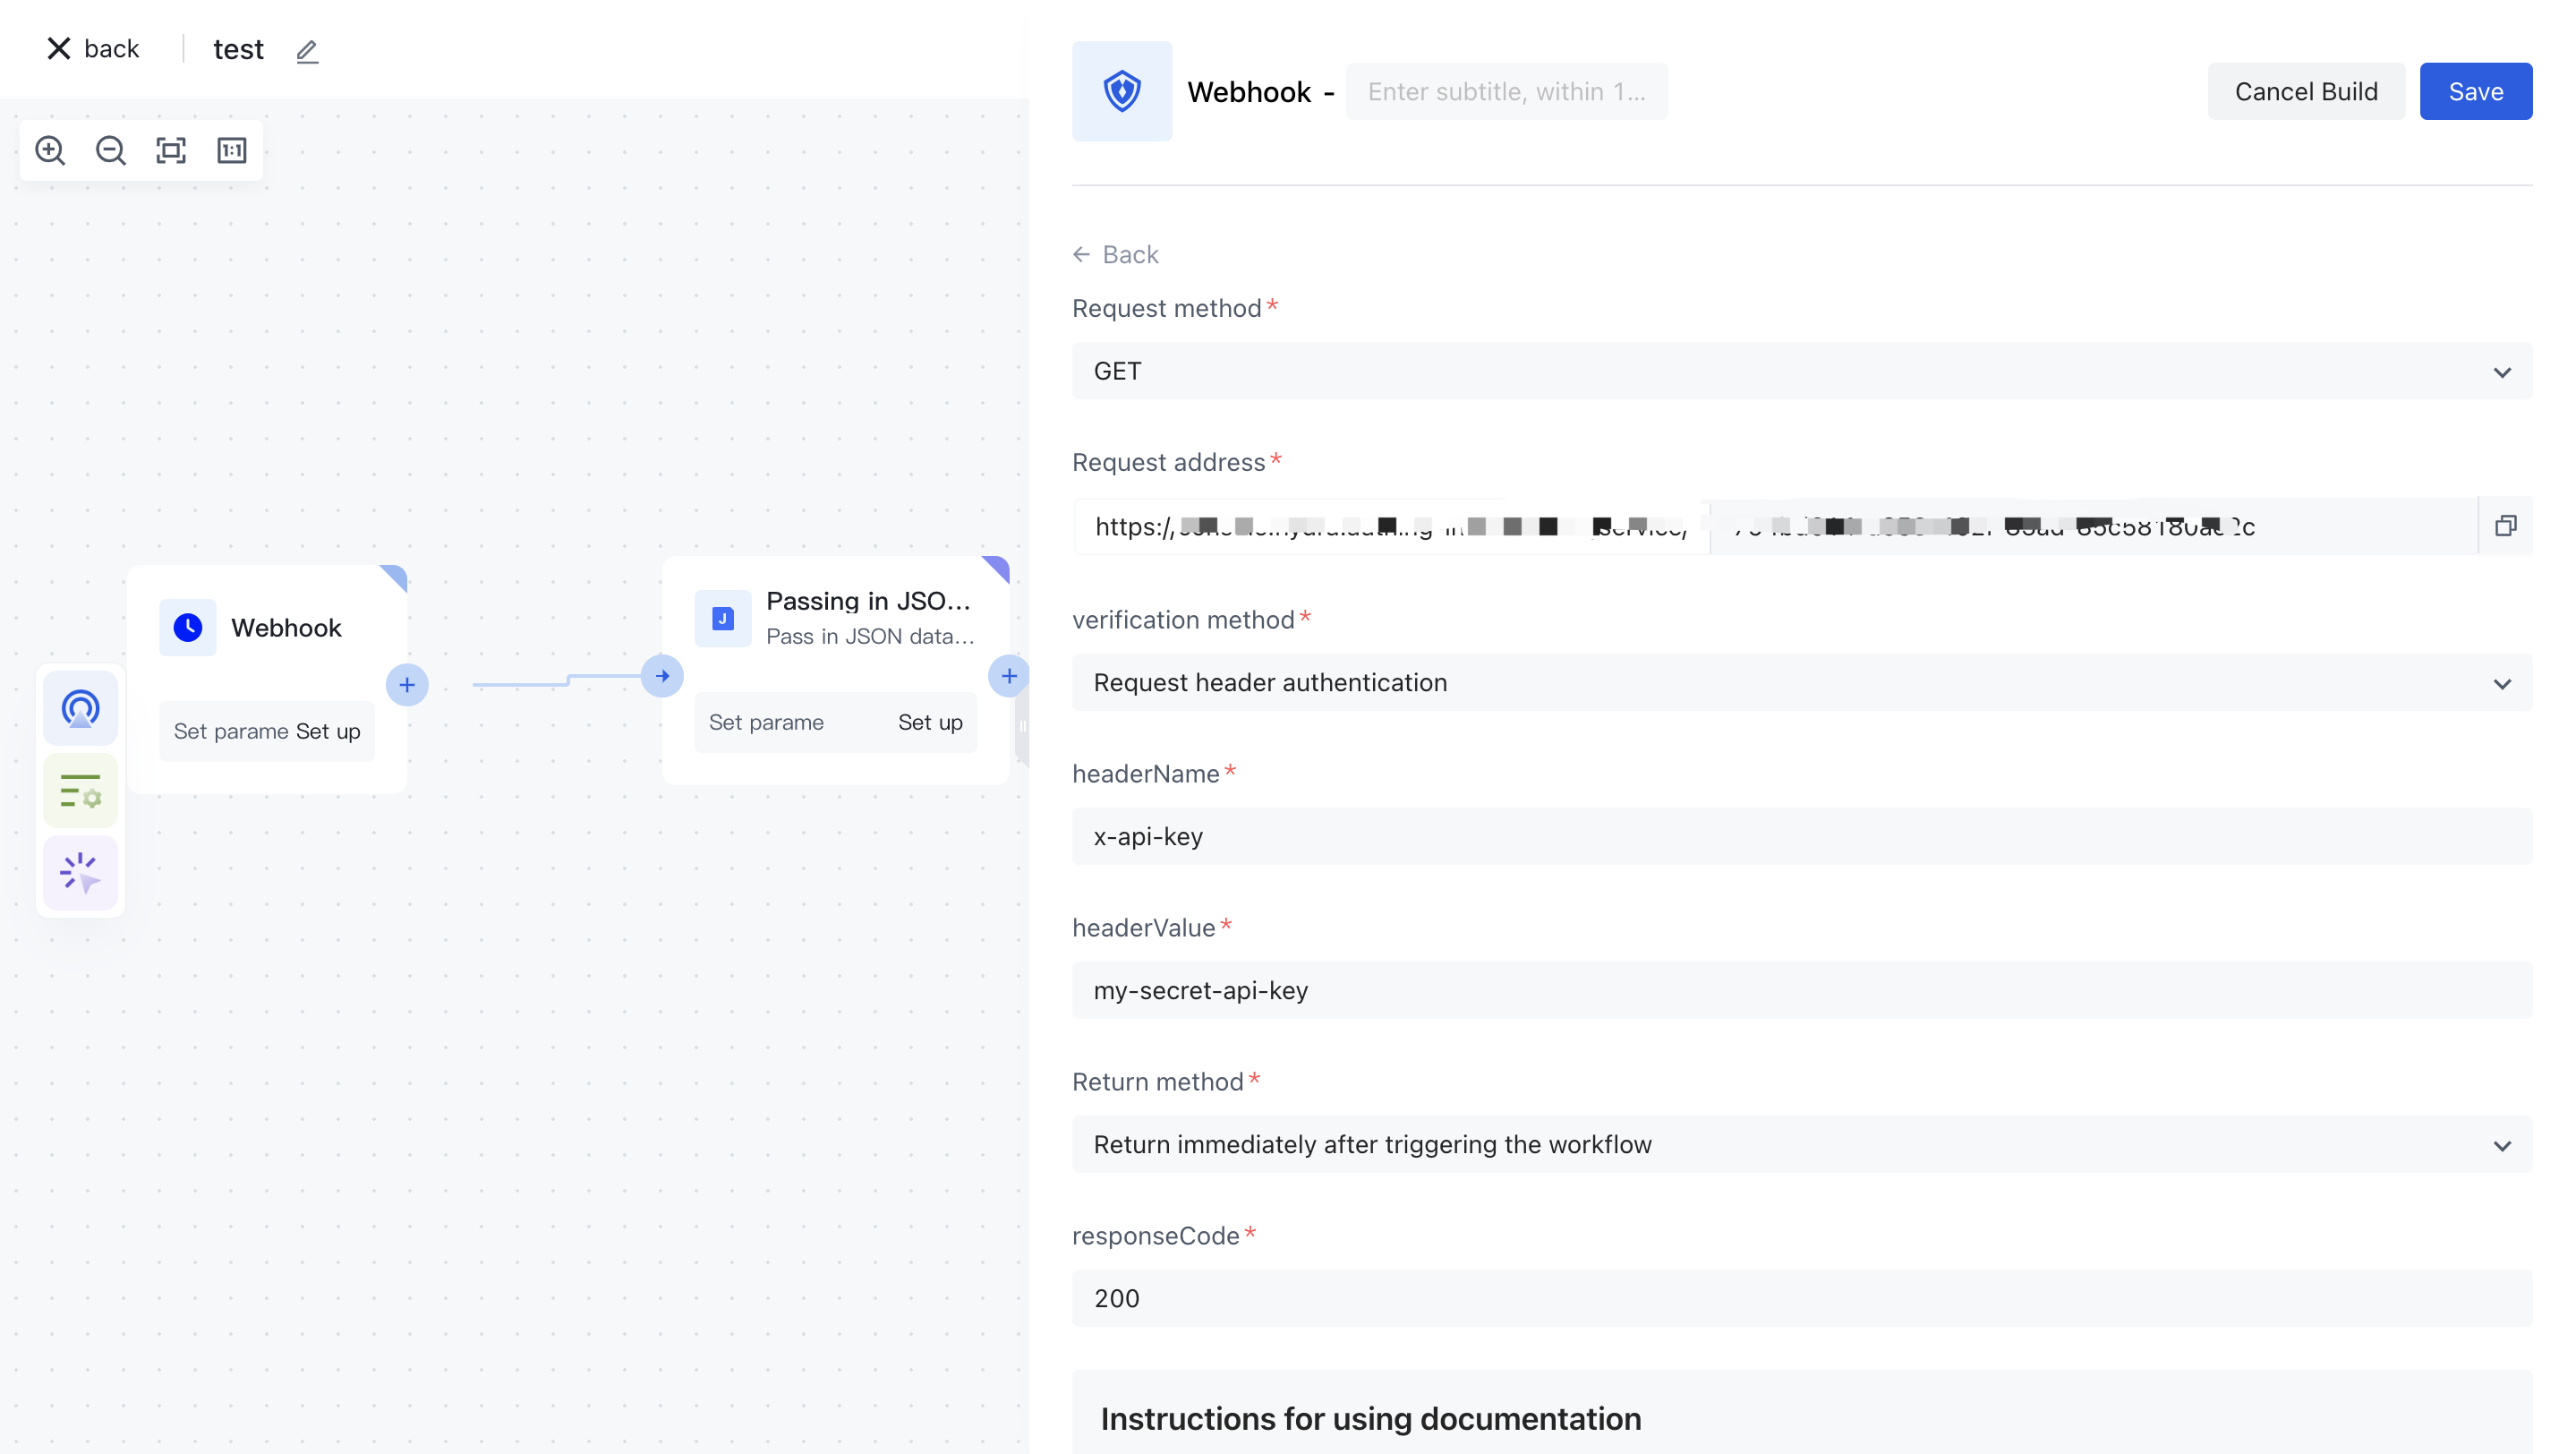
We then set the authentication mode to " request header authentication ", set the request header to 'x-api-key', and set the key to 'my-secret-api-key' :
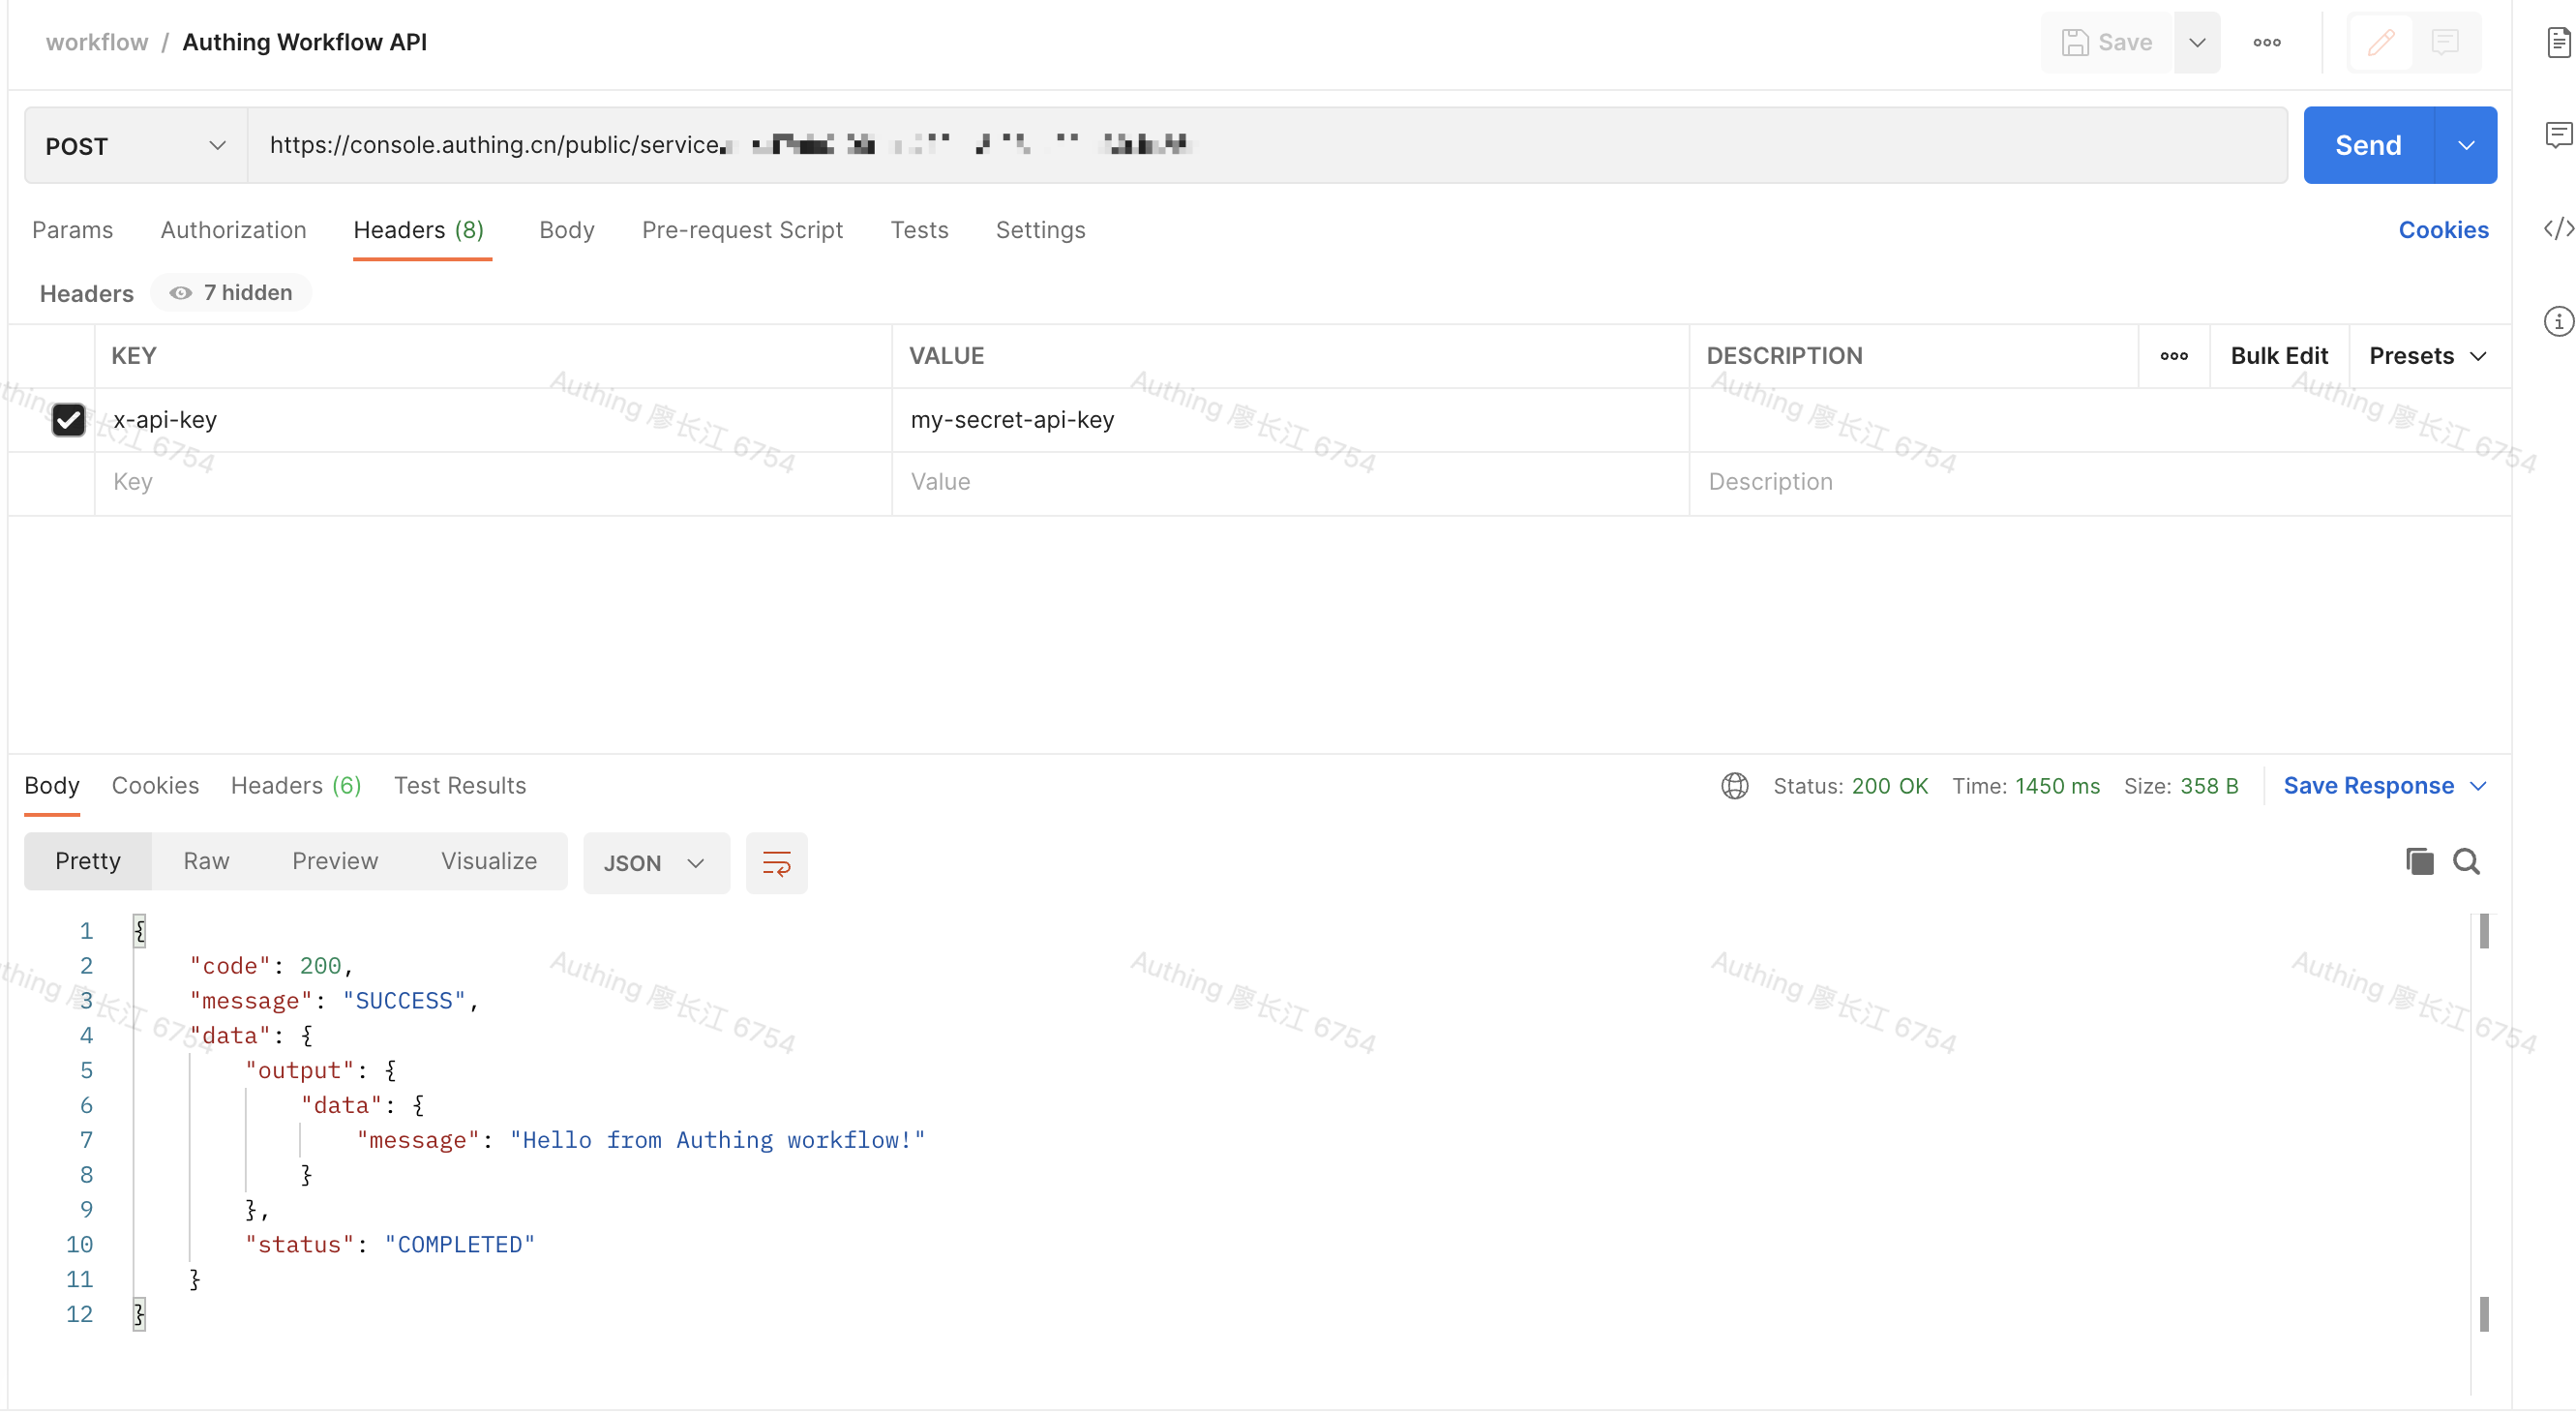
Using a Postman or curl request, you can see the workflow execution result:
¶ Gets the parameters passed in the HTTP request
In the node where workflow runs, you can get the parameters passed by the HTTP request, including:
- Request body: Obtain it through ${workflow.input.body}
- Query parameters: Obtain them by running ${workflow.input.query}
- Request header: Obtain this parameter through ${workflow.input.headers}
Here we modify the contents of the JSON node to be:
{
    "body": "${workflow.input.body}",
    "headers": "${workflow.input.headers}",
    "query": "${workflow.input.query}"
}
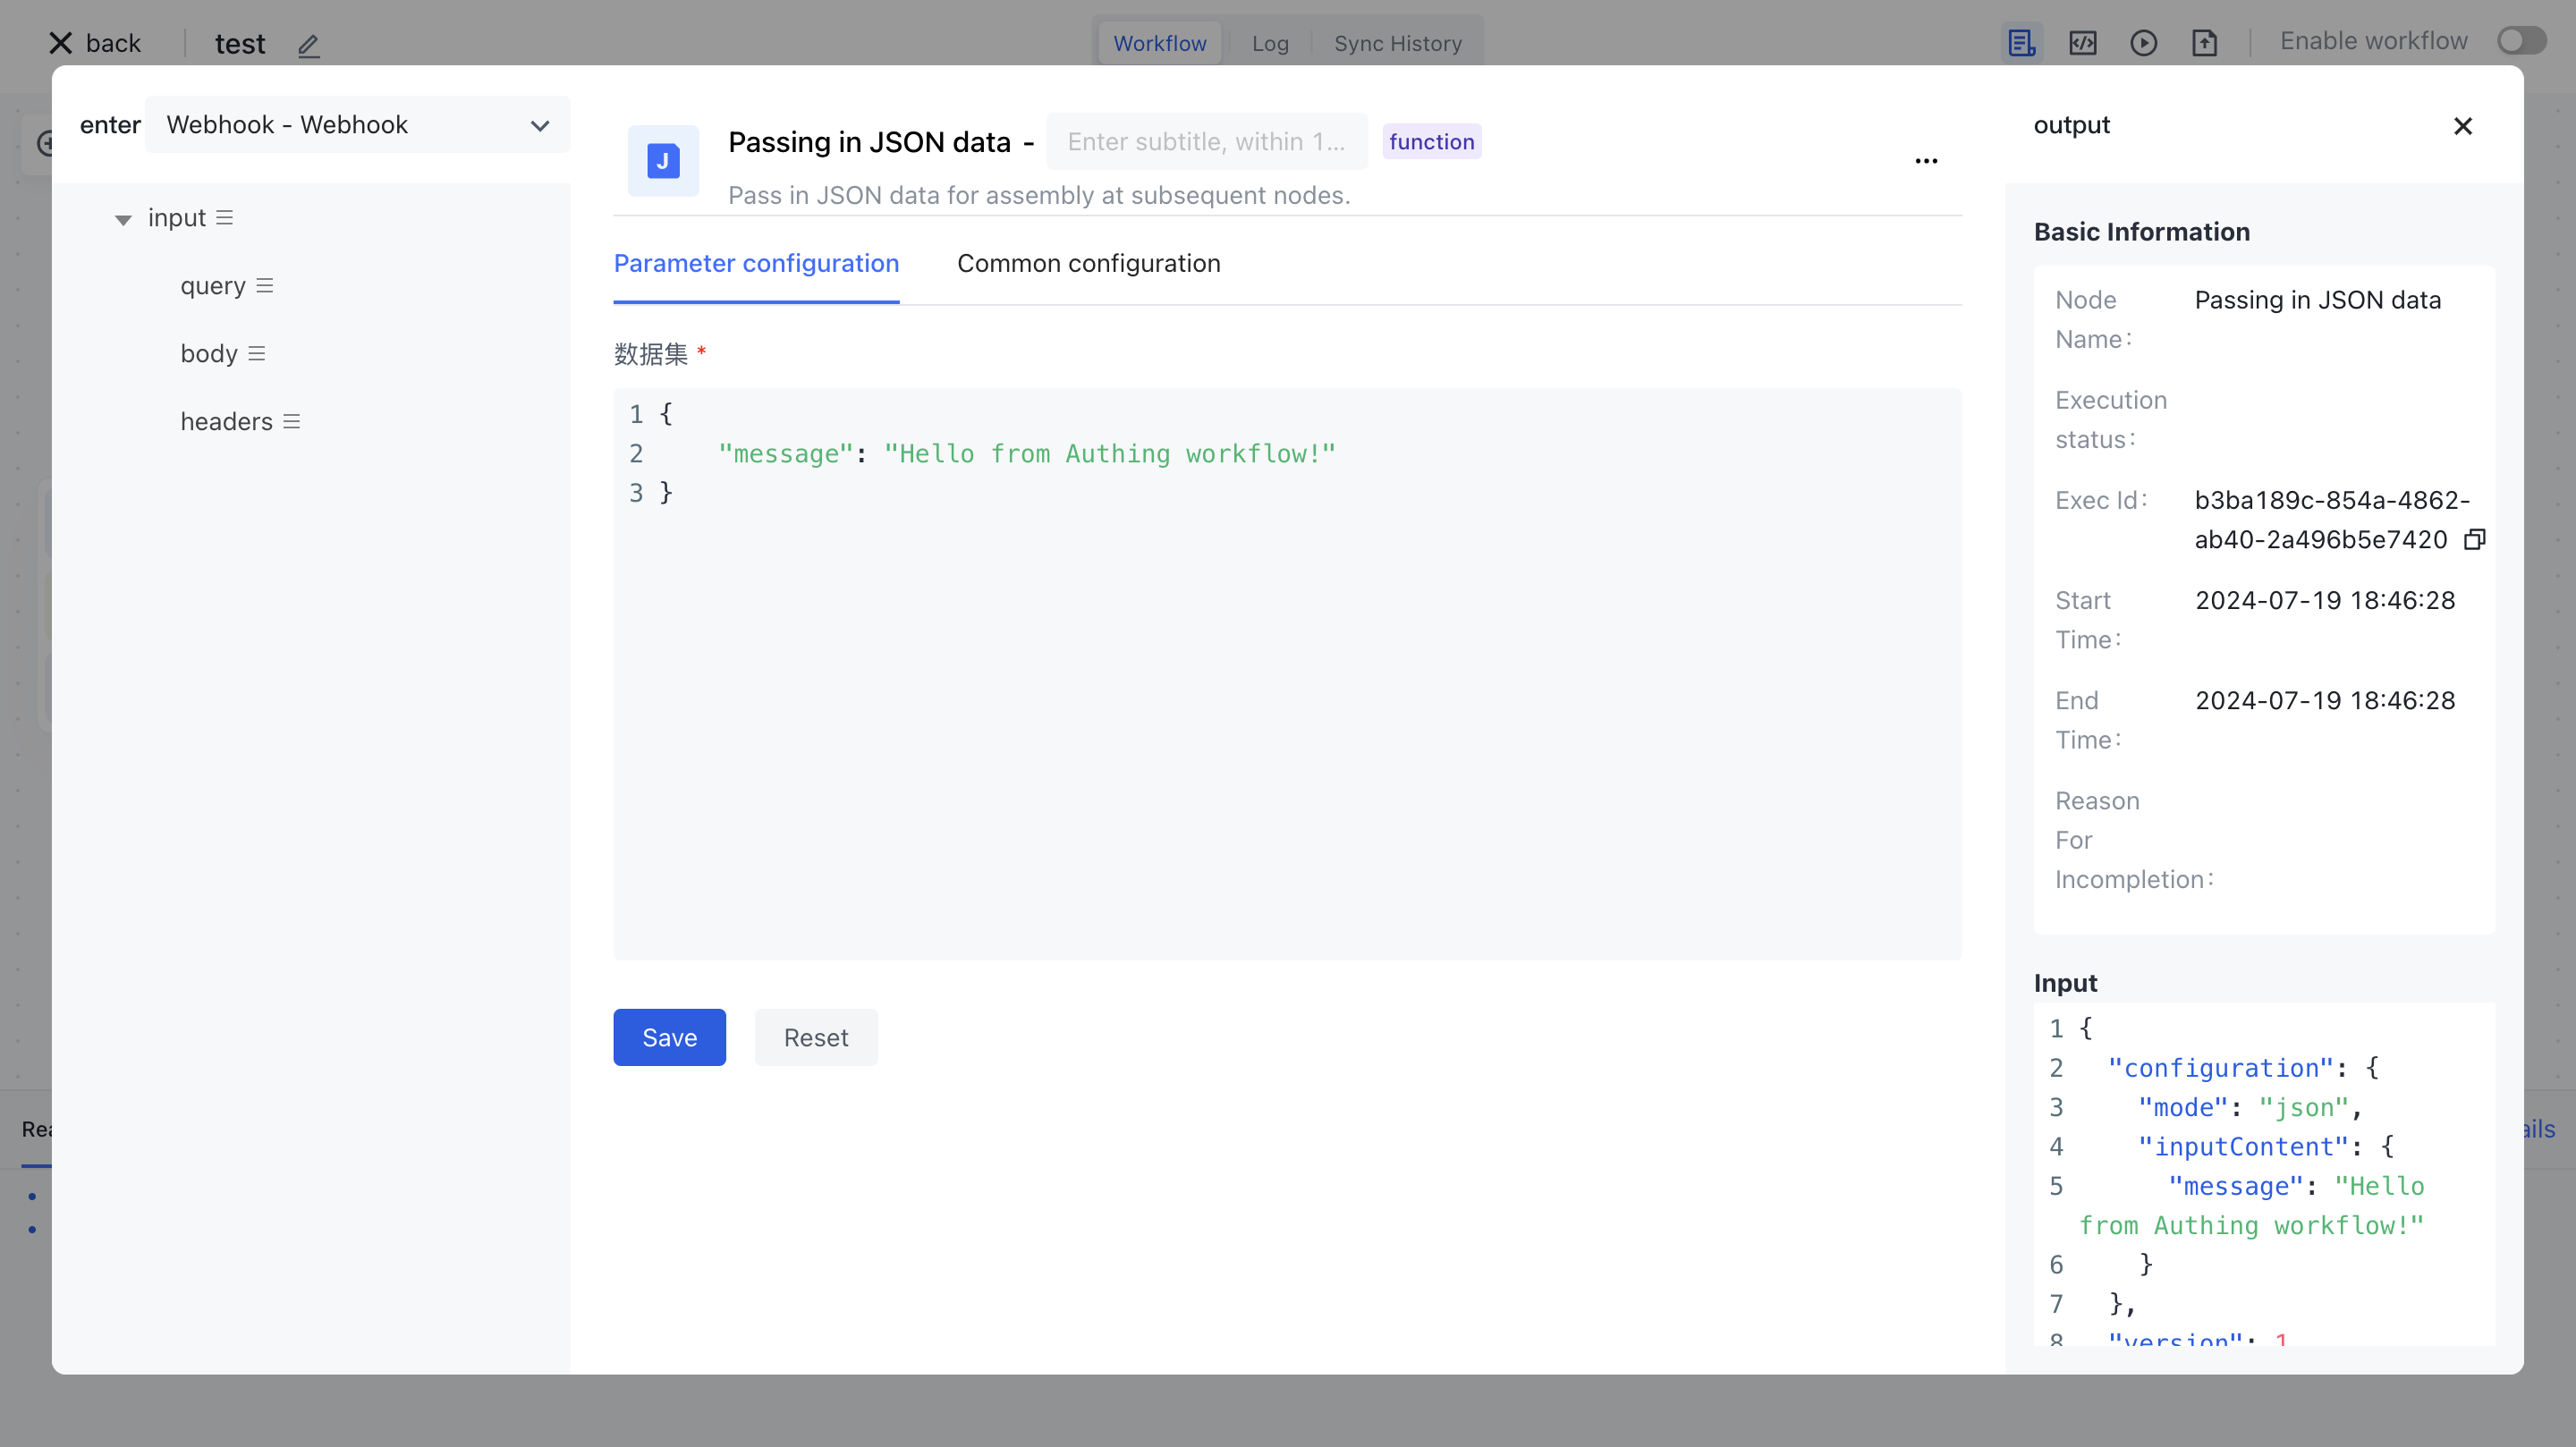
Using Postman or curl again, notice that we set the request header, request body, and query parameters:
curl --location --request POST 'https://console.authing.cn/public/service/c1447ab0-091b-472e-8f03-a2fde394c25c?param1=value1¶m2=value2' \
--header 'x-api-key: my-secret-api-key' \
--header 'Content-Type: application/json' \
--data-raw '{
"key1": "value1",
"key2": "value2"
}'
By returning the result we can see that we end up with this information in the node:
{
    "code": 200,
    "message": "SUCCESS",
    "data": {
        "output": {
            "data": {
                "headers": {
                    "x-request-id": "2a0baec567eda9d215278c704f1445eb",
                    "content-length": "33",
                    "x-forwarded-proto": "https",
                    "postman-token": "59148df2-c25c-4d39-a953-257638e3a974",
                    "x-forwarded-port": "443",
                    "accept": "*/*",
                    "x-real-ip": "111.196.161.238",
                    "x-forwarded-scheme": "https",
                    "x-forwarded-host": "console.authing.cn",
                    "sw8": "1-MTFkMTQyZWMwZWRkNGYzY2IwN2IzN2JiNDhlZjVkMTI=-NzQ2MzM2OWY5ZWI5NDkwNTkwNjgzYzFjYTMzY2Y2OTc=-3-YXV0aGluZy1zZXJ2ZXI=-YXV0aGluZy1zZXJ2ZXItY2Q5OWQ4OTc4LXhxam5y-L2FwaS92MS93b3JrZmxvdy93ZWJob29rL2FwaS9jMTQ0N2FiMC0wOTFiLTQ3MmUtOGYwMy1hMmZkZTM5NGMyNWM=-YXV0aGluZy1mbG93LWVuZ2luZS5hdXRoaW5nLnN2Yy5jbHVzdGVyLmxvY2FsOjgwODA=",
                    "x-api-key": "my-secret-api-key",
                    "host": "authing-flow-engine.authing.svc.cluster.local:8080",
                    "content-type": "application/json",
                    "connection": "close",
                    "x-scheme": "https",
                    "accept-encoding": "gzip, deflate, br",
                    "user-agent": "PostmanRuntime/7.29.2"
                },
                "query": {
                    "param1": "value1",
                    "param2": "value2"
                },
                "body": {
                    "key1": "value1",
                    "key2": "value2"
                }
            }
        },
        "status": "COMPLETED"
    }
}