¶ 企业微信登录
集成企业微信录需要以下步骤:
在企业微信管理后台进行配置
在 Authing 管理控制台进行配置
集成 Authing iOS 企业微信登录
¶ STEP 1:在企业微信管理后台 (opens new window)进行配置
获取 CorpID AgentID Schema Secret 并填写 BundleID
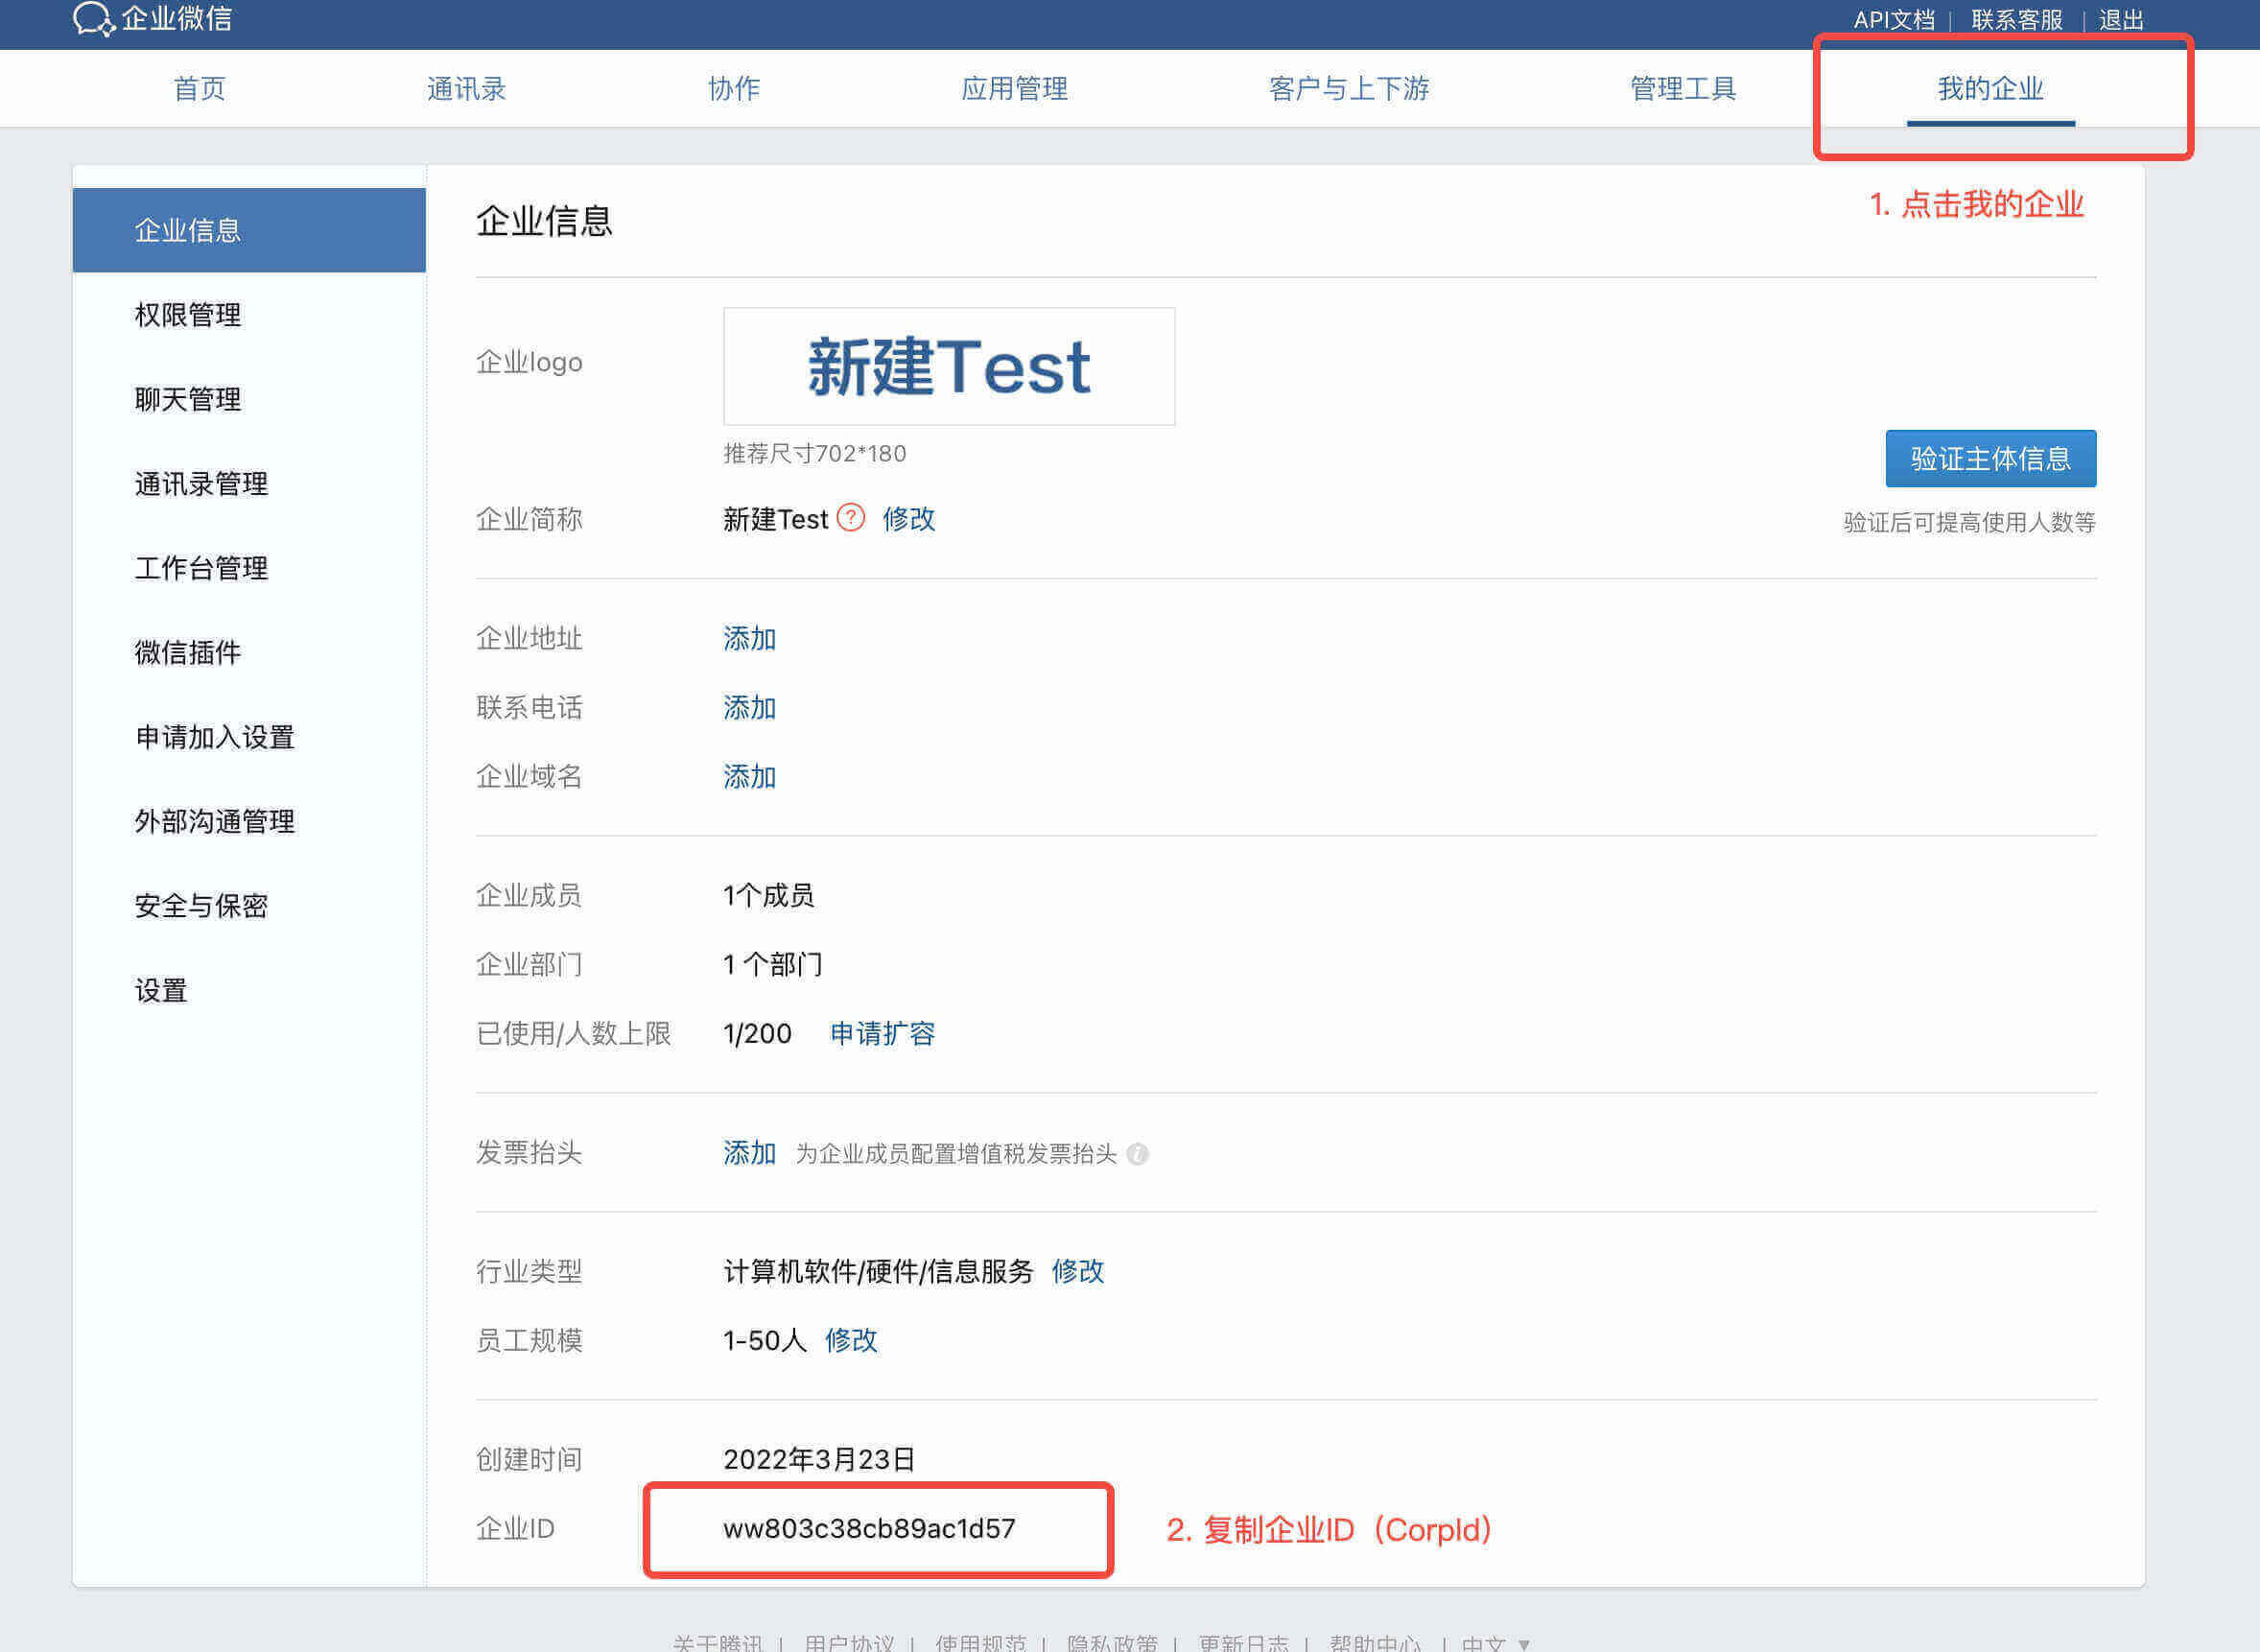
点击 “我的企业”
页面底部复制企业ID ( CorpID )
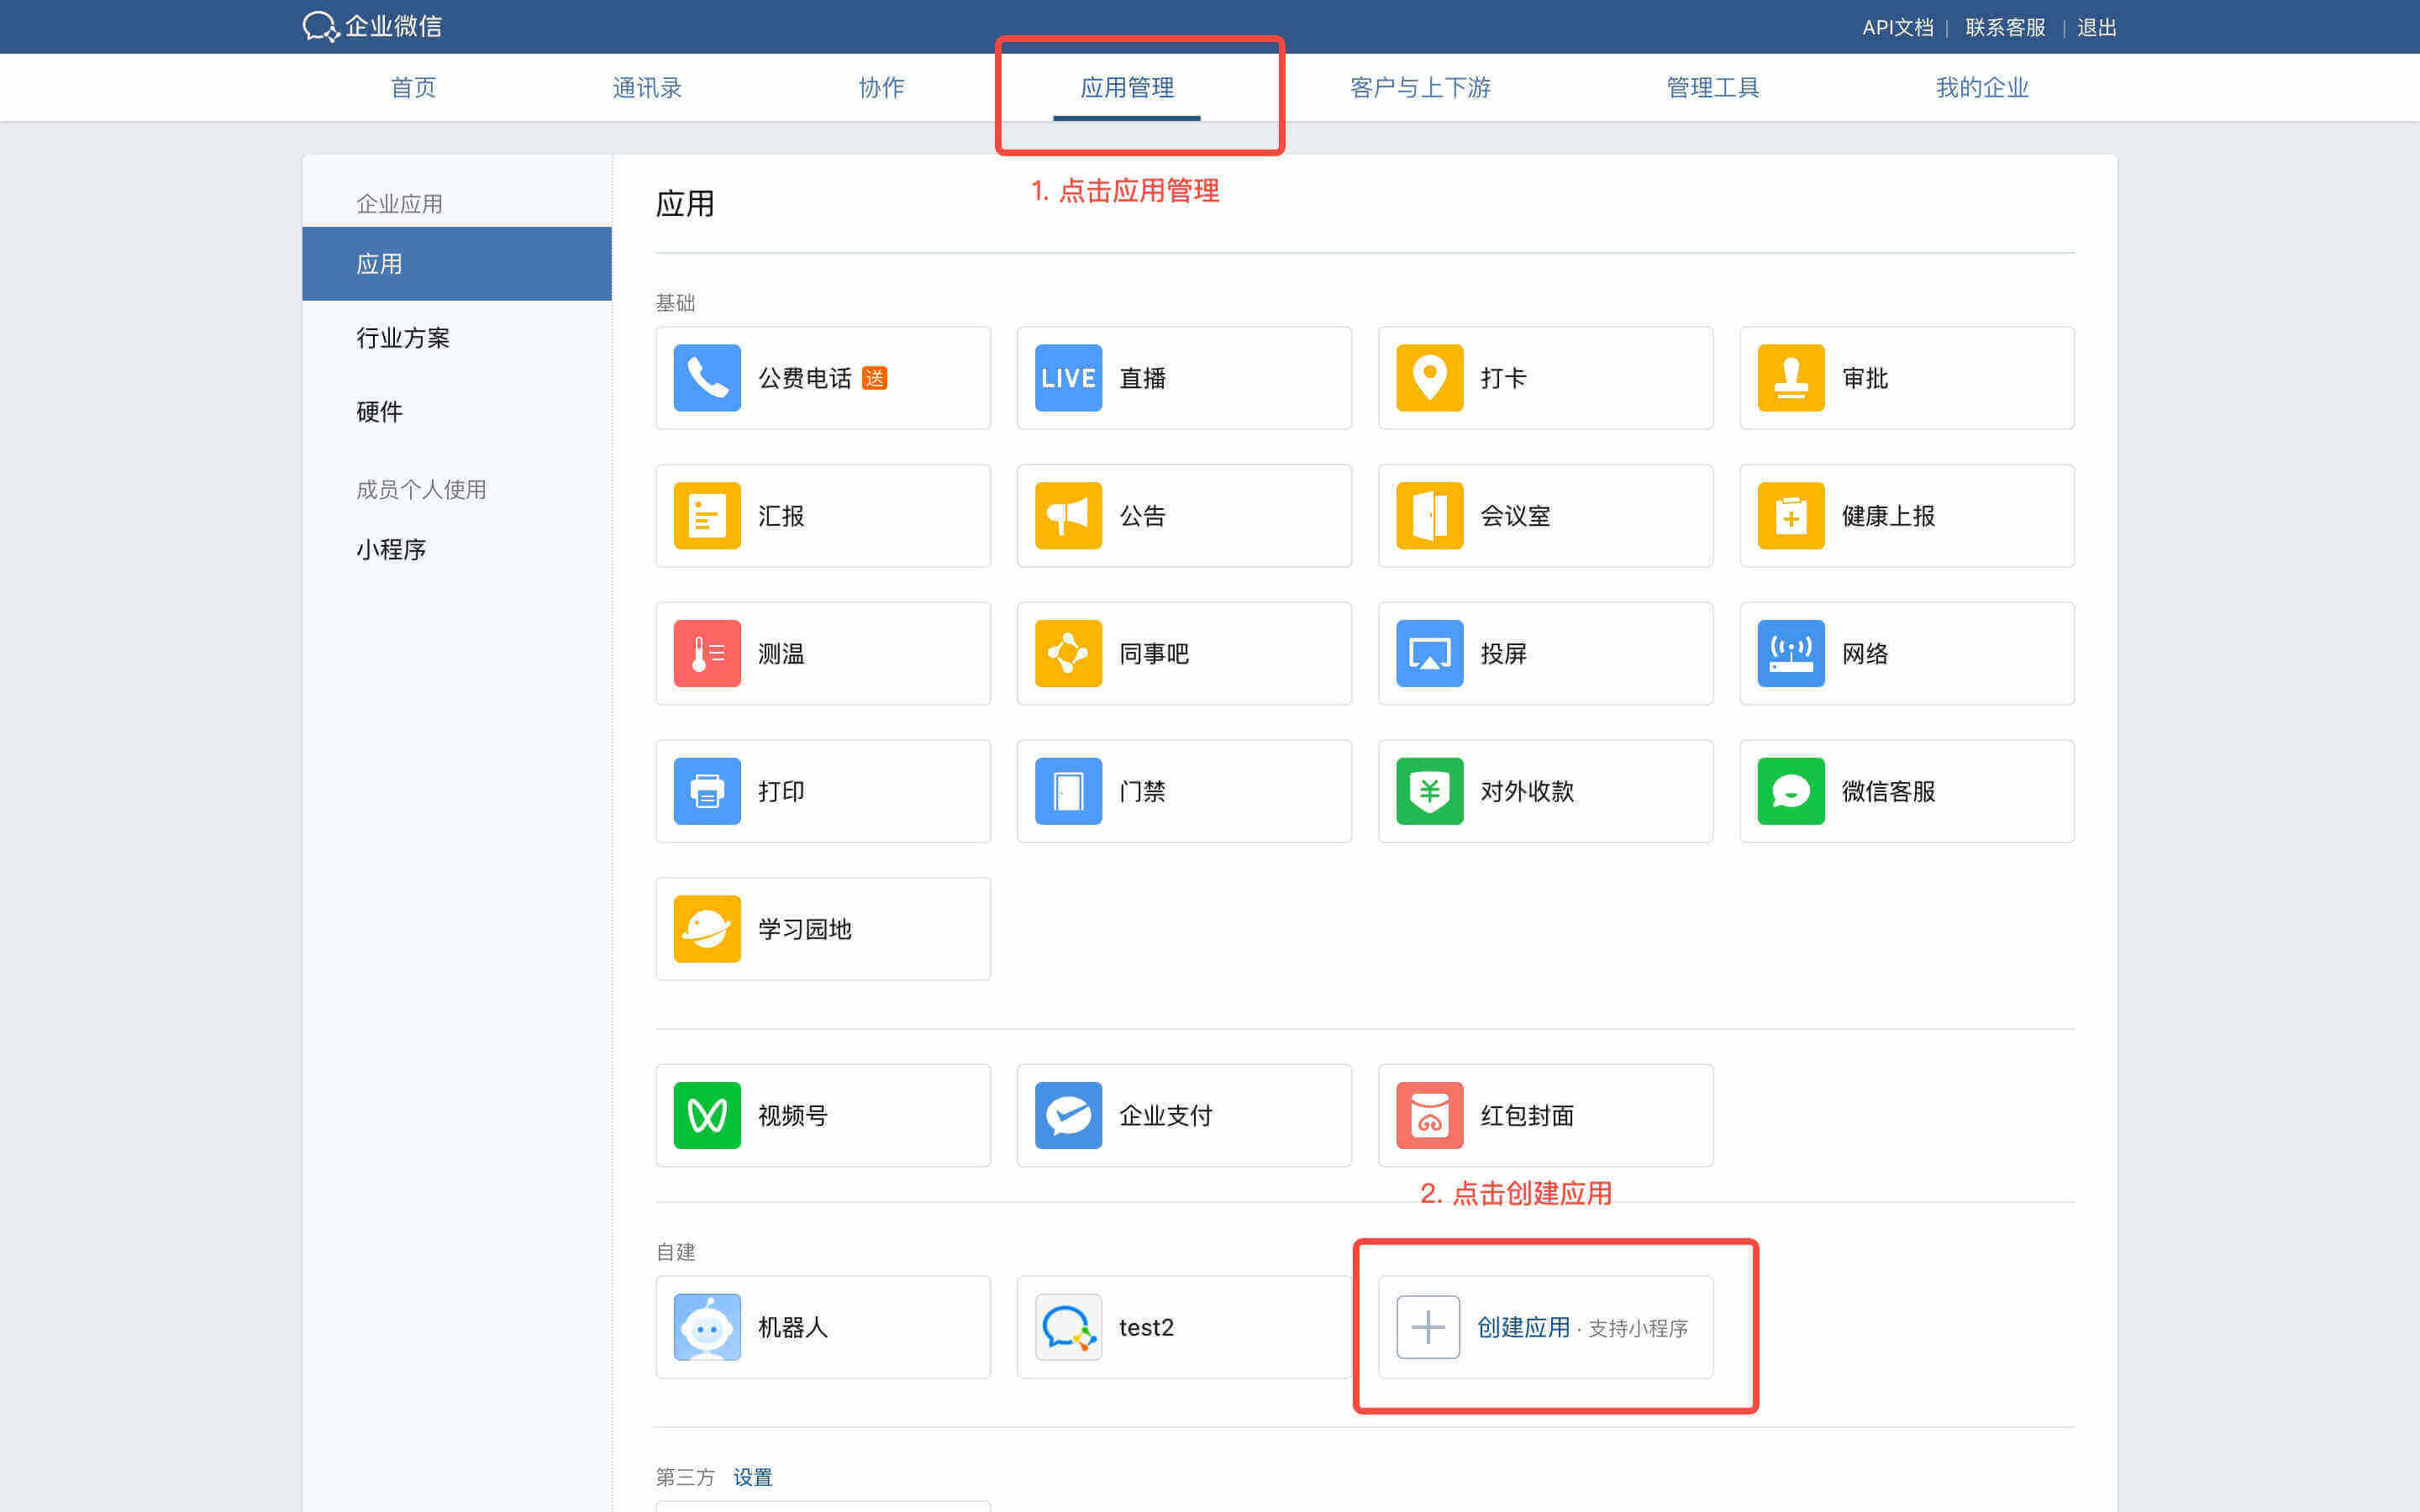
点击 “应用管理“
点击 “创建应用“
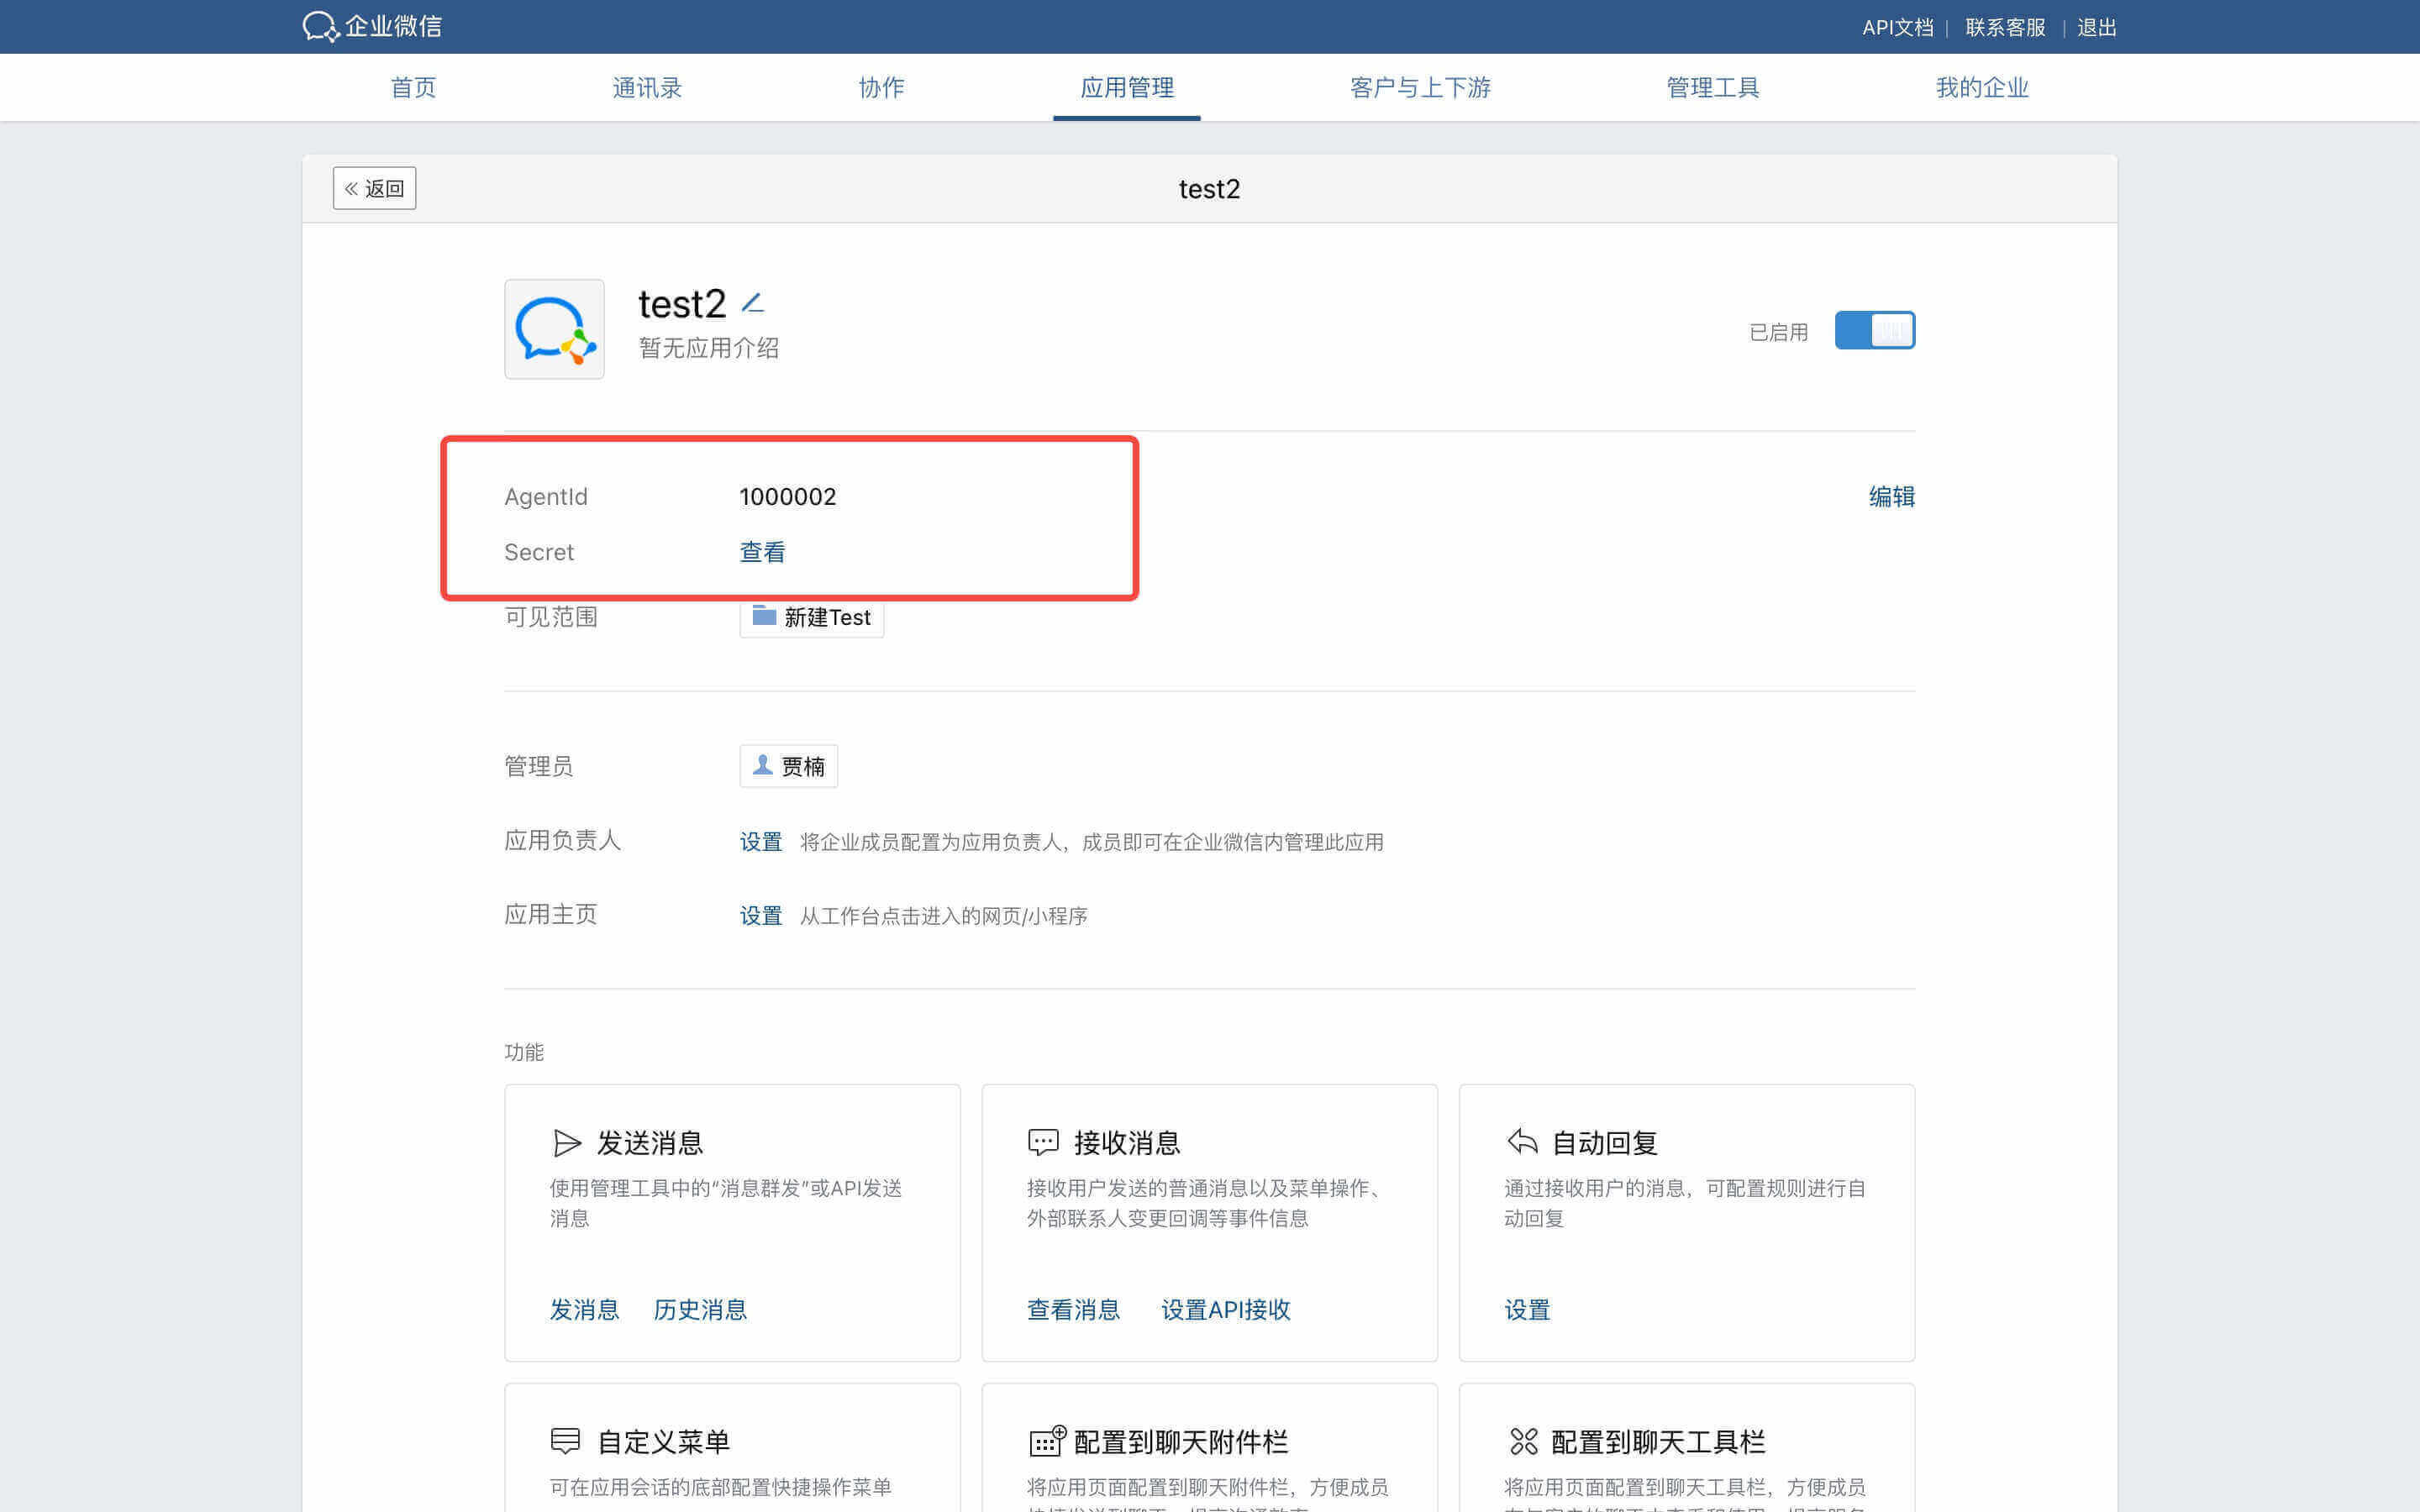
复制 AgentID 和 Schema
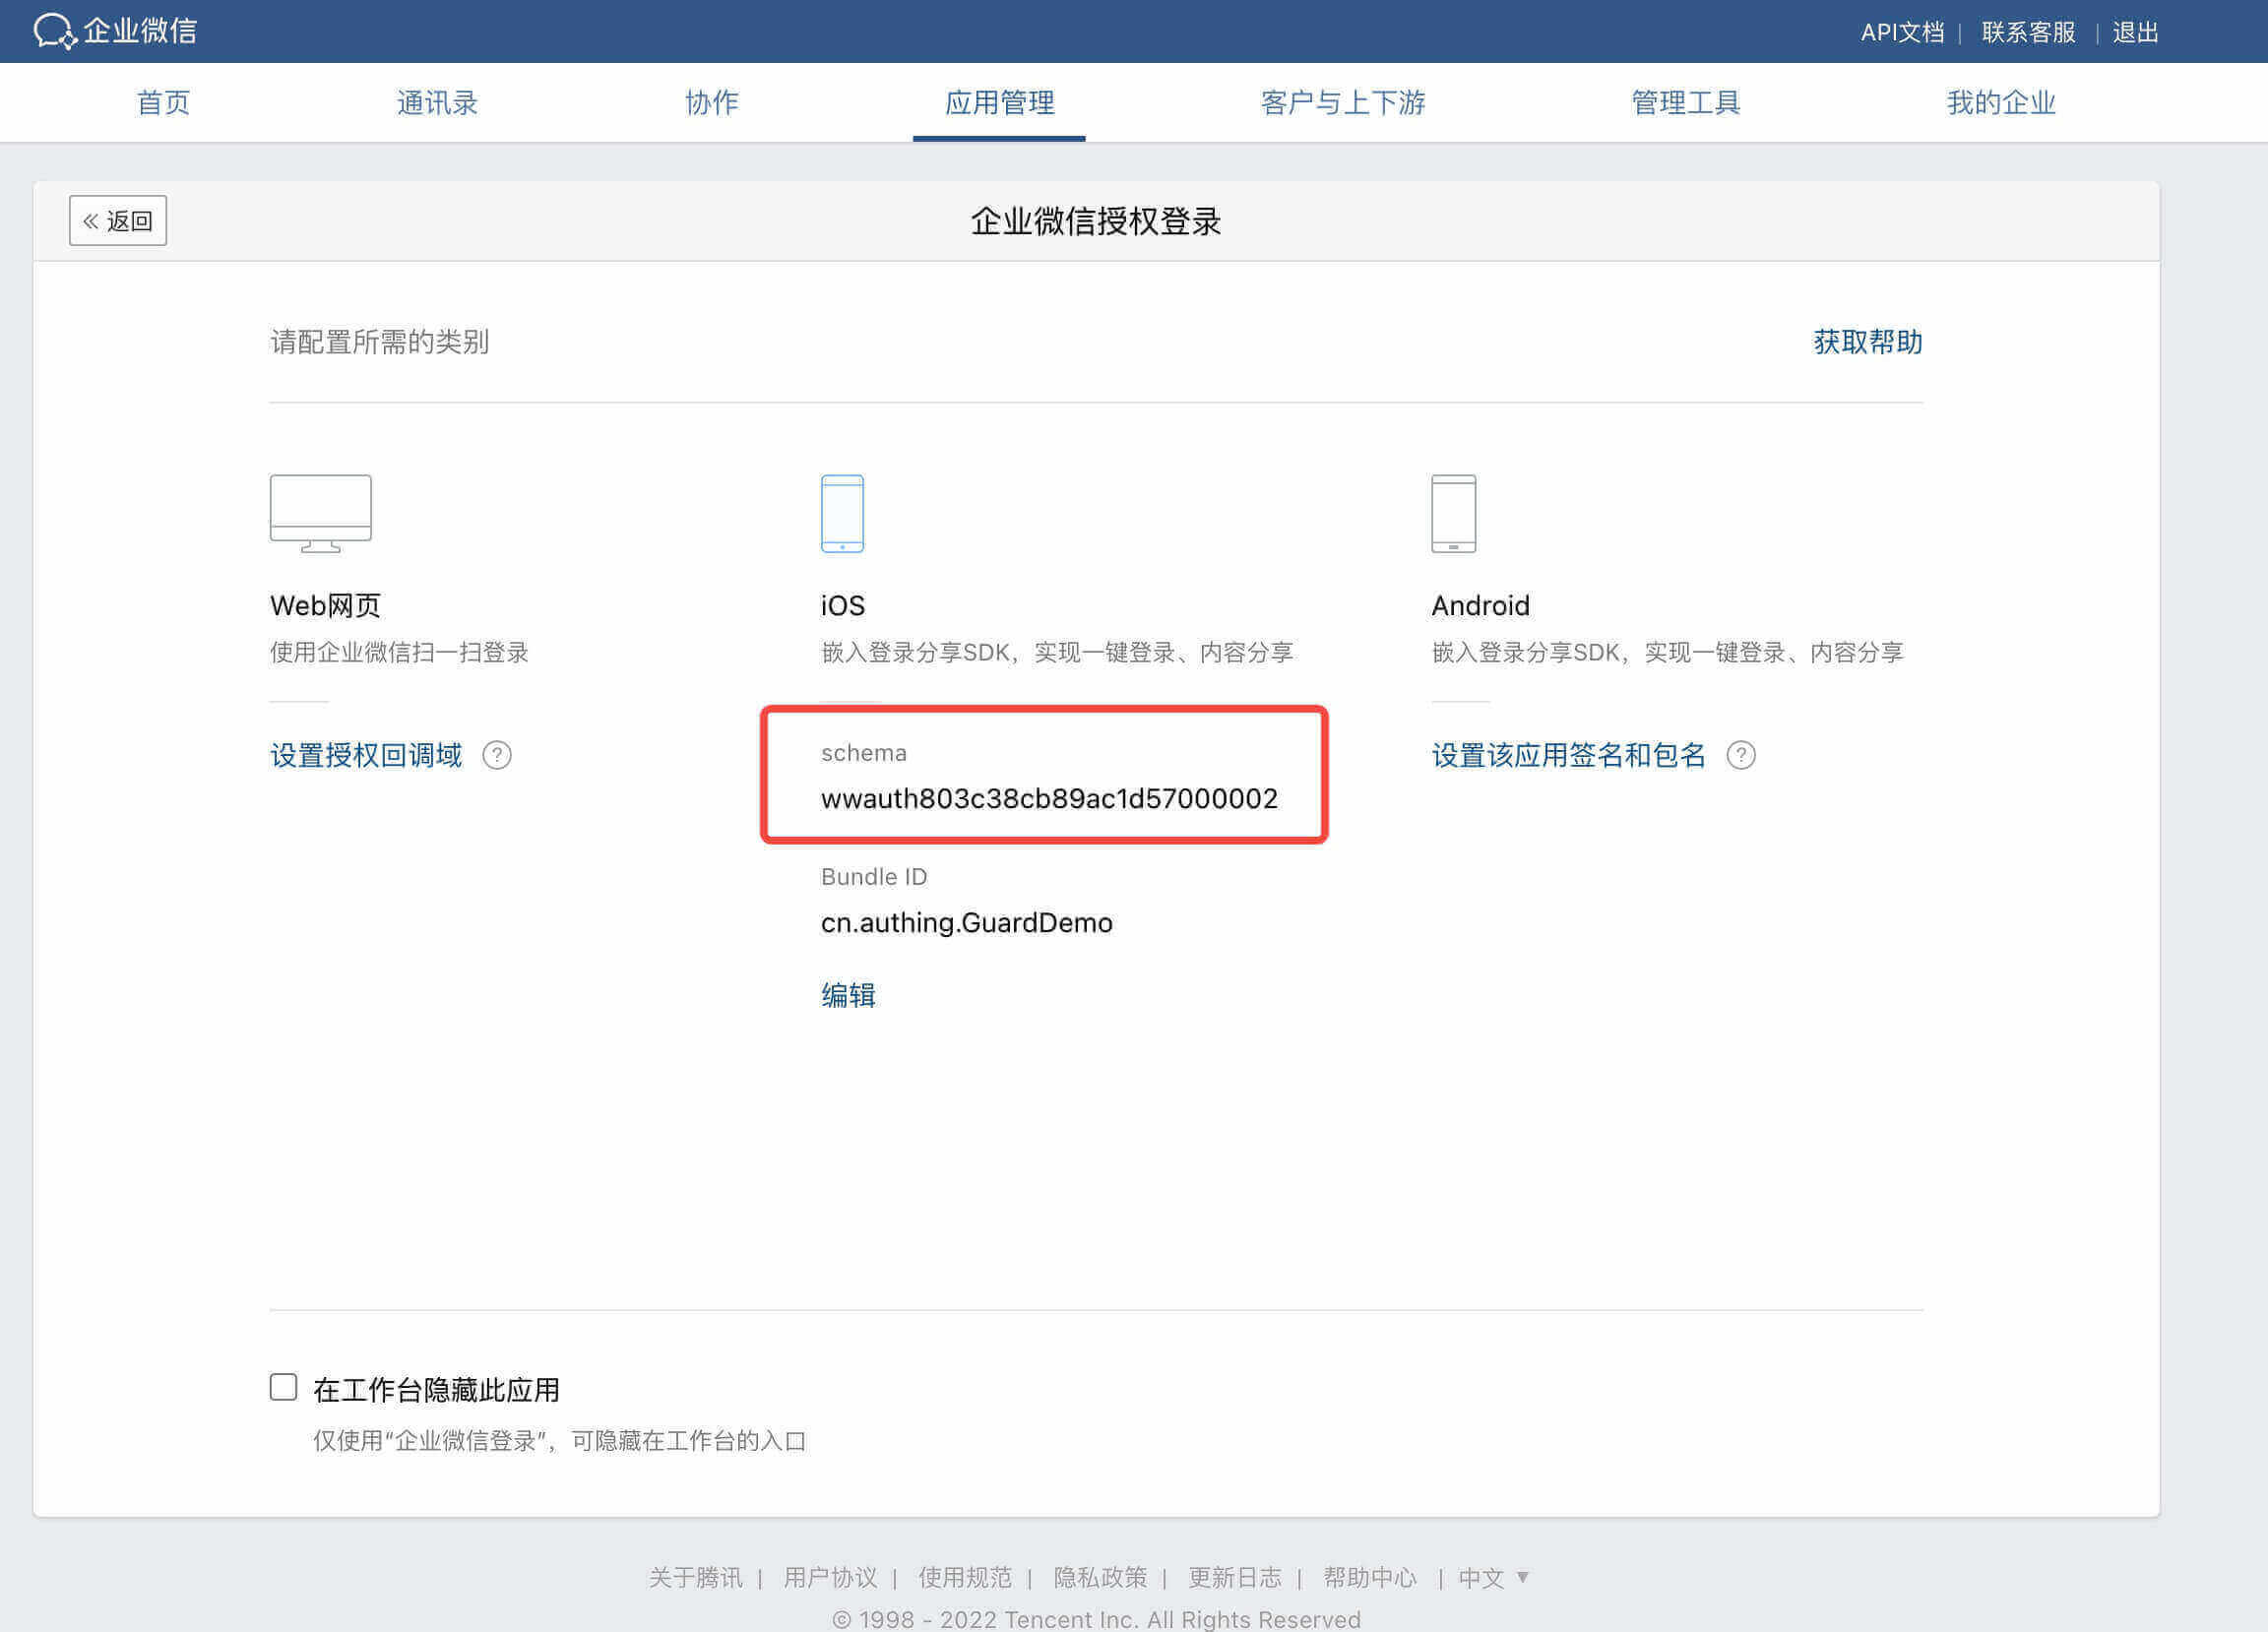
点击 “企业微信授权登录“
选择 iOS 复制 Schema 并填写 BundleID
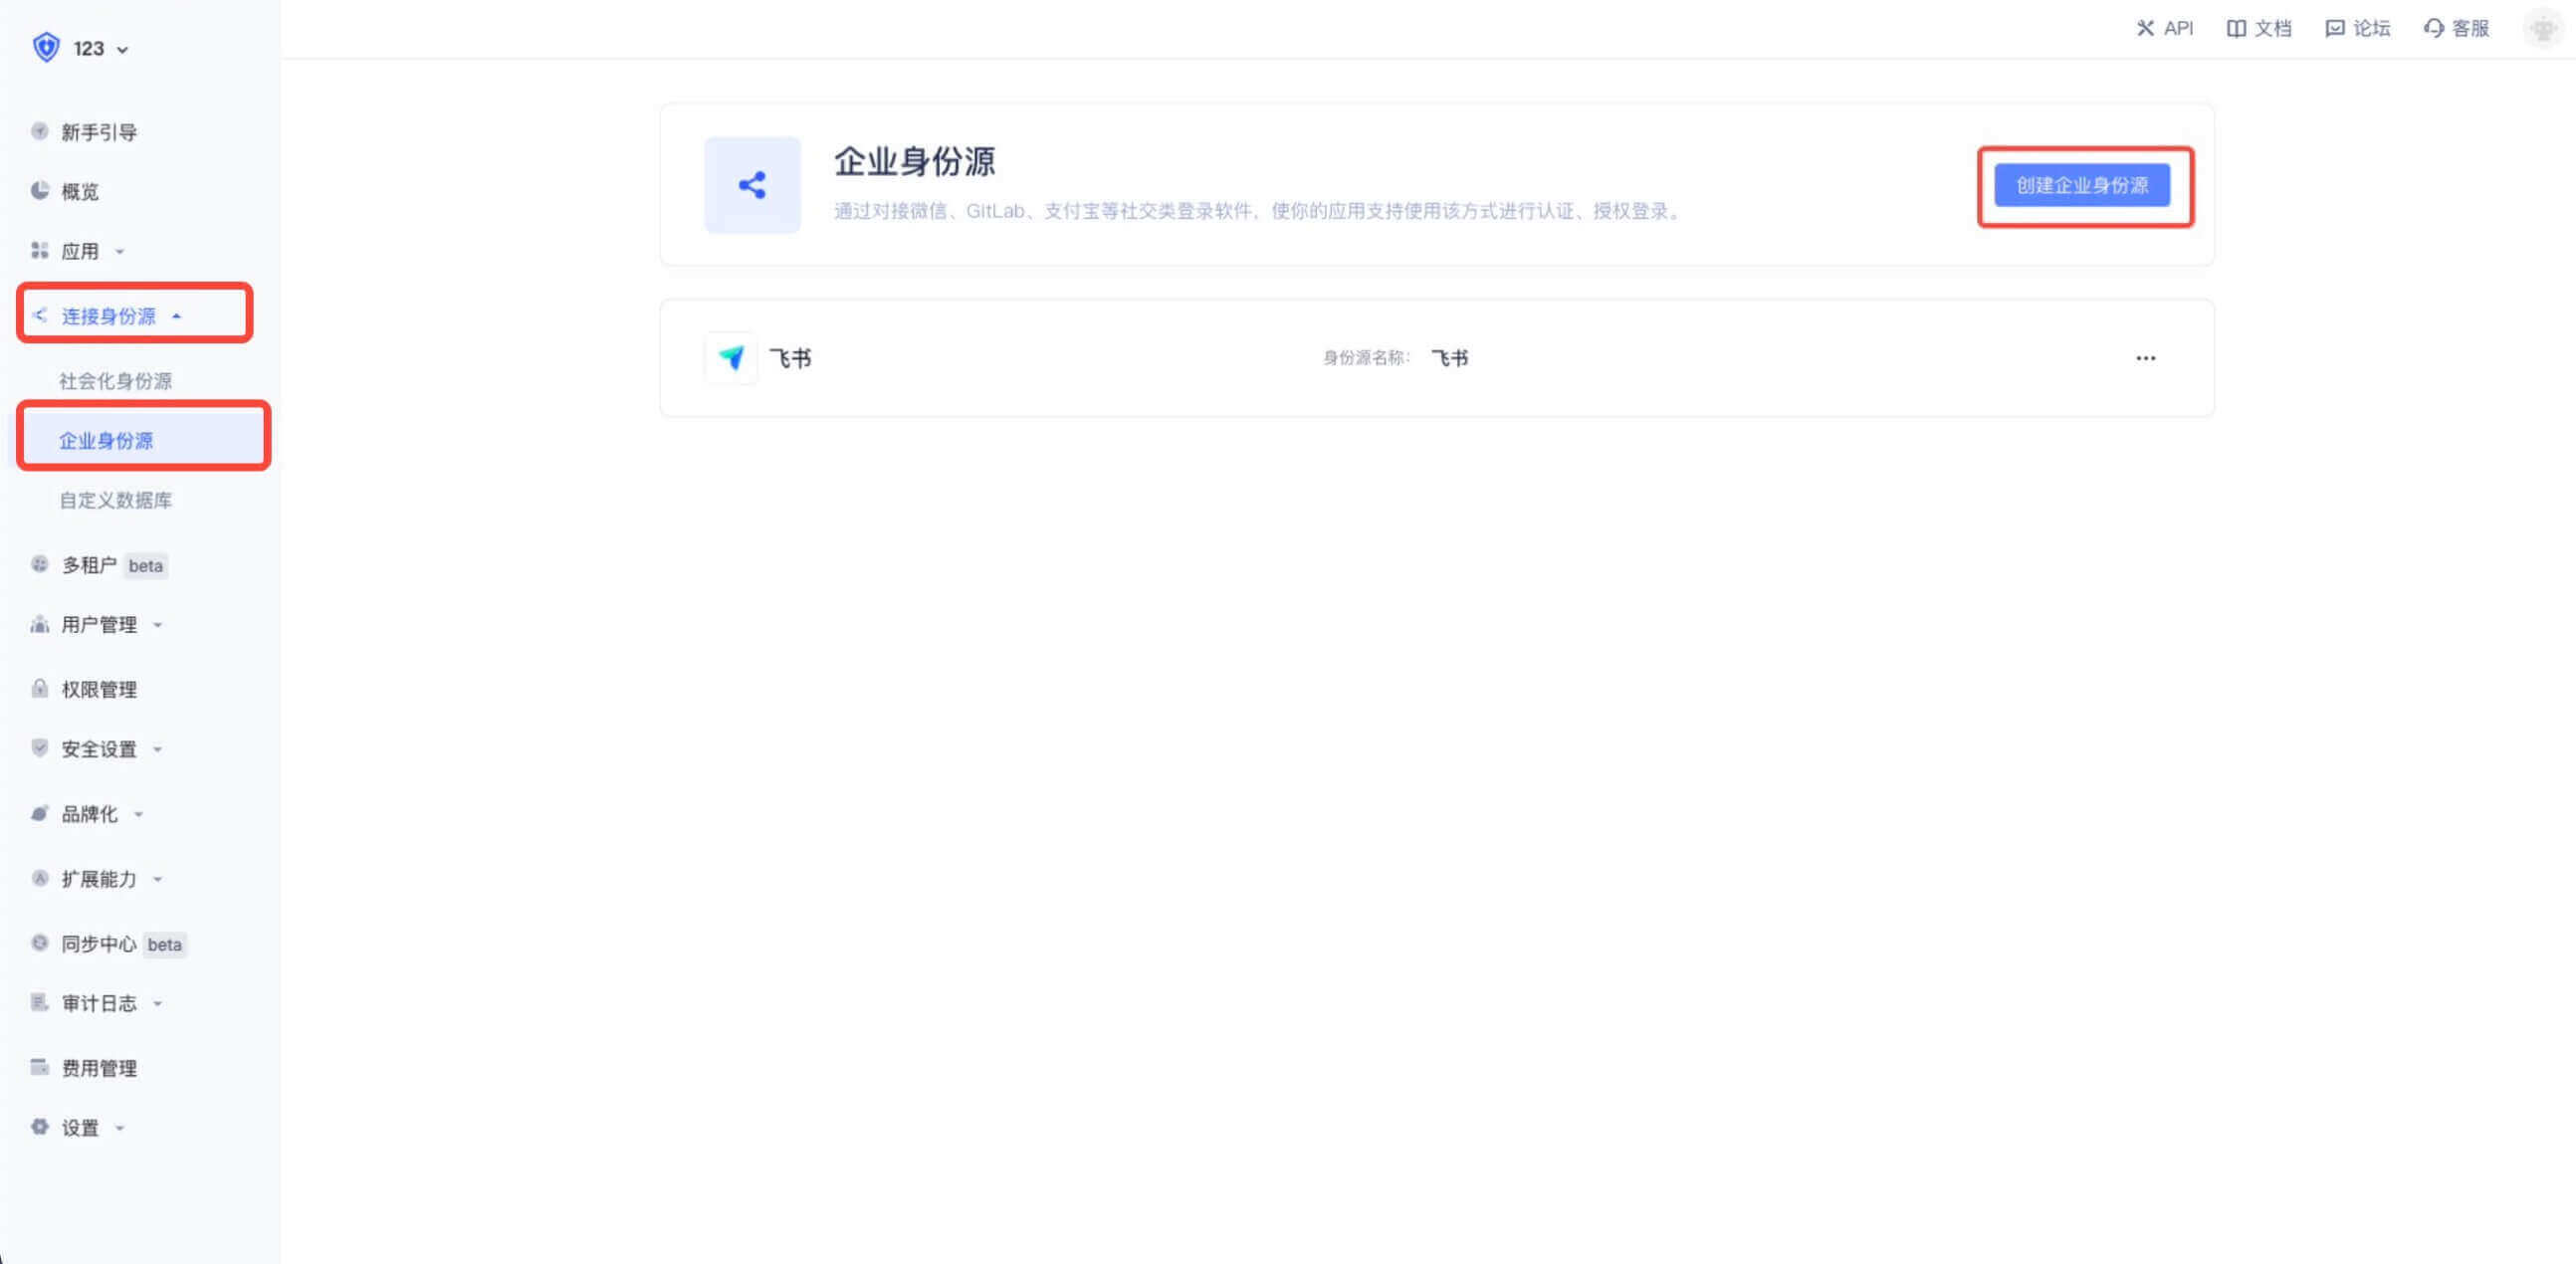
¶ STEP 2:在 Authing 管理控制台的操作步骤
在控制台的 “连接身份源” 菜单选择 “创建企业身份源“
选择 “企业微信”
选择 “企业微信企业内部应用移动端登录”
填入对应参数

¶ STEP 3:集成 Authing iOS 企业微信登录
¶ 添加依赖
Guard-iOS-binary 依赖于 Guard 组件(Version 1.2.4 之后)
在 swift package 搜索栏输入:https://github.com/Authing/authing-binary
依赖规则选择 Up to Next Major Version 1.0.0
Add Package 后勾选 WeCom
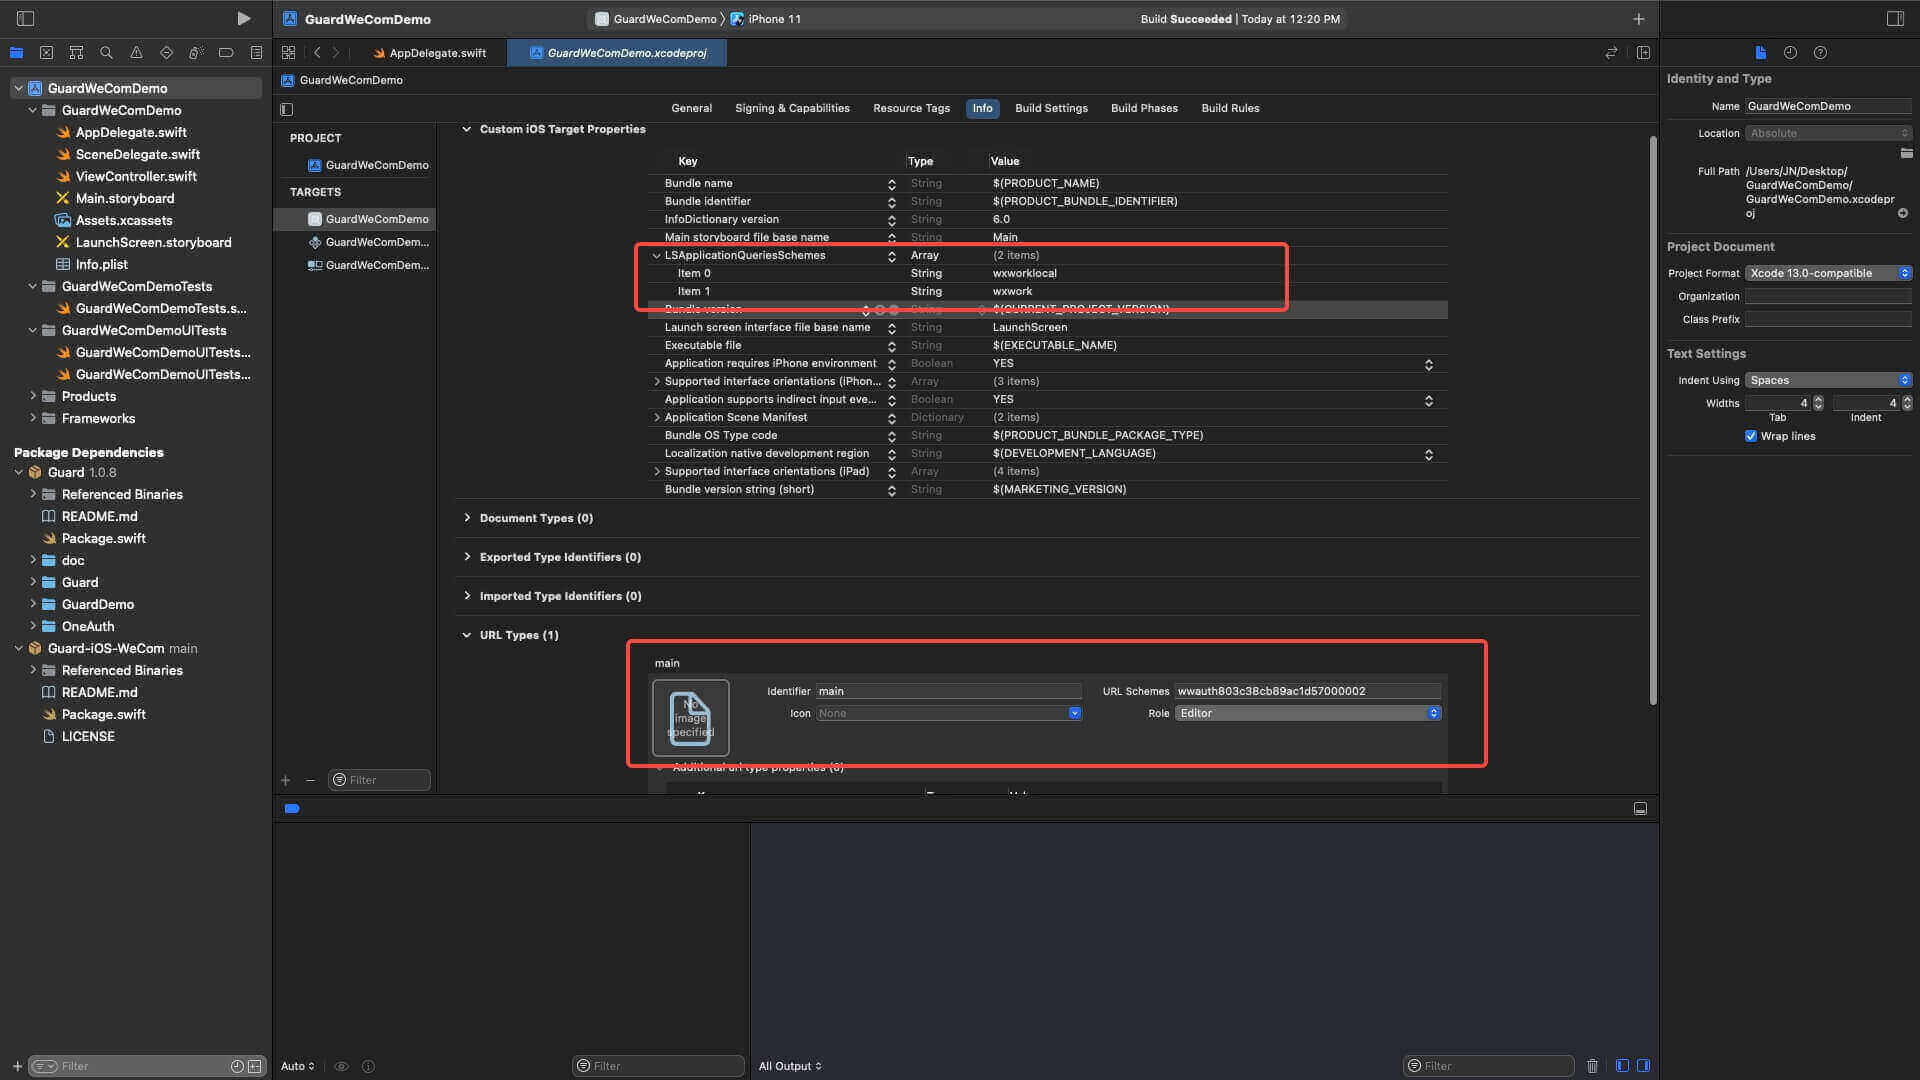
¶ 修改项目配置
配置跳转 Scheme: LSApplicationQueriesSchemes Key 下添加 wxwork 和 wxworklocal
配置企业微信回跳 URL:URL types Key 下 添加企业微信管理后台申请到的 Schema (例如:wwauth803c38cb89ac1d57000002)
¶ 初始化 WeCom
导入 Guard 和 WeCom
WeCom.registerApp 需要传入企业微信发放的
SchemeAgentIDCorpID
import Guard
import WeCom

Authing.start(<#Authing AppId#>);
WeCom.registerApp(appId: <#Scheme#>, corpId: <#CorpID#>, agentId: <#AgentID#>)
¶ 添加回调
企业微信返回应用后,如果使用了 SceneDelegate,则需要在 SceneDelegate.swift 里面重载下面的函数:
func scene(_ scene: UIScene, openURLContexts URLContexts: Set<UIOpenURLContext>) {
    if let url = URLContexts.first?.url {
        _ = WeCom.handleOpenURL(url: url)
    }
}
如果未使用 SceneDelegate,则需要在 AppDelegate 里面重载
func application(_ app: UIApplication, open url: URL, options: [UIApplication.OpenURLOptionsKey : Any] = [:]) -> Bool {
    return WeCom.handleOpenURL(url: url)
}
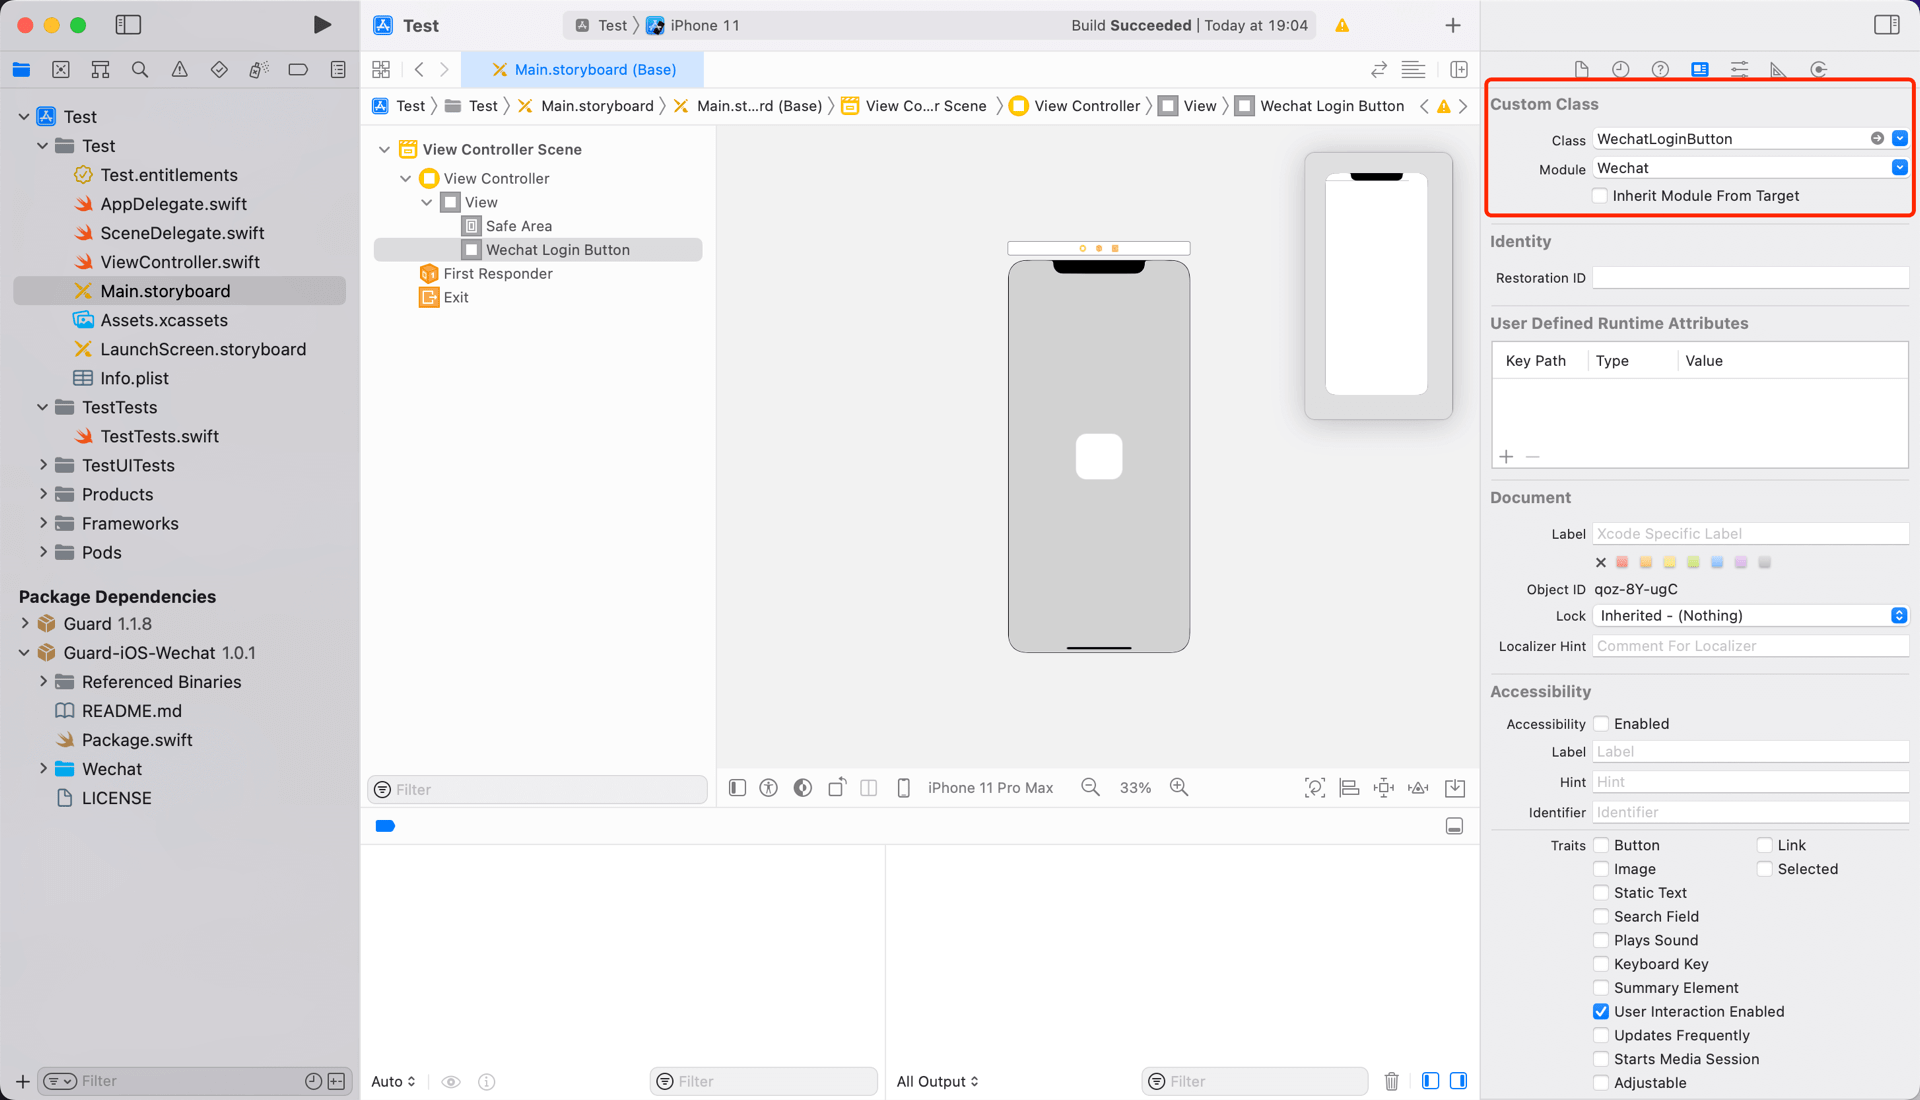
¶ 发起企业微信授权
推荐通过我们提供的语义化 Hyper Component,只需要在 xib 里面放置一个:
WeComLoginButton
设置 Module 为 WeCom
如果不想使用我们内置的按钮,则可以在自己按钮的点击事件里面调用 Authing 企业微信登录 API:
WeCom.login { code, message, userInfo in
    if (code == 200) {
        // userInfo:用户信息
    }
}