¶ Apple Mobile Login
¶ Introduction
- Overview: Apple social login is a user who uses Apple as the identity provider to securely log in to a third-party application or website. By configuring and enabling Apple's social login in Authing, you can quickly obtain basic open information of Apple through Authing and help users achieve password-free login.
- Application scenarios: PC website
- End-User Preview:

¶ Precautions
- Please make sure that you have applied for an Apple developer account, otherwise the following operations cannot be performed. The address for applying for personal and company accounts: https://developer.apple.com/programs/ (opens new window), and the address for applying for enterprise accounts: https://developer.apple.com/programs/enterprise/ (opens new window)
- If you do not have an Authing Console account, please go to the Authing Console (opens new window) to register a developer account.
¶ Step 1: Configure in the Apple Developer Center
¶ Get Team ID
Go to the Membership page (opens new window) of the Apple Developer Portal (opens new window) and record the Team ID: 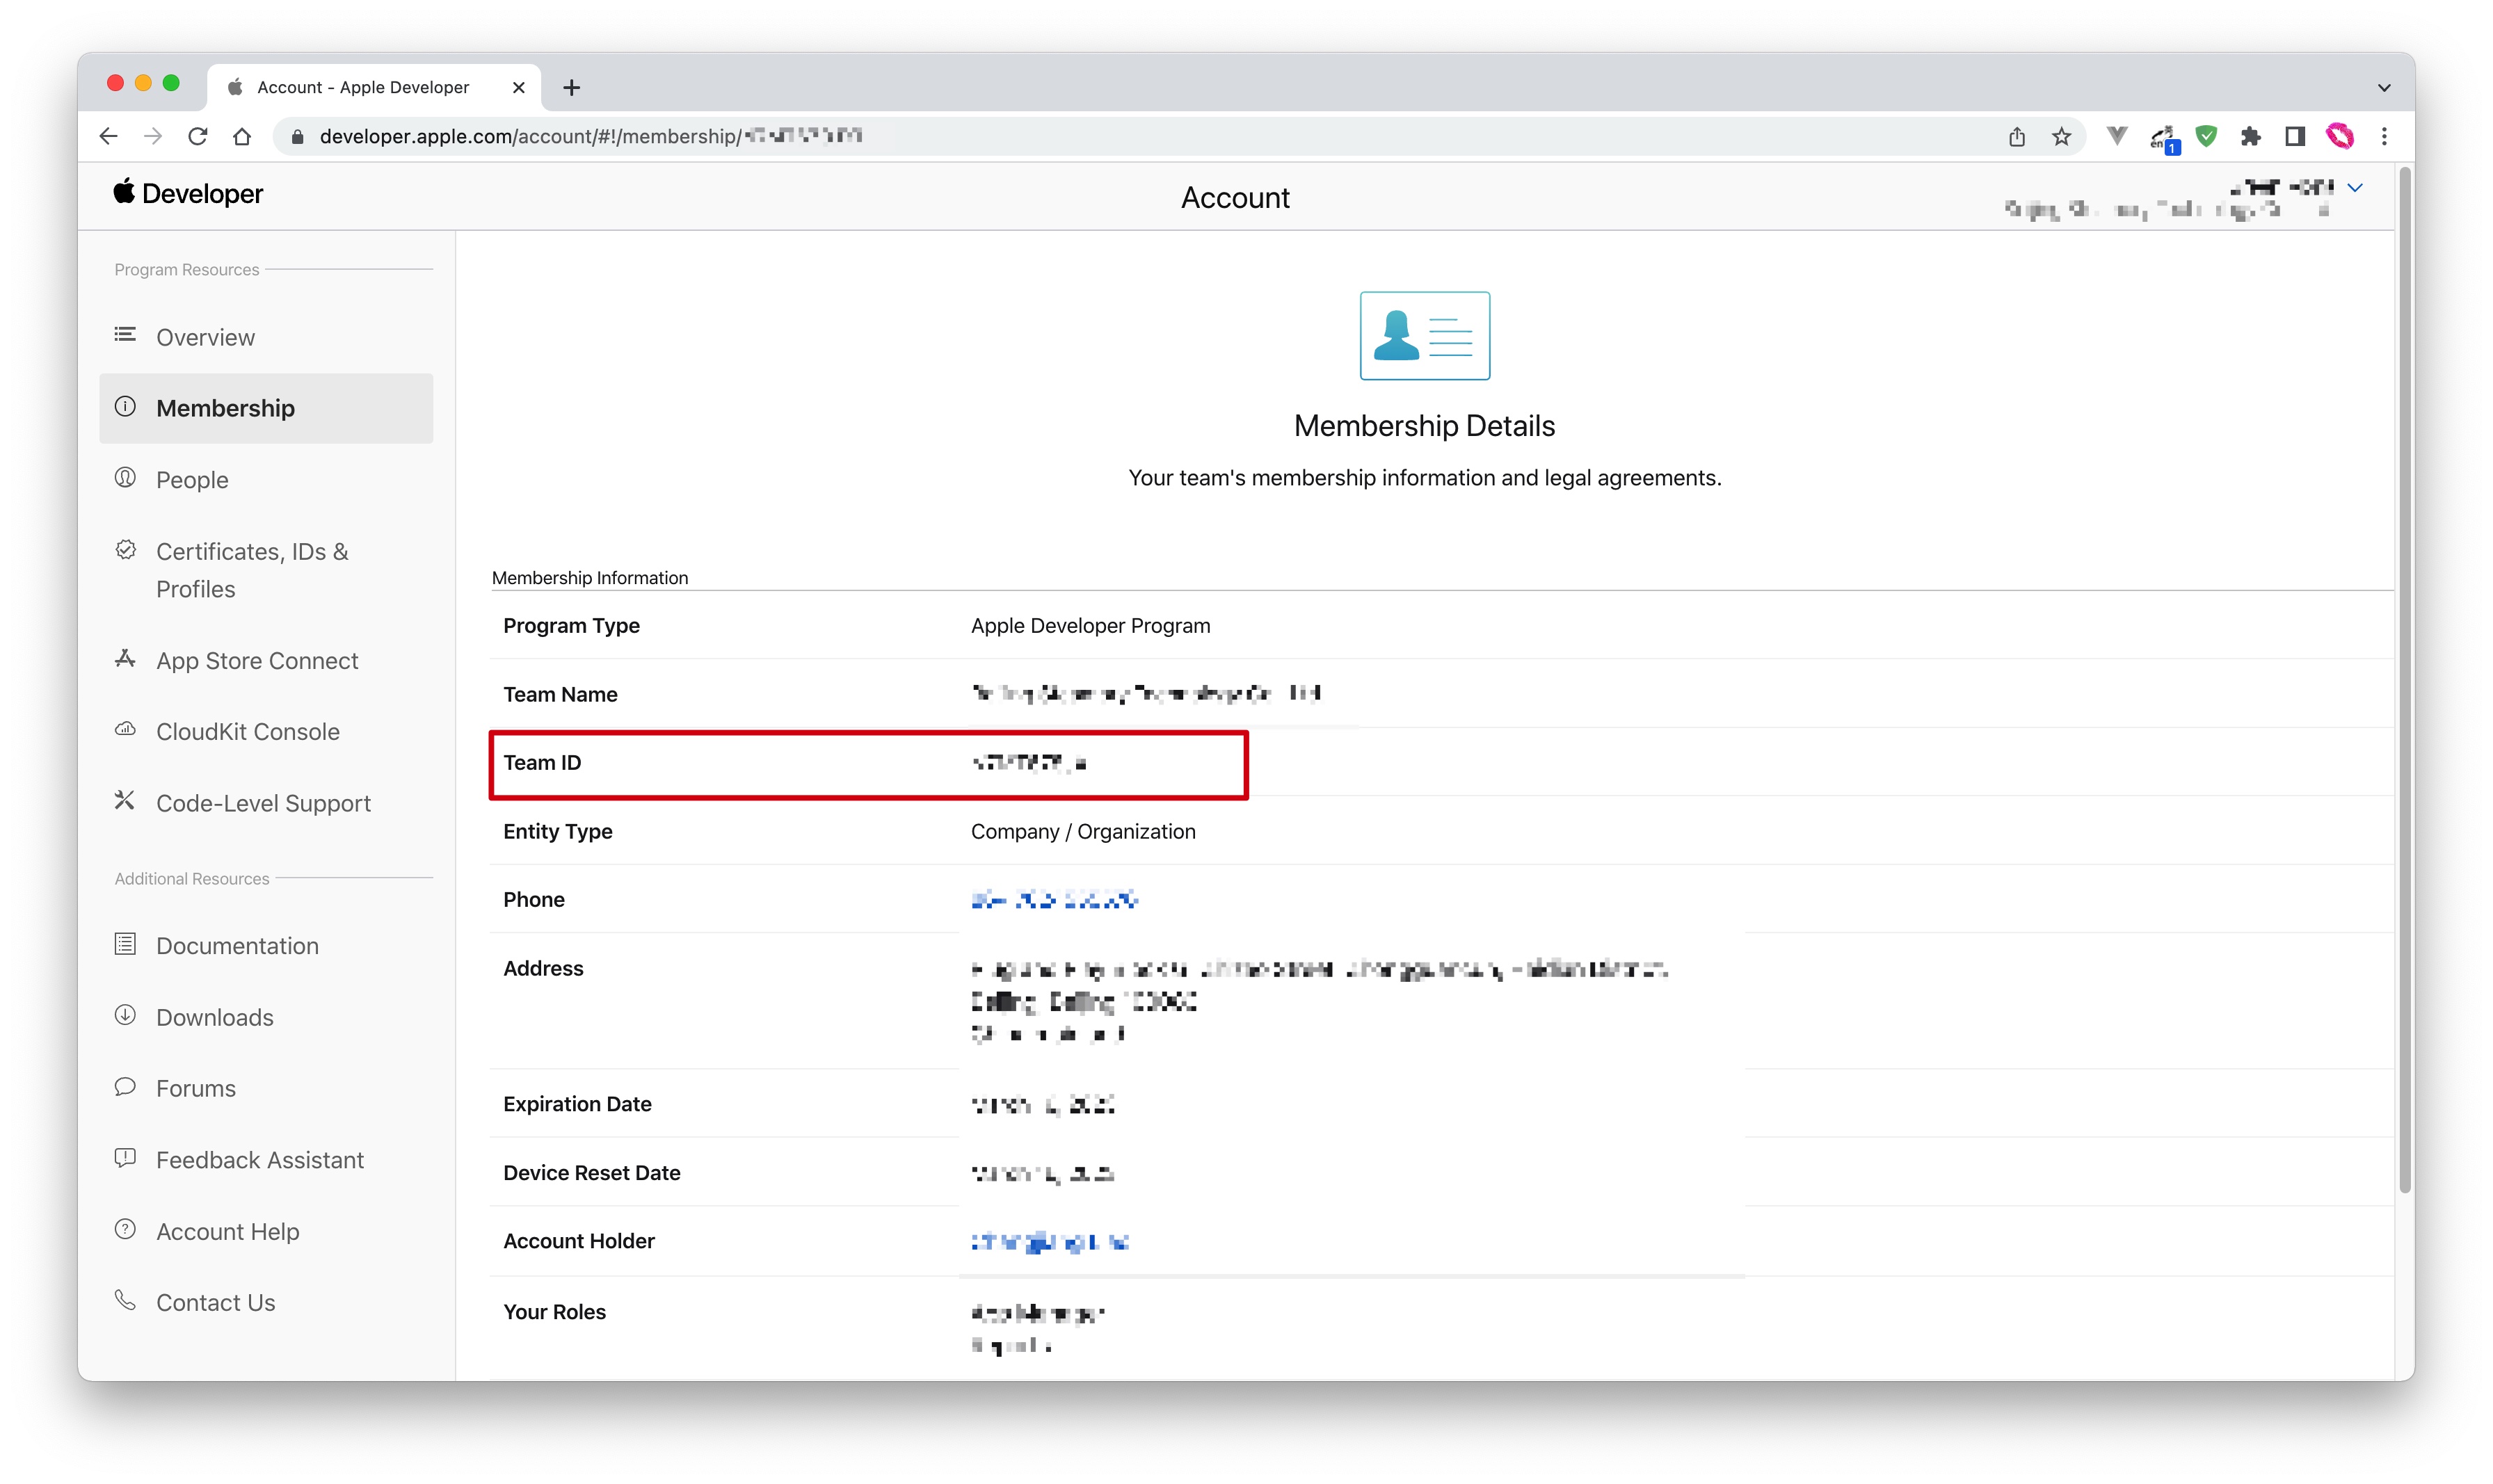
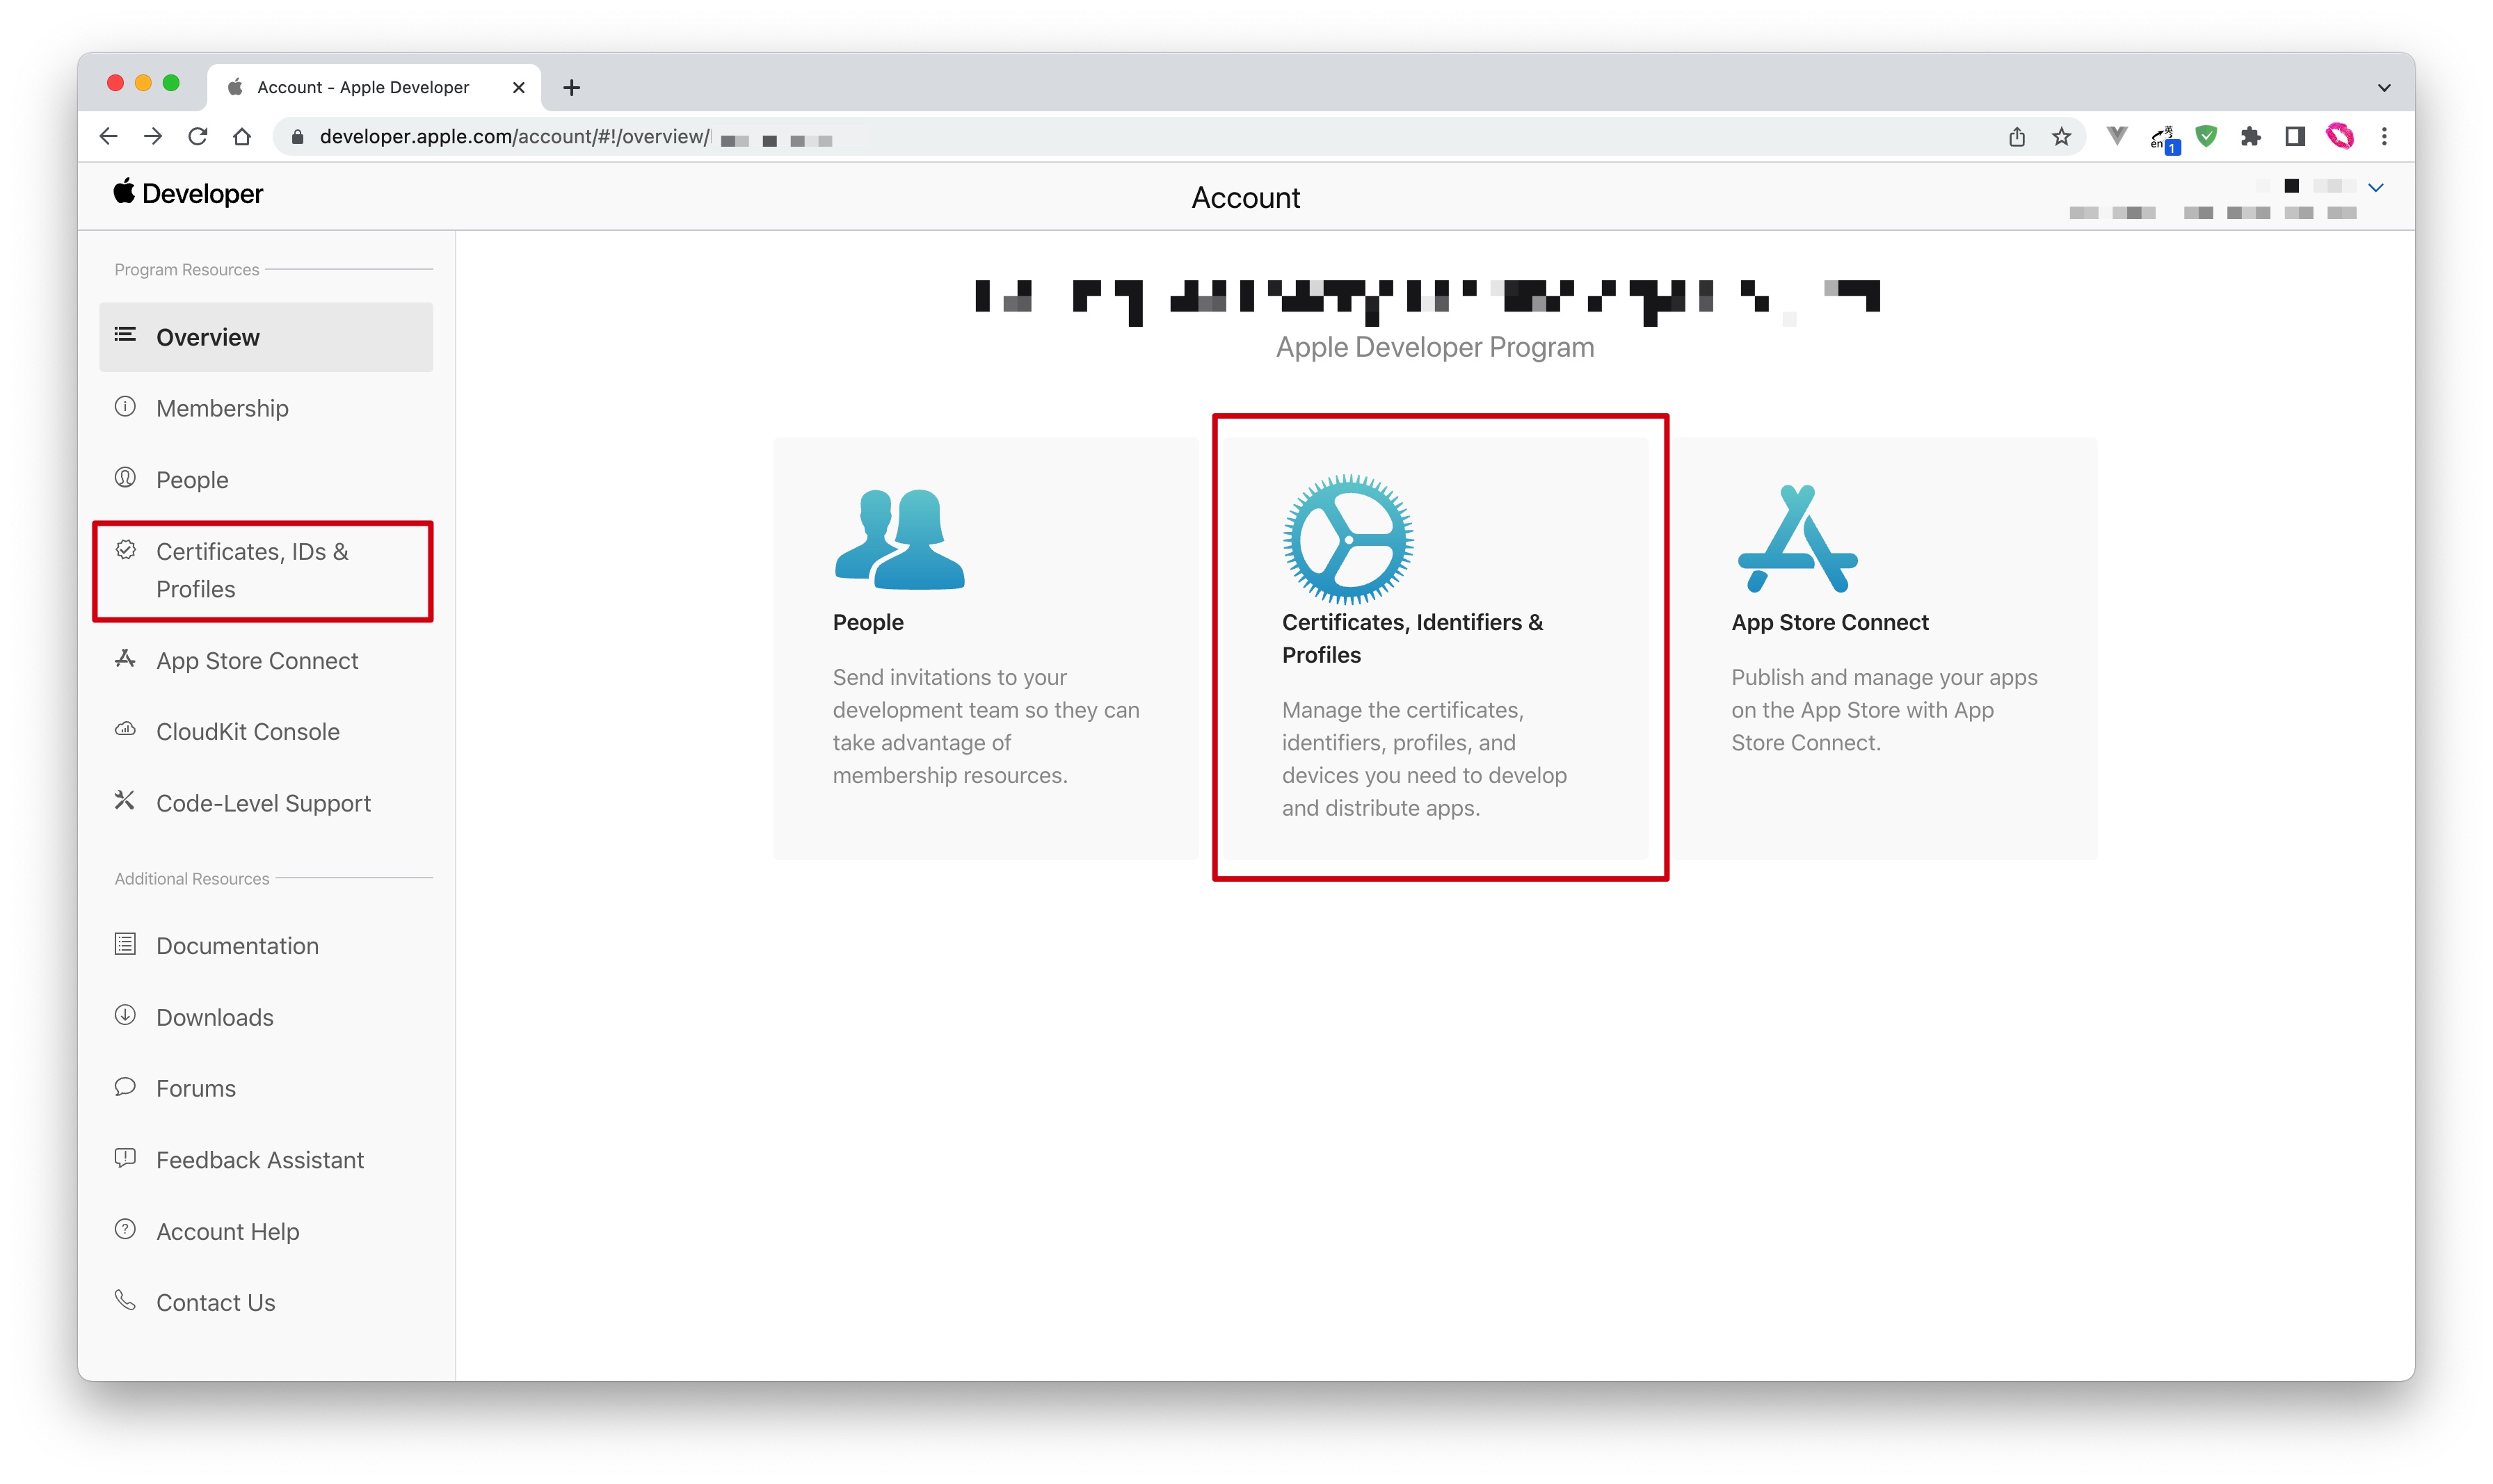
¶ Create an App ID
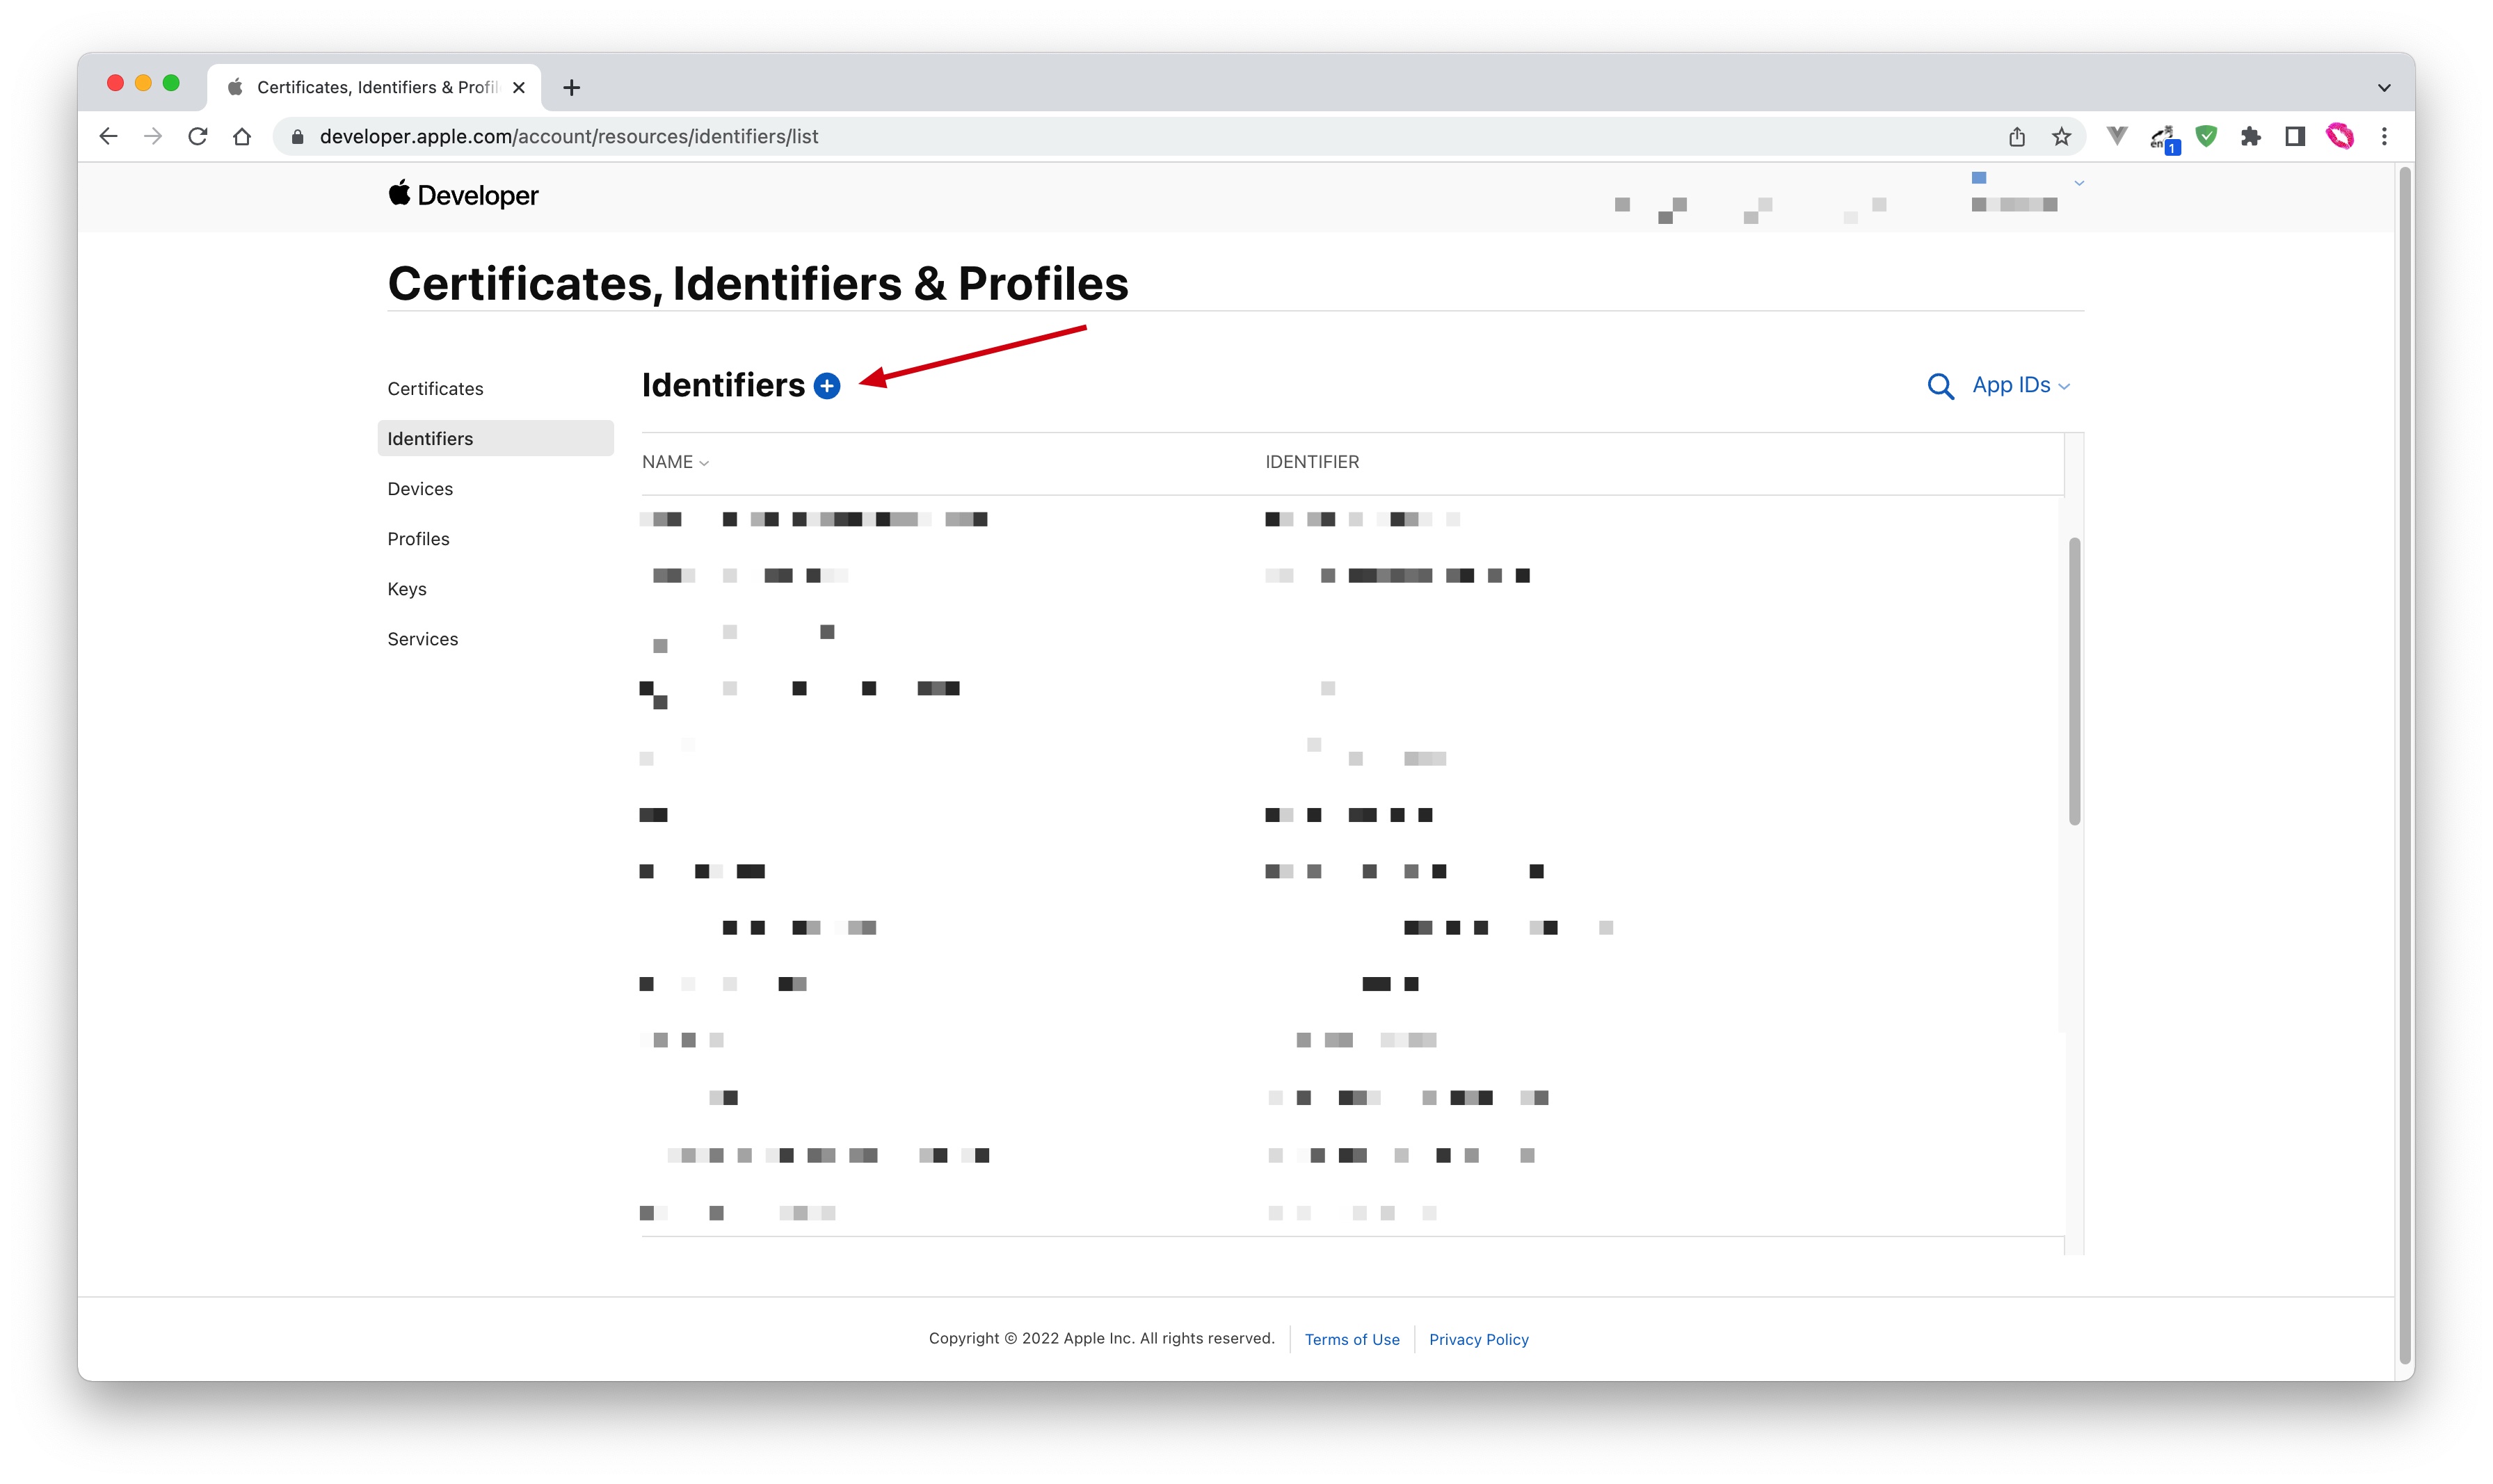
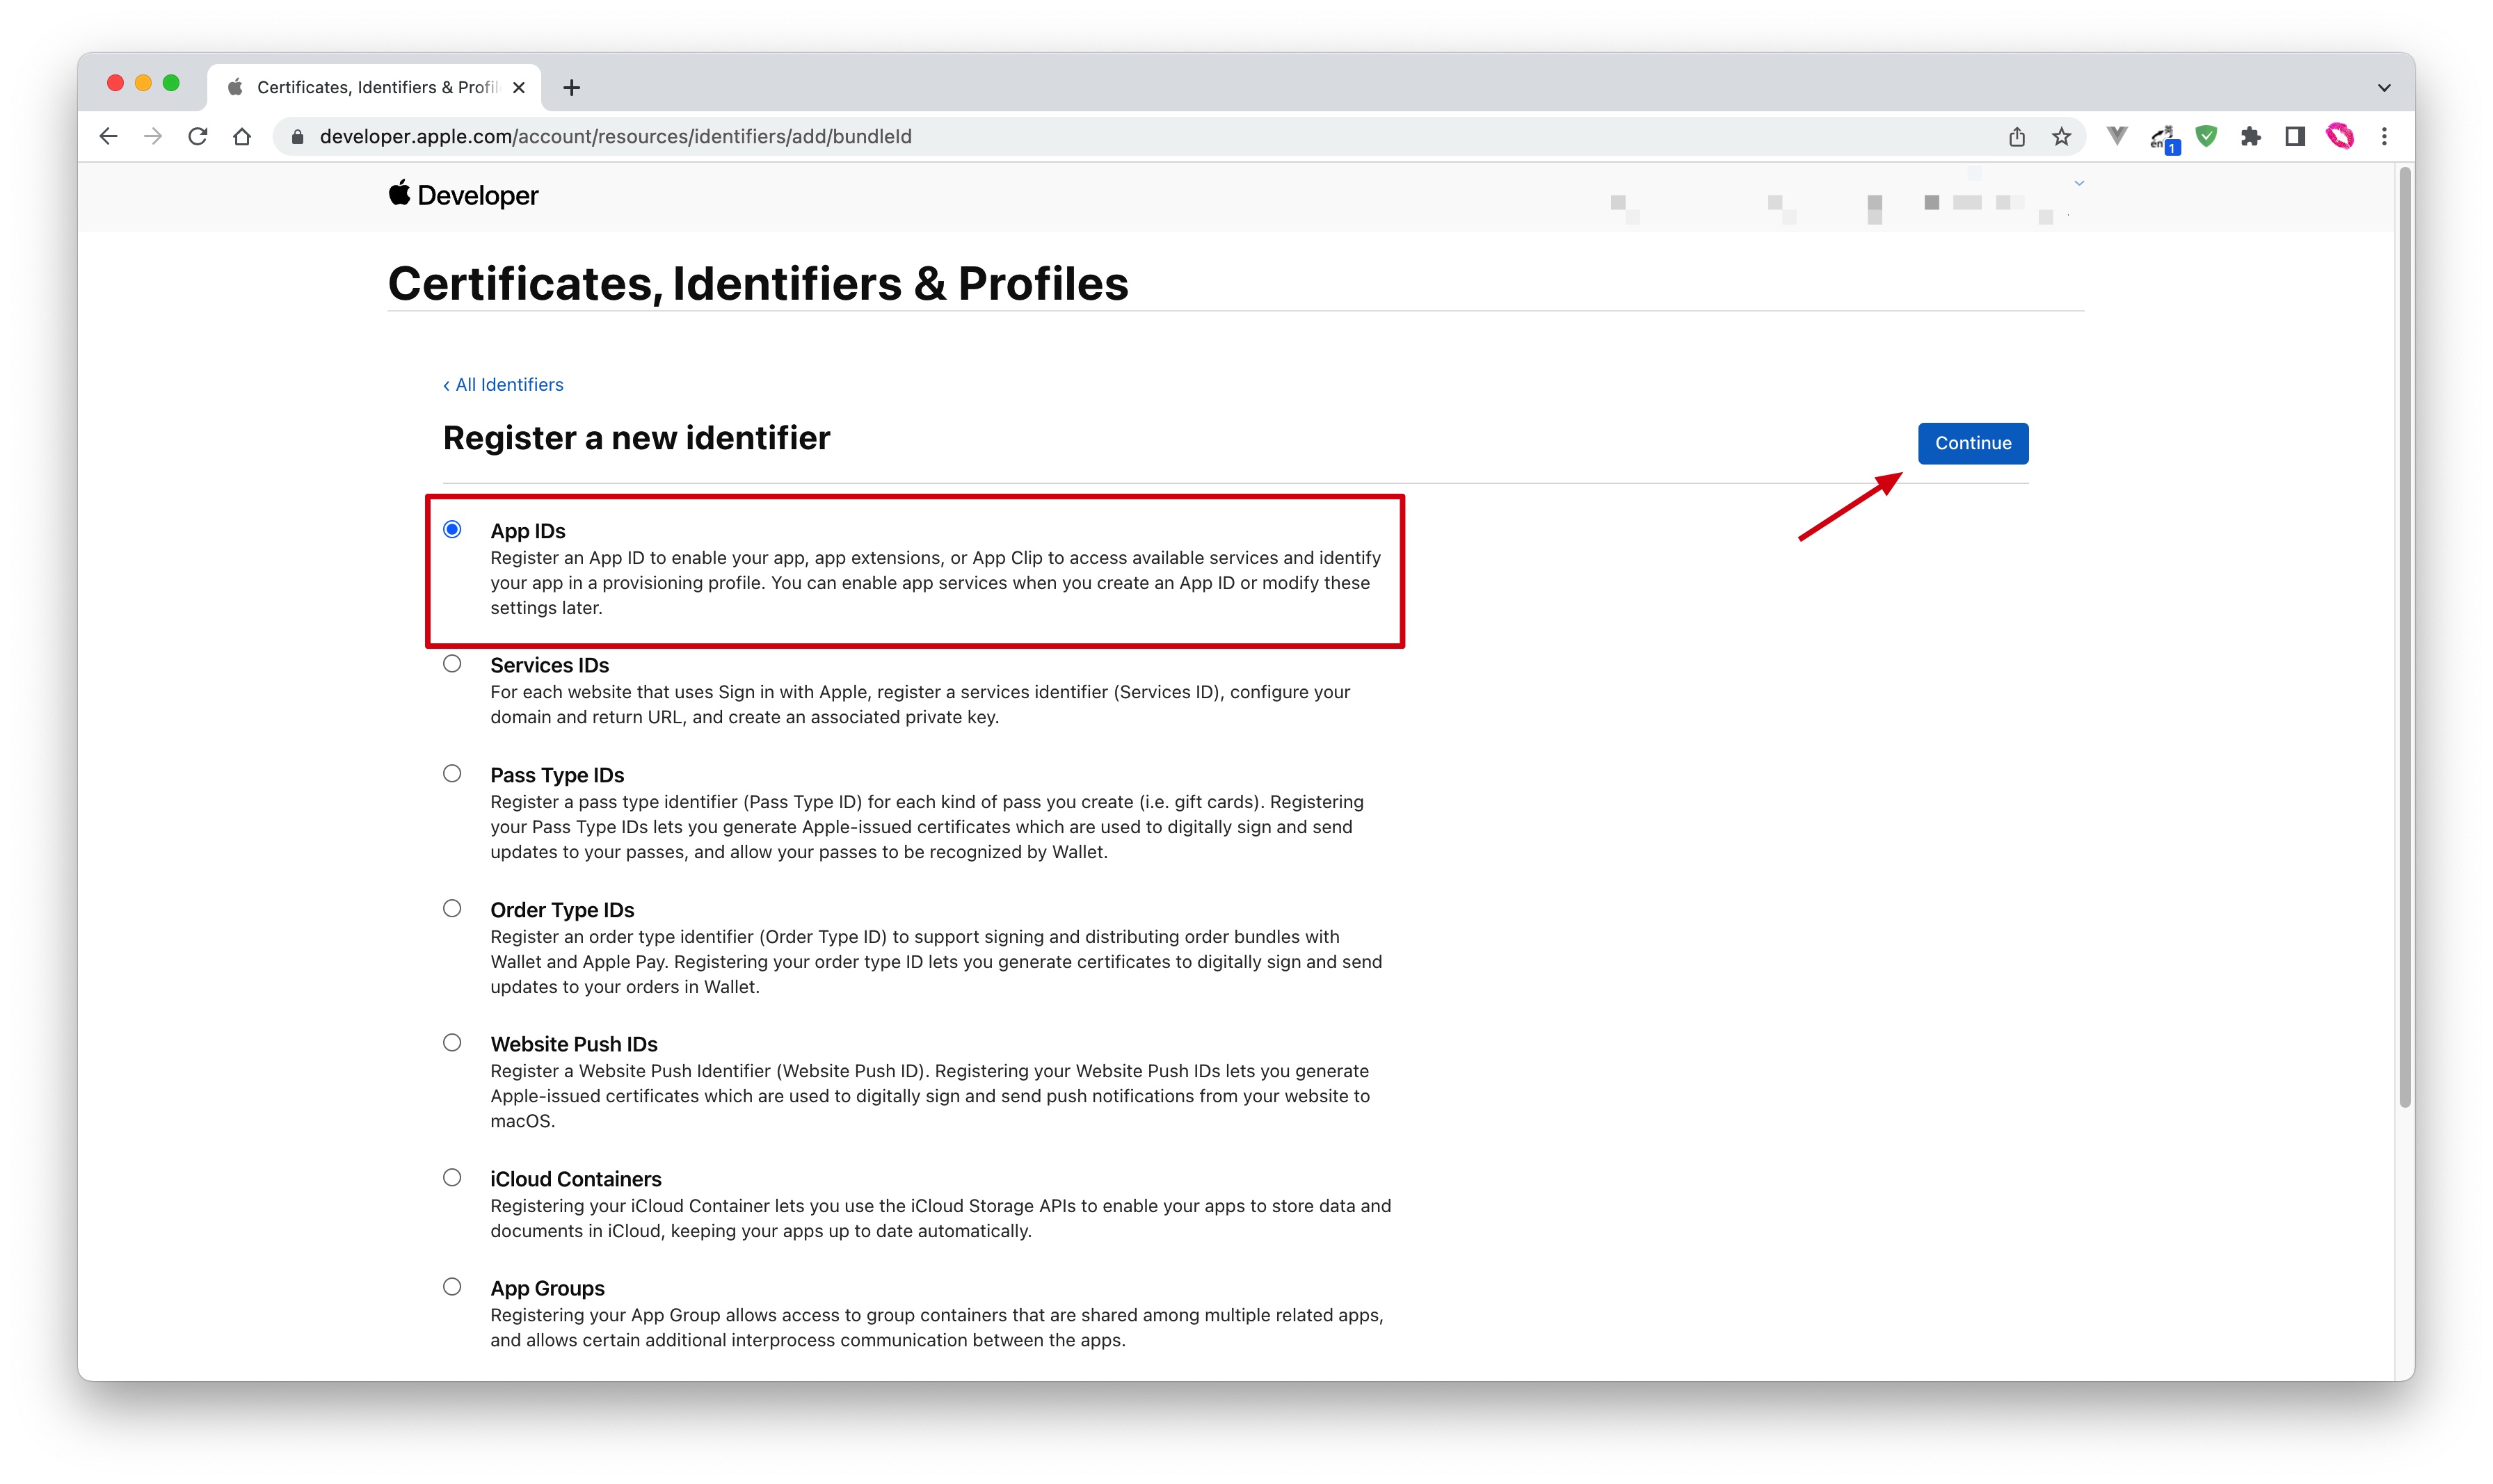
- On the Apple Developer Portal, Certificates, Identifiers & Profiles > Identifiers page, click the ➕ icon to create an app:
- Select App IDs and click the Continue button to continue:
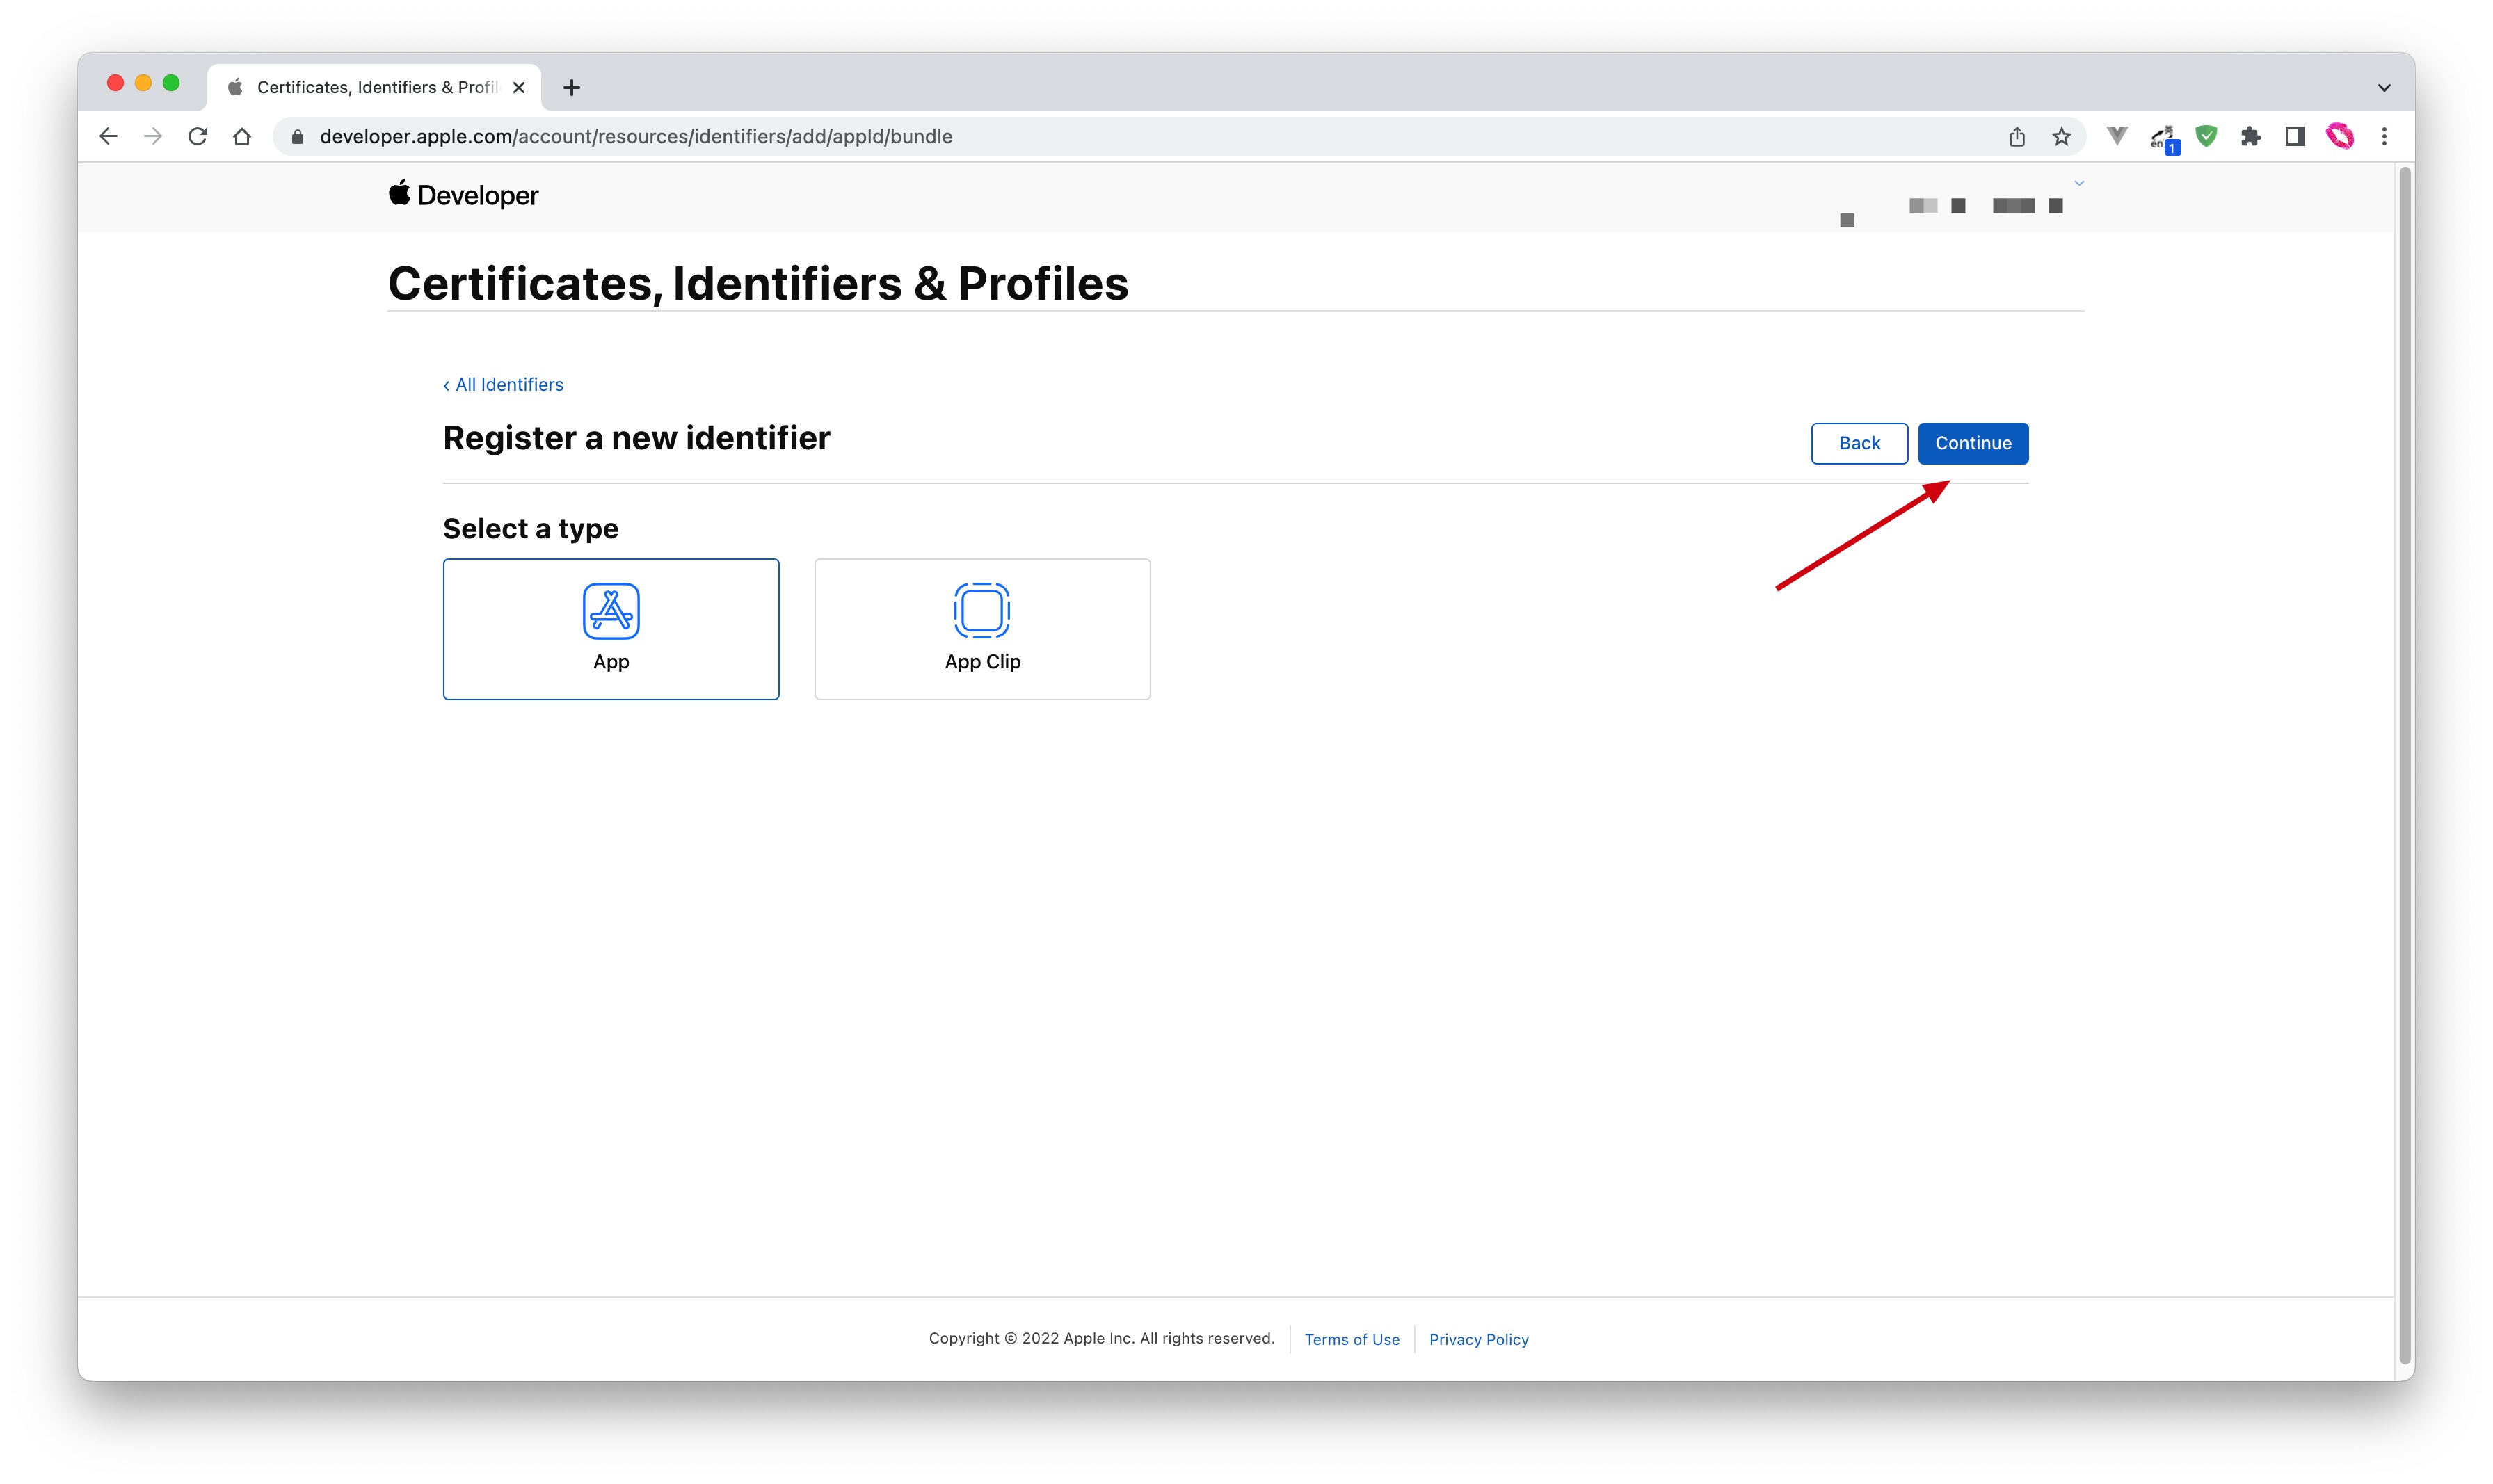
- Select the application type and click the Continue button to continue:
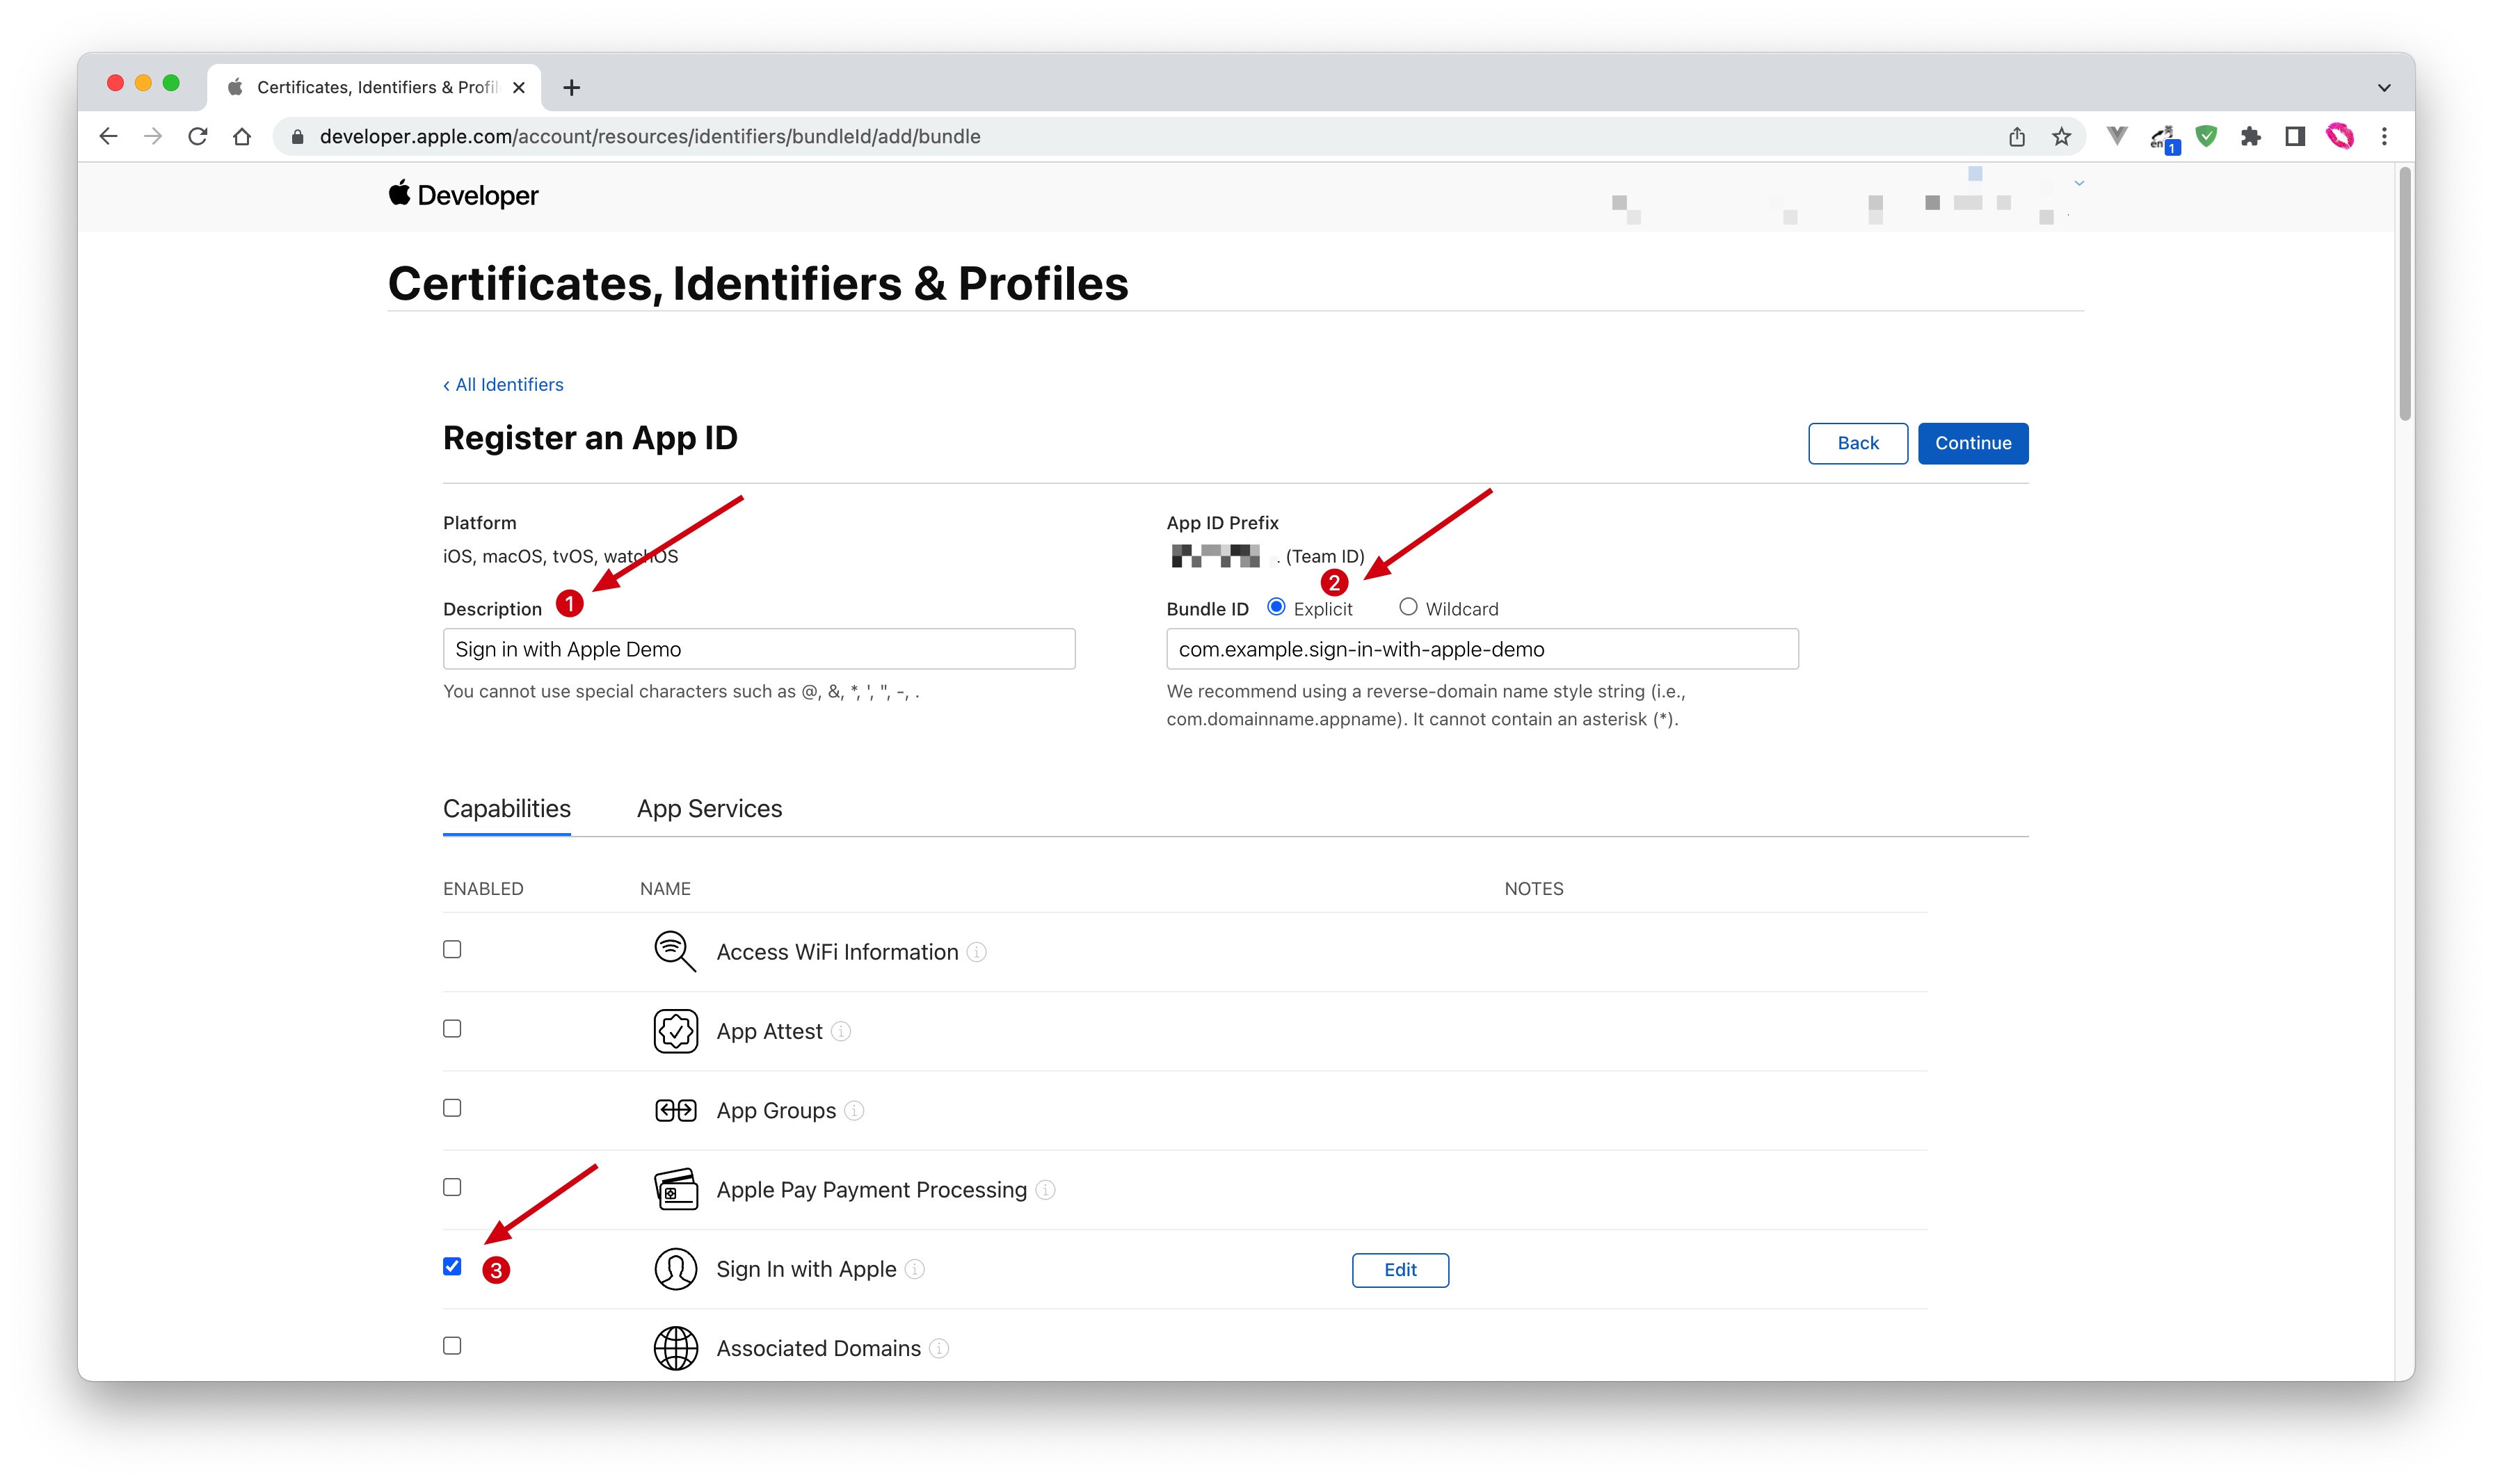
- To complete the application Description and Bundle ID, record the Bundle ID:
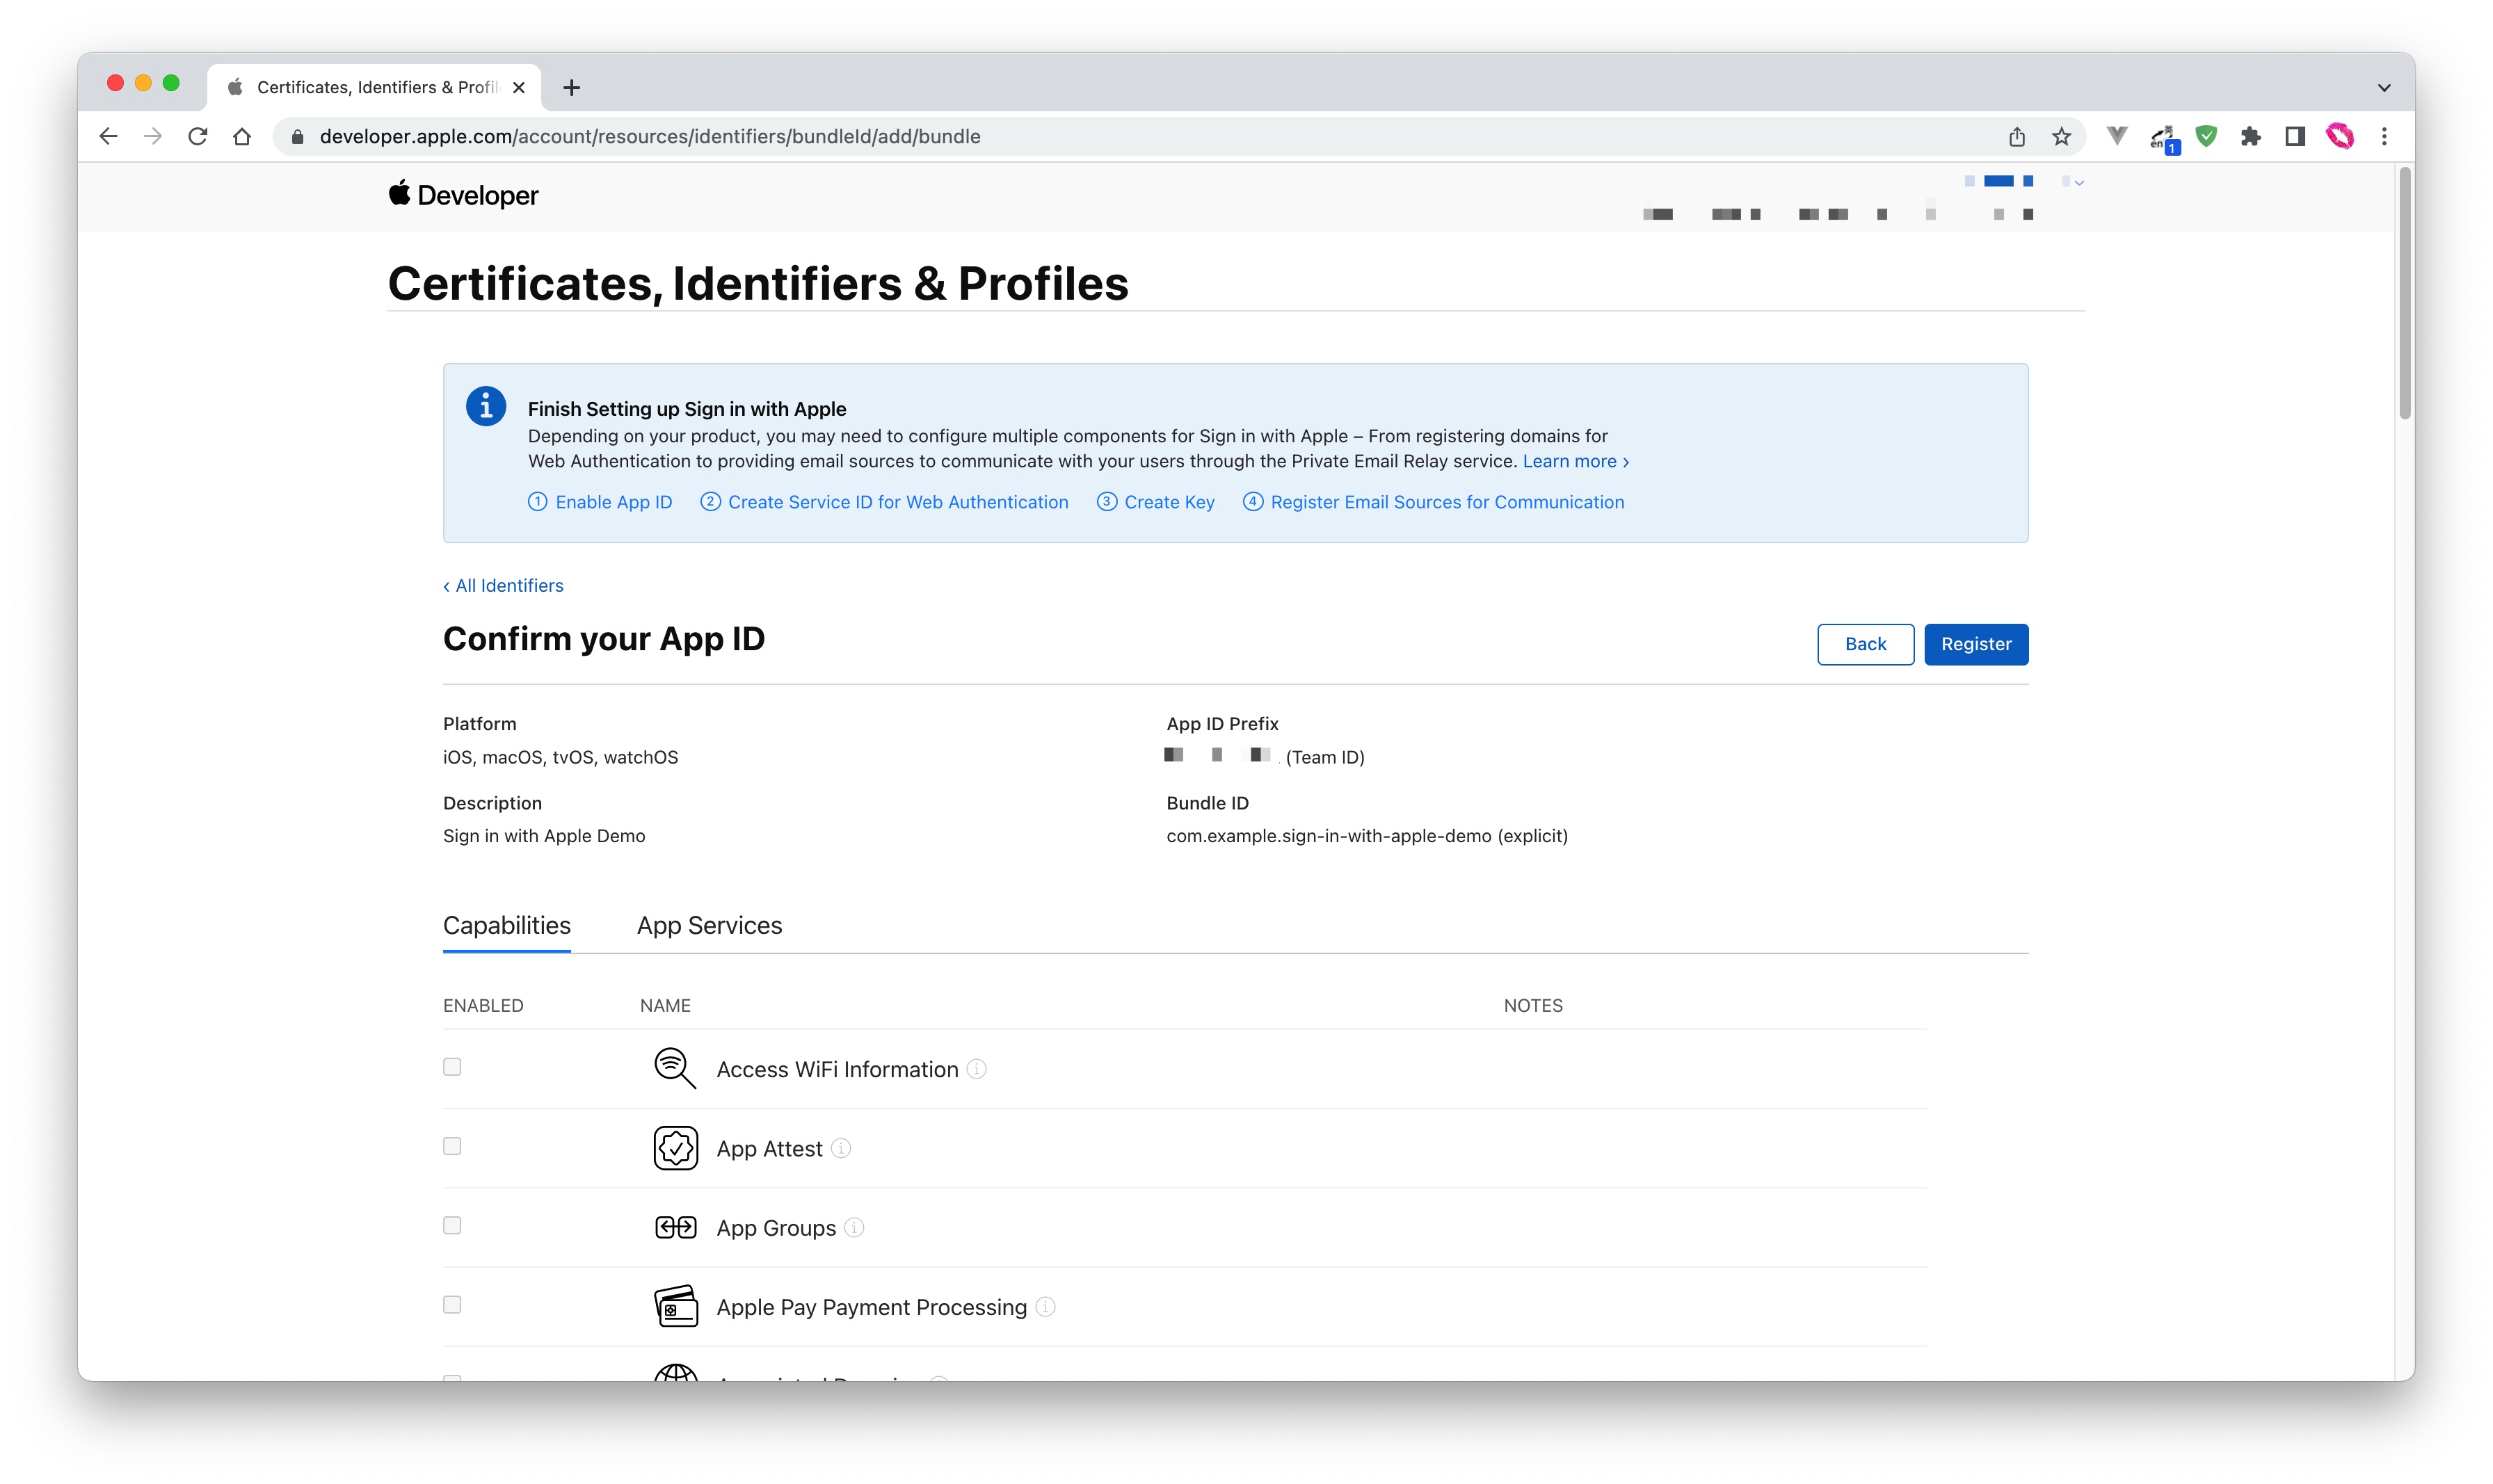
- Finally, click the Continue button, confirm the information in the opened page, and click the Register button to create the application.
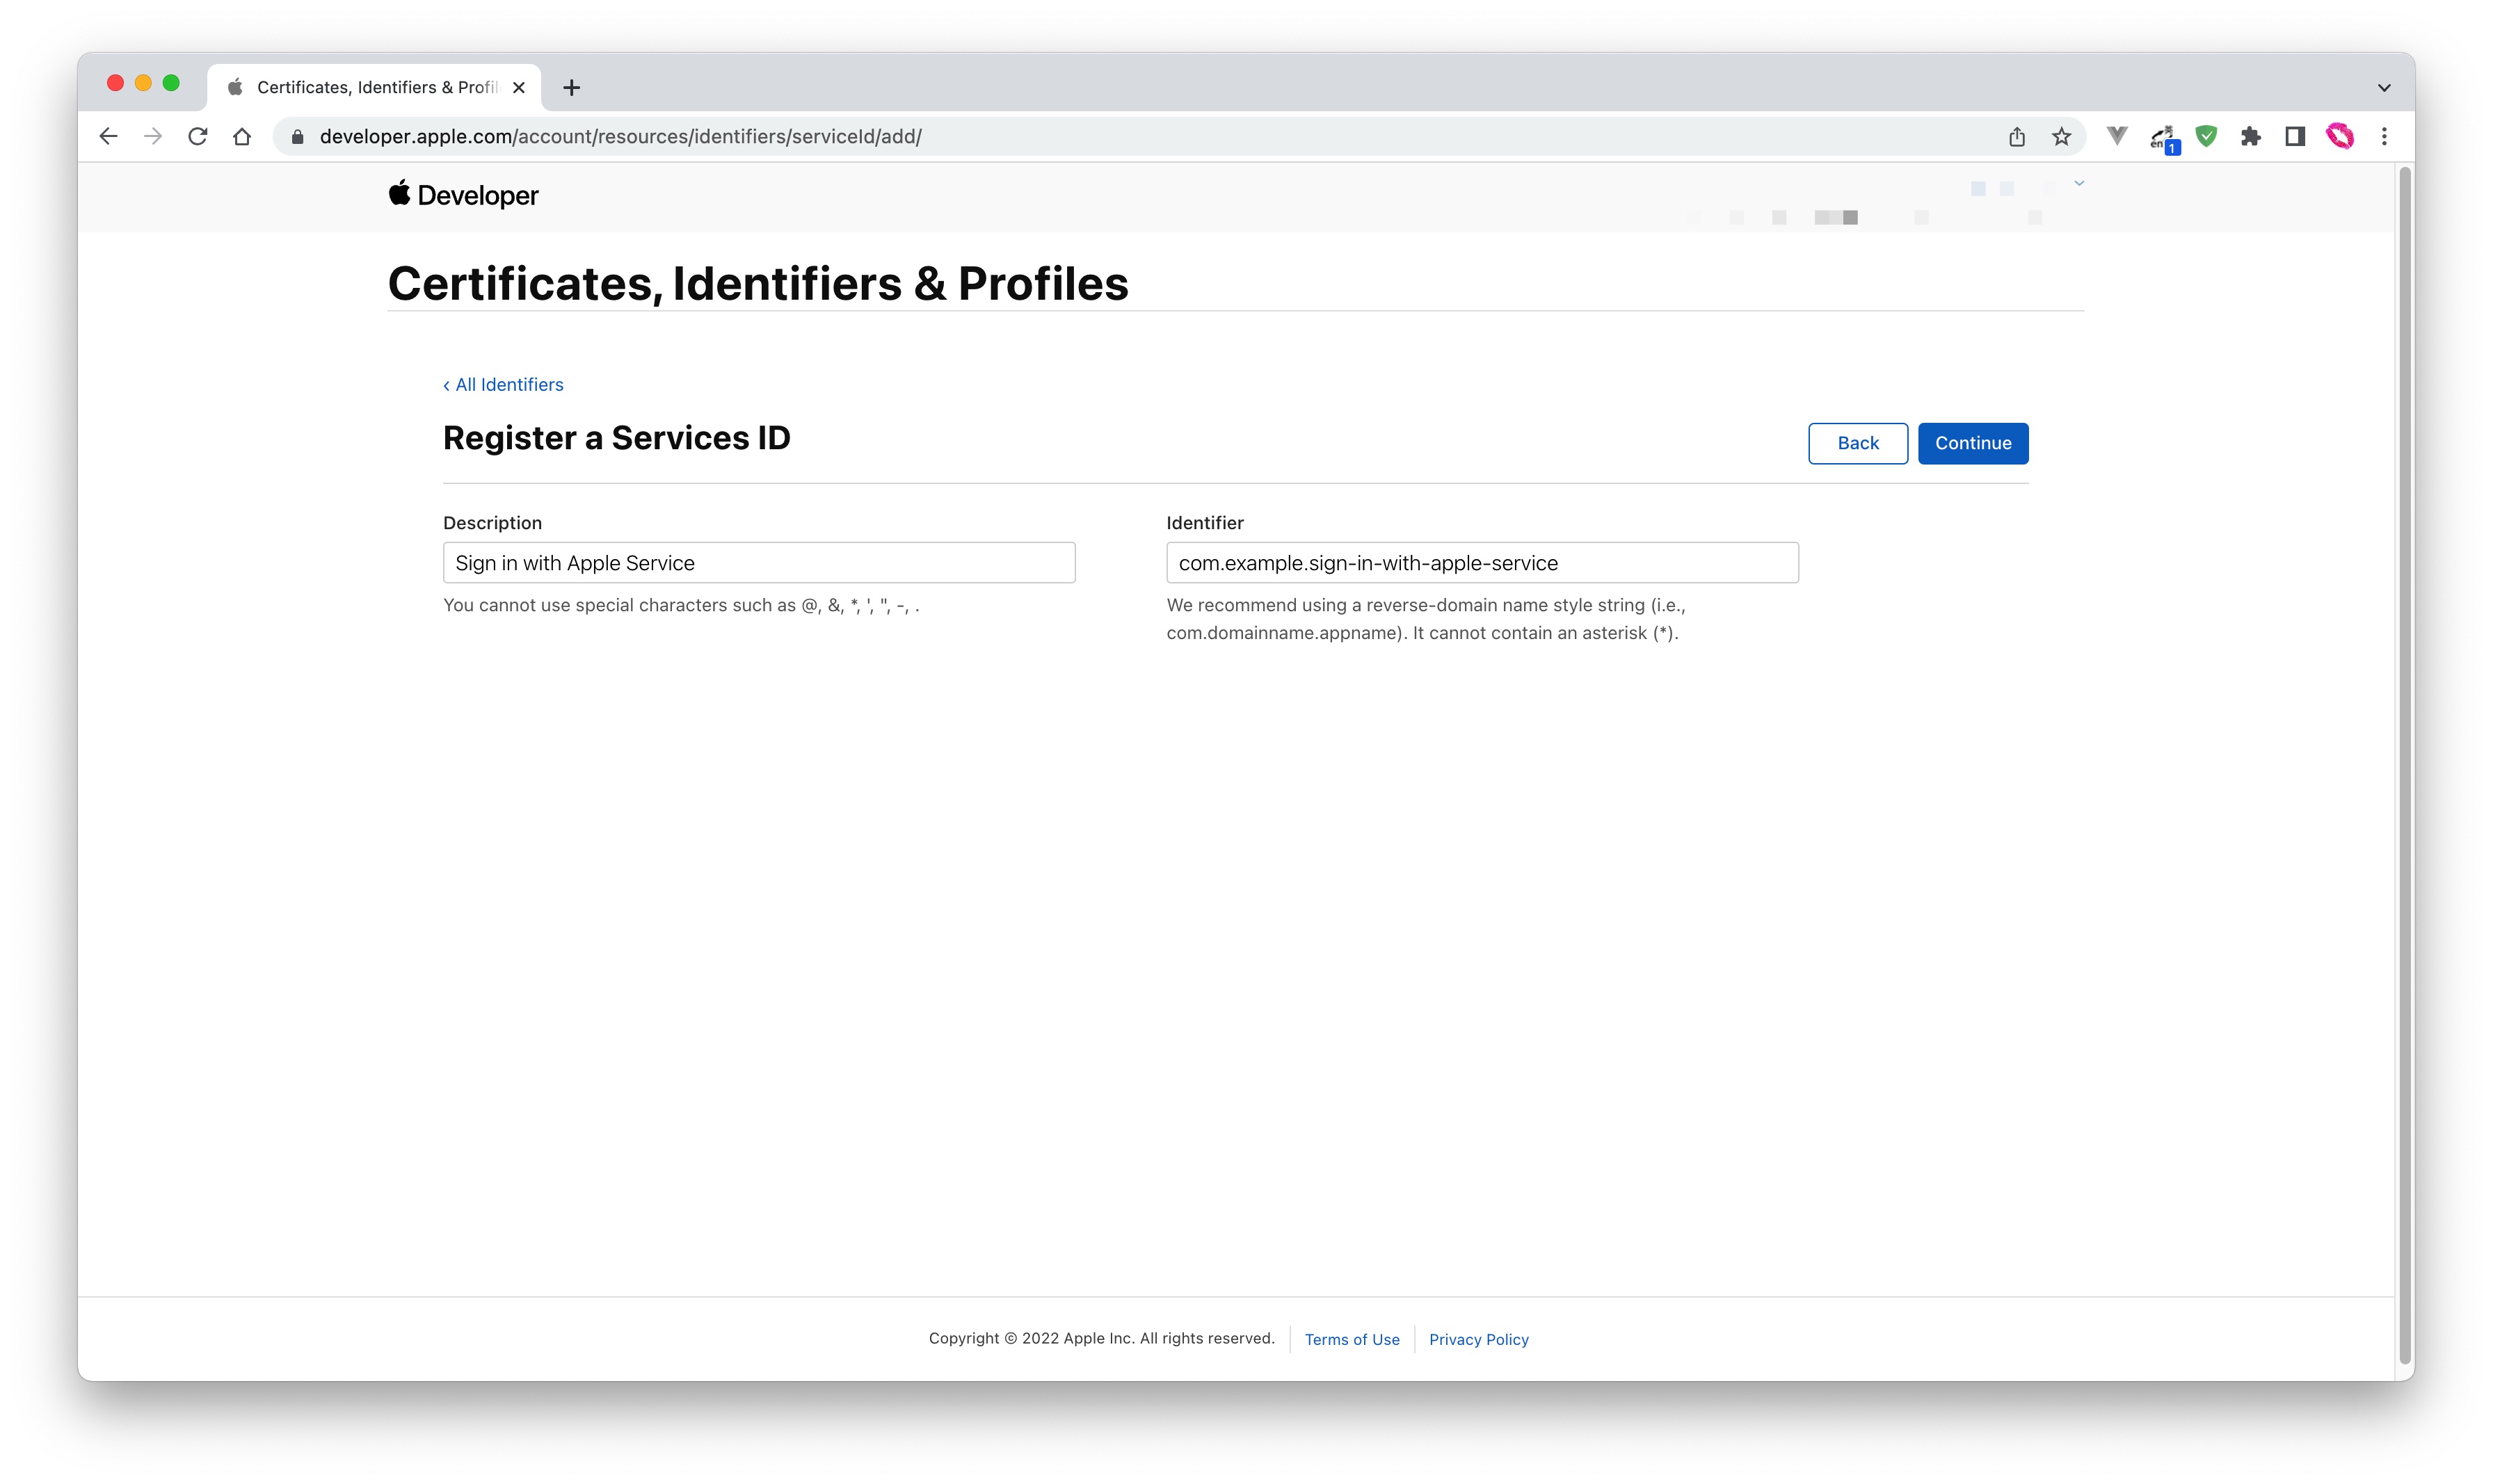
¶ Create a Service ID
- Go back to Certificates, Identifiers & Profiles > Identifiers, and click the ➕ icon, select Services IDs and click the Continue button to continue:

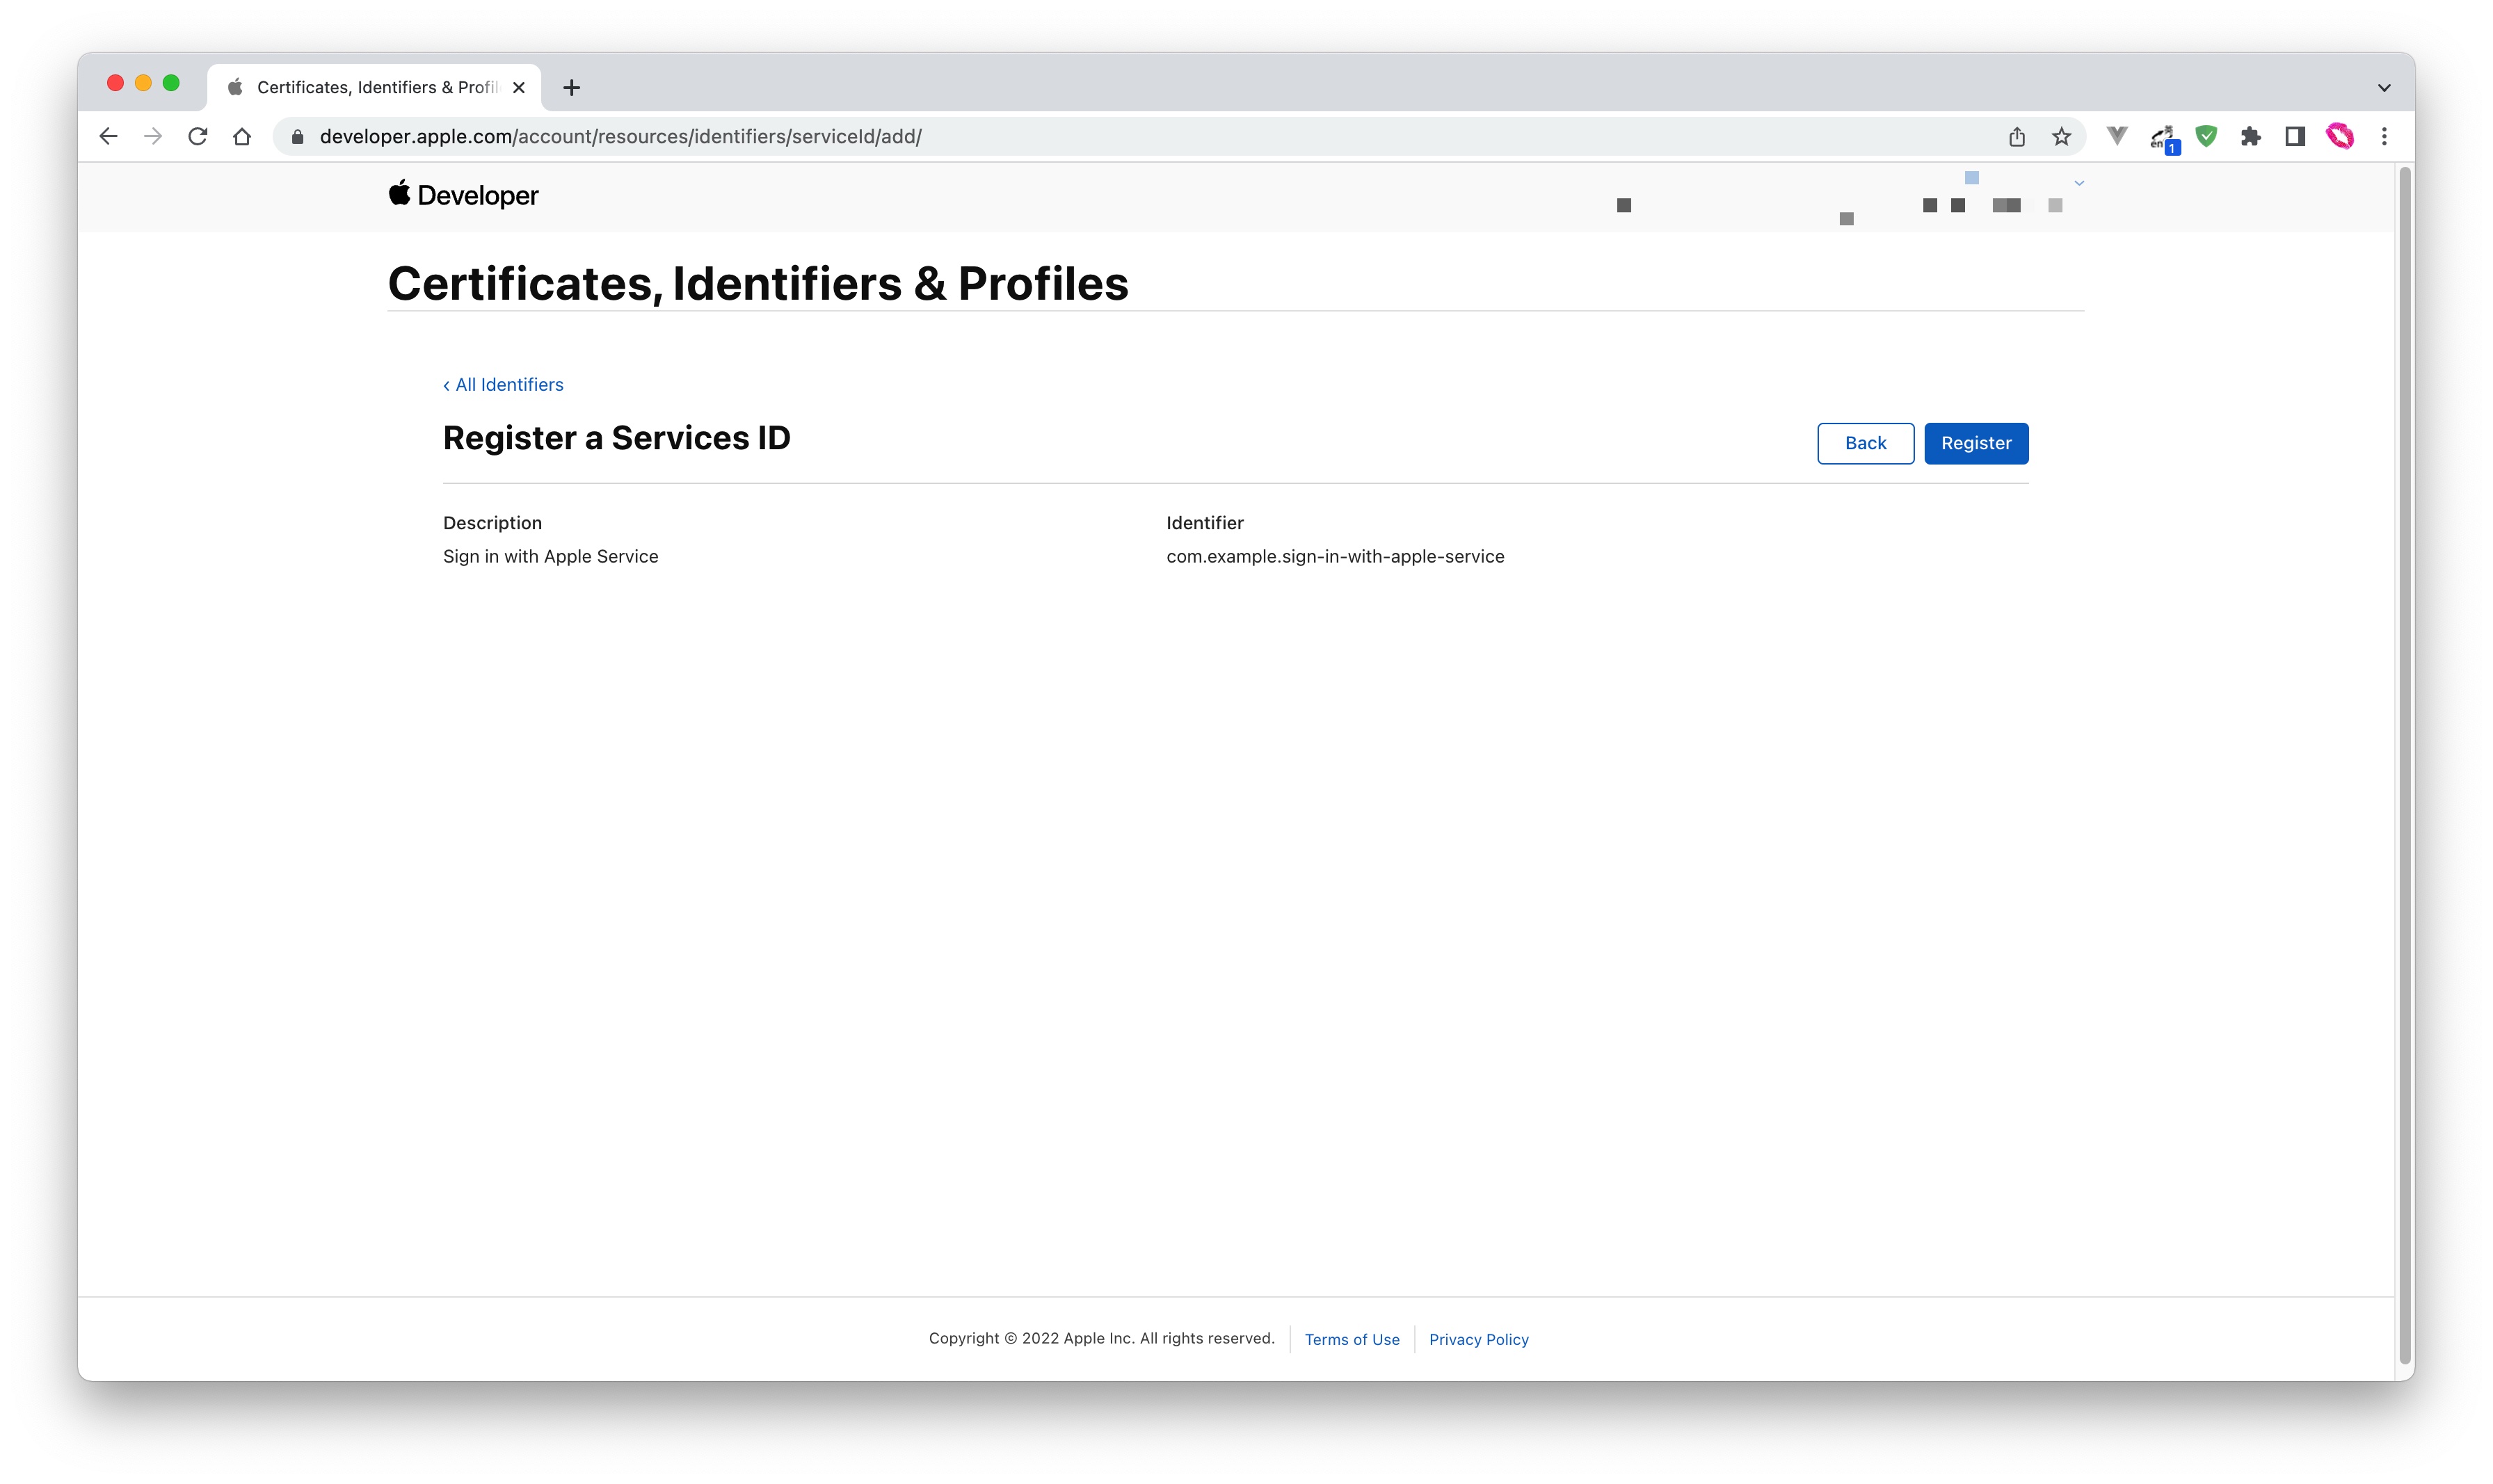
- Fill in the Description and Identifier, then click the Continue button, and click the Register button on the confirmation page that opens to create the Service:
- Locate the service you just created, check Sign In with Apple, click Configure:
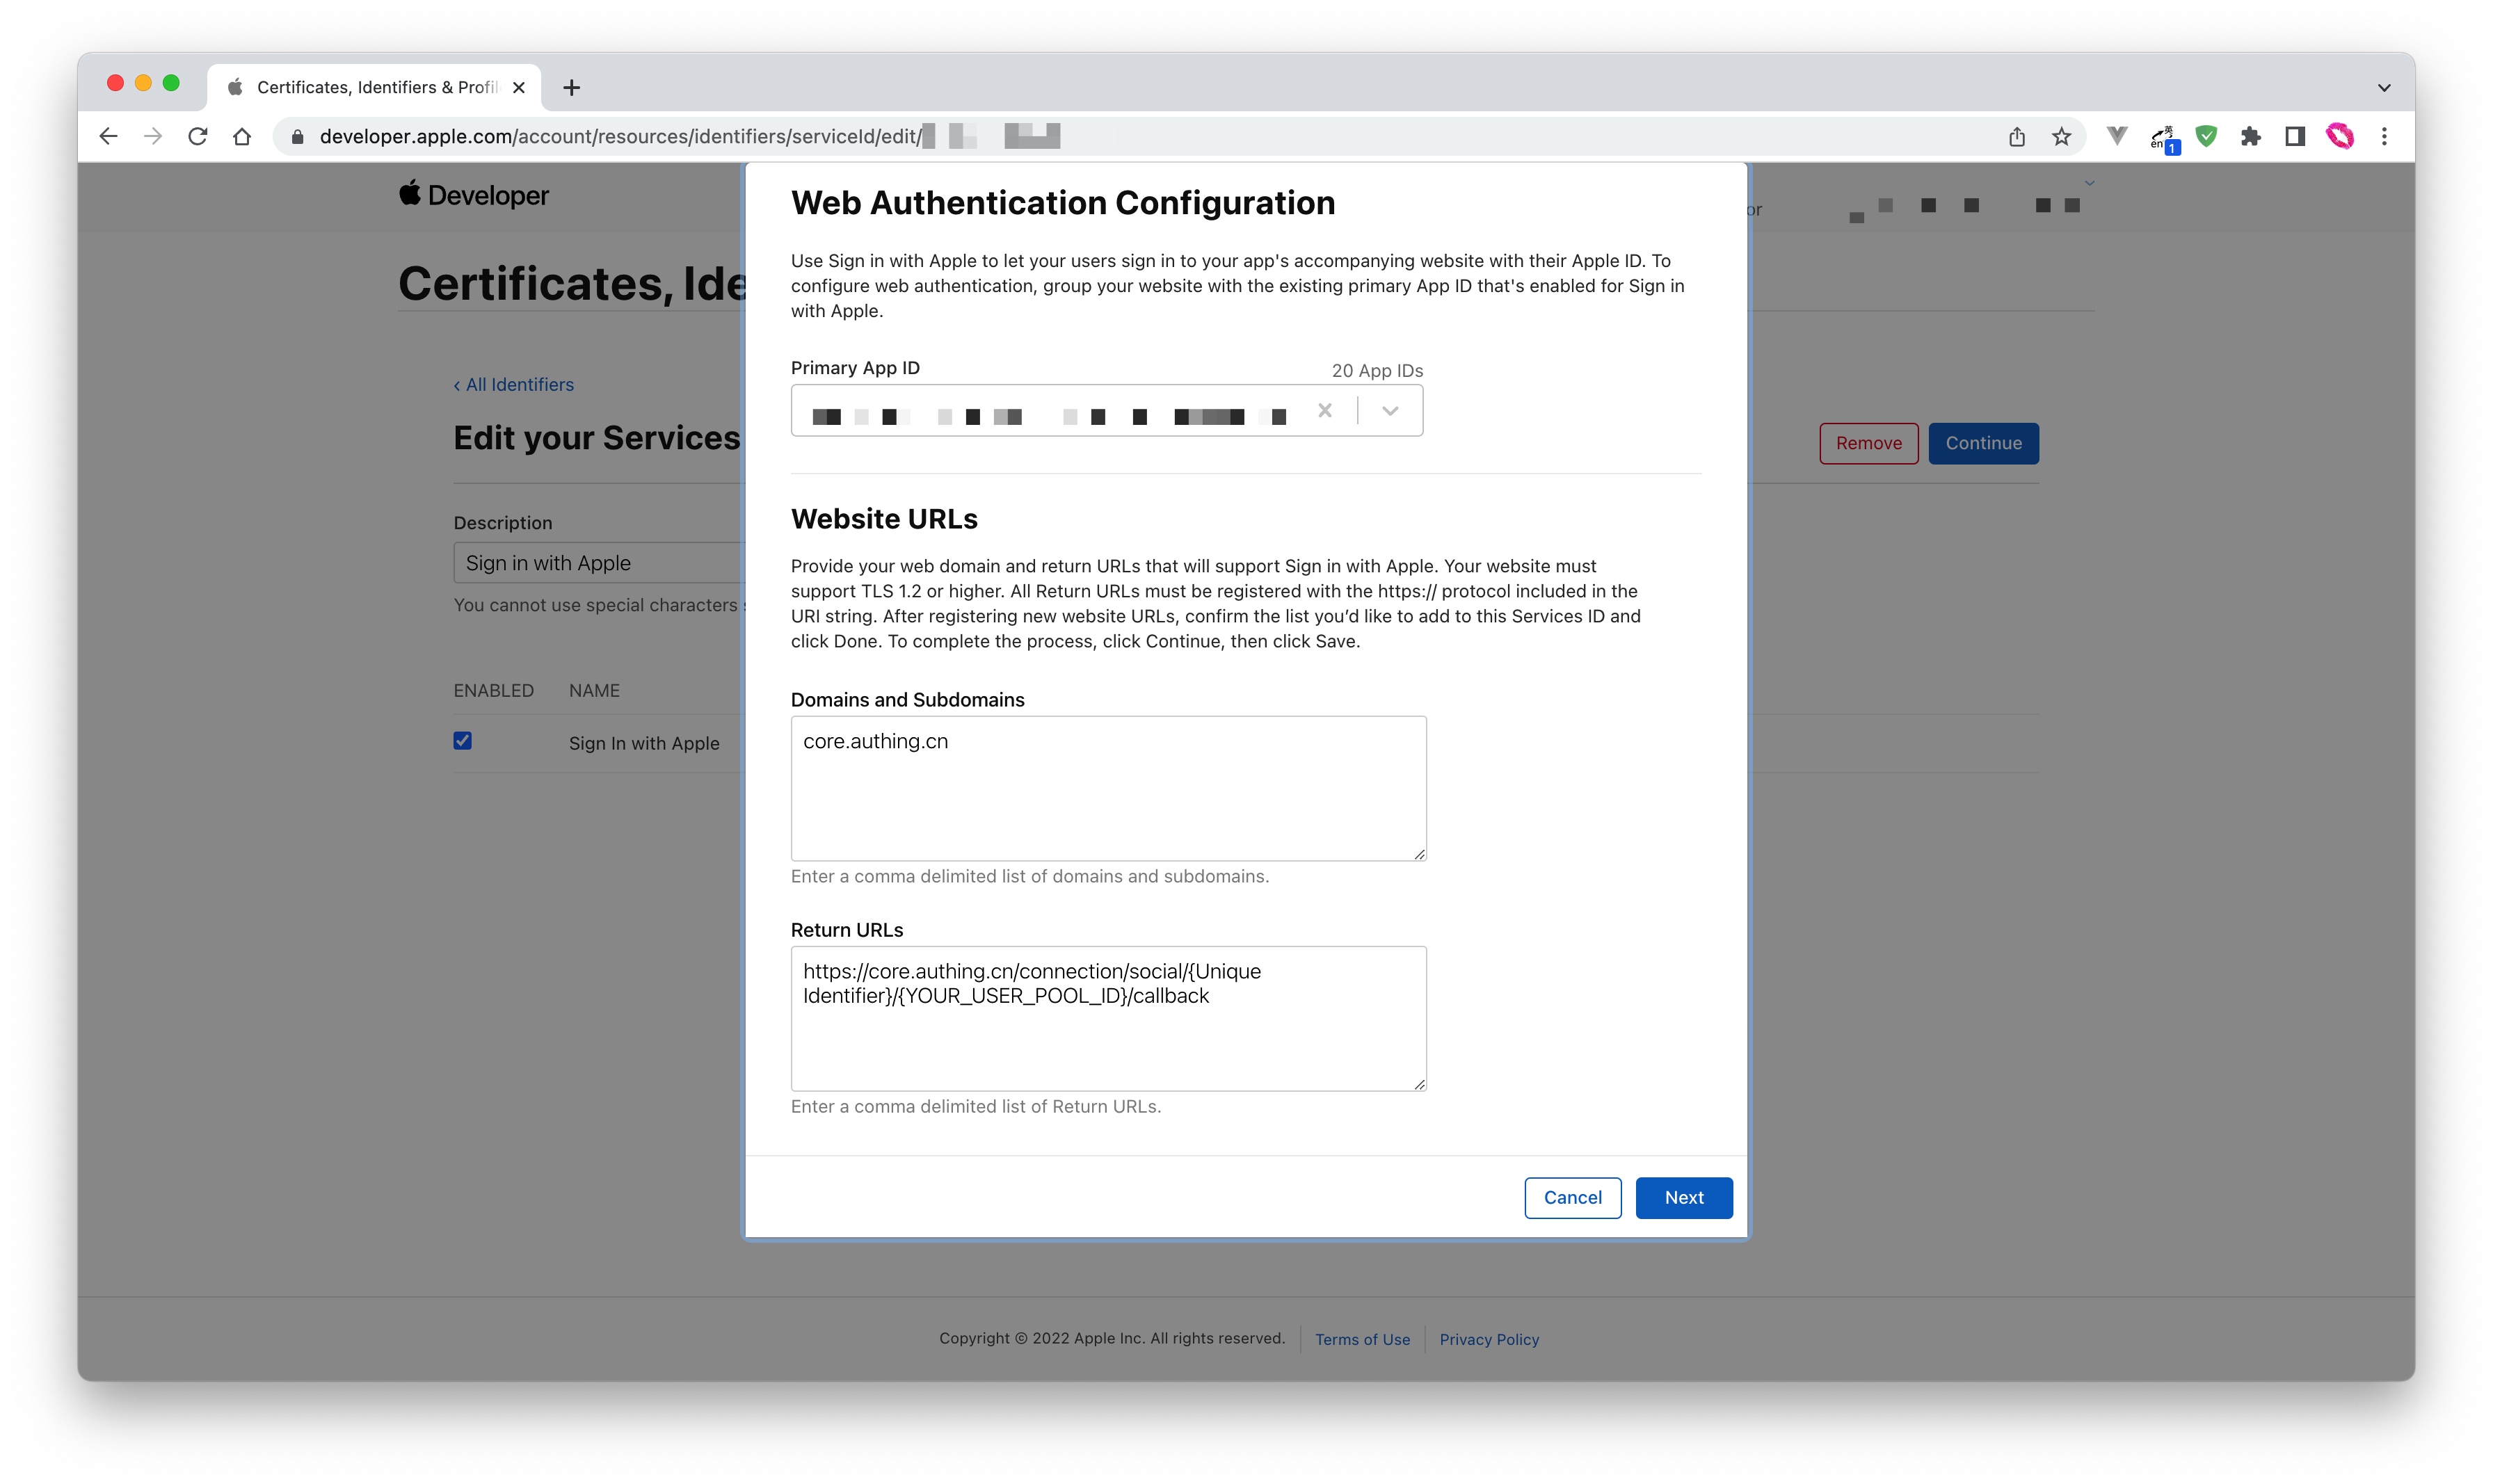
- Fill in Domains and Subdomains and Return URLs:
- Domains and Subdomains: Please fill in
core.authing.cn - Return URLs: Please fill in
https://core.authing.cn/connection/social/{Unique Identifier}/{YOUR_USER_POOL_ID}/callback, and replace{Unique Identifier}with theUnique Identifierof the identity provider you are creating by Authing,{ YOUR_USER_POOL_ID}with your UserPool ID
- Click Save, Continue, and finally Register, and record the Service ID.
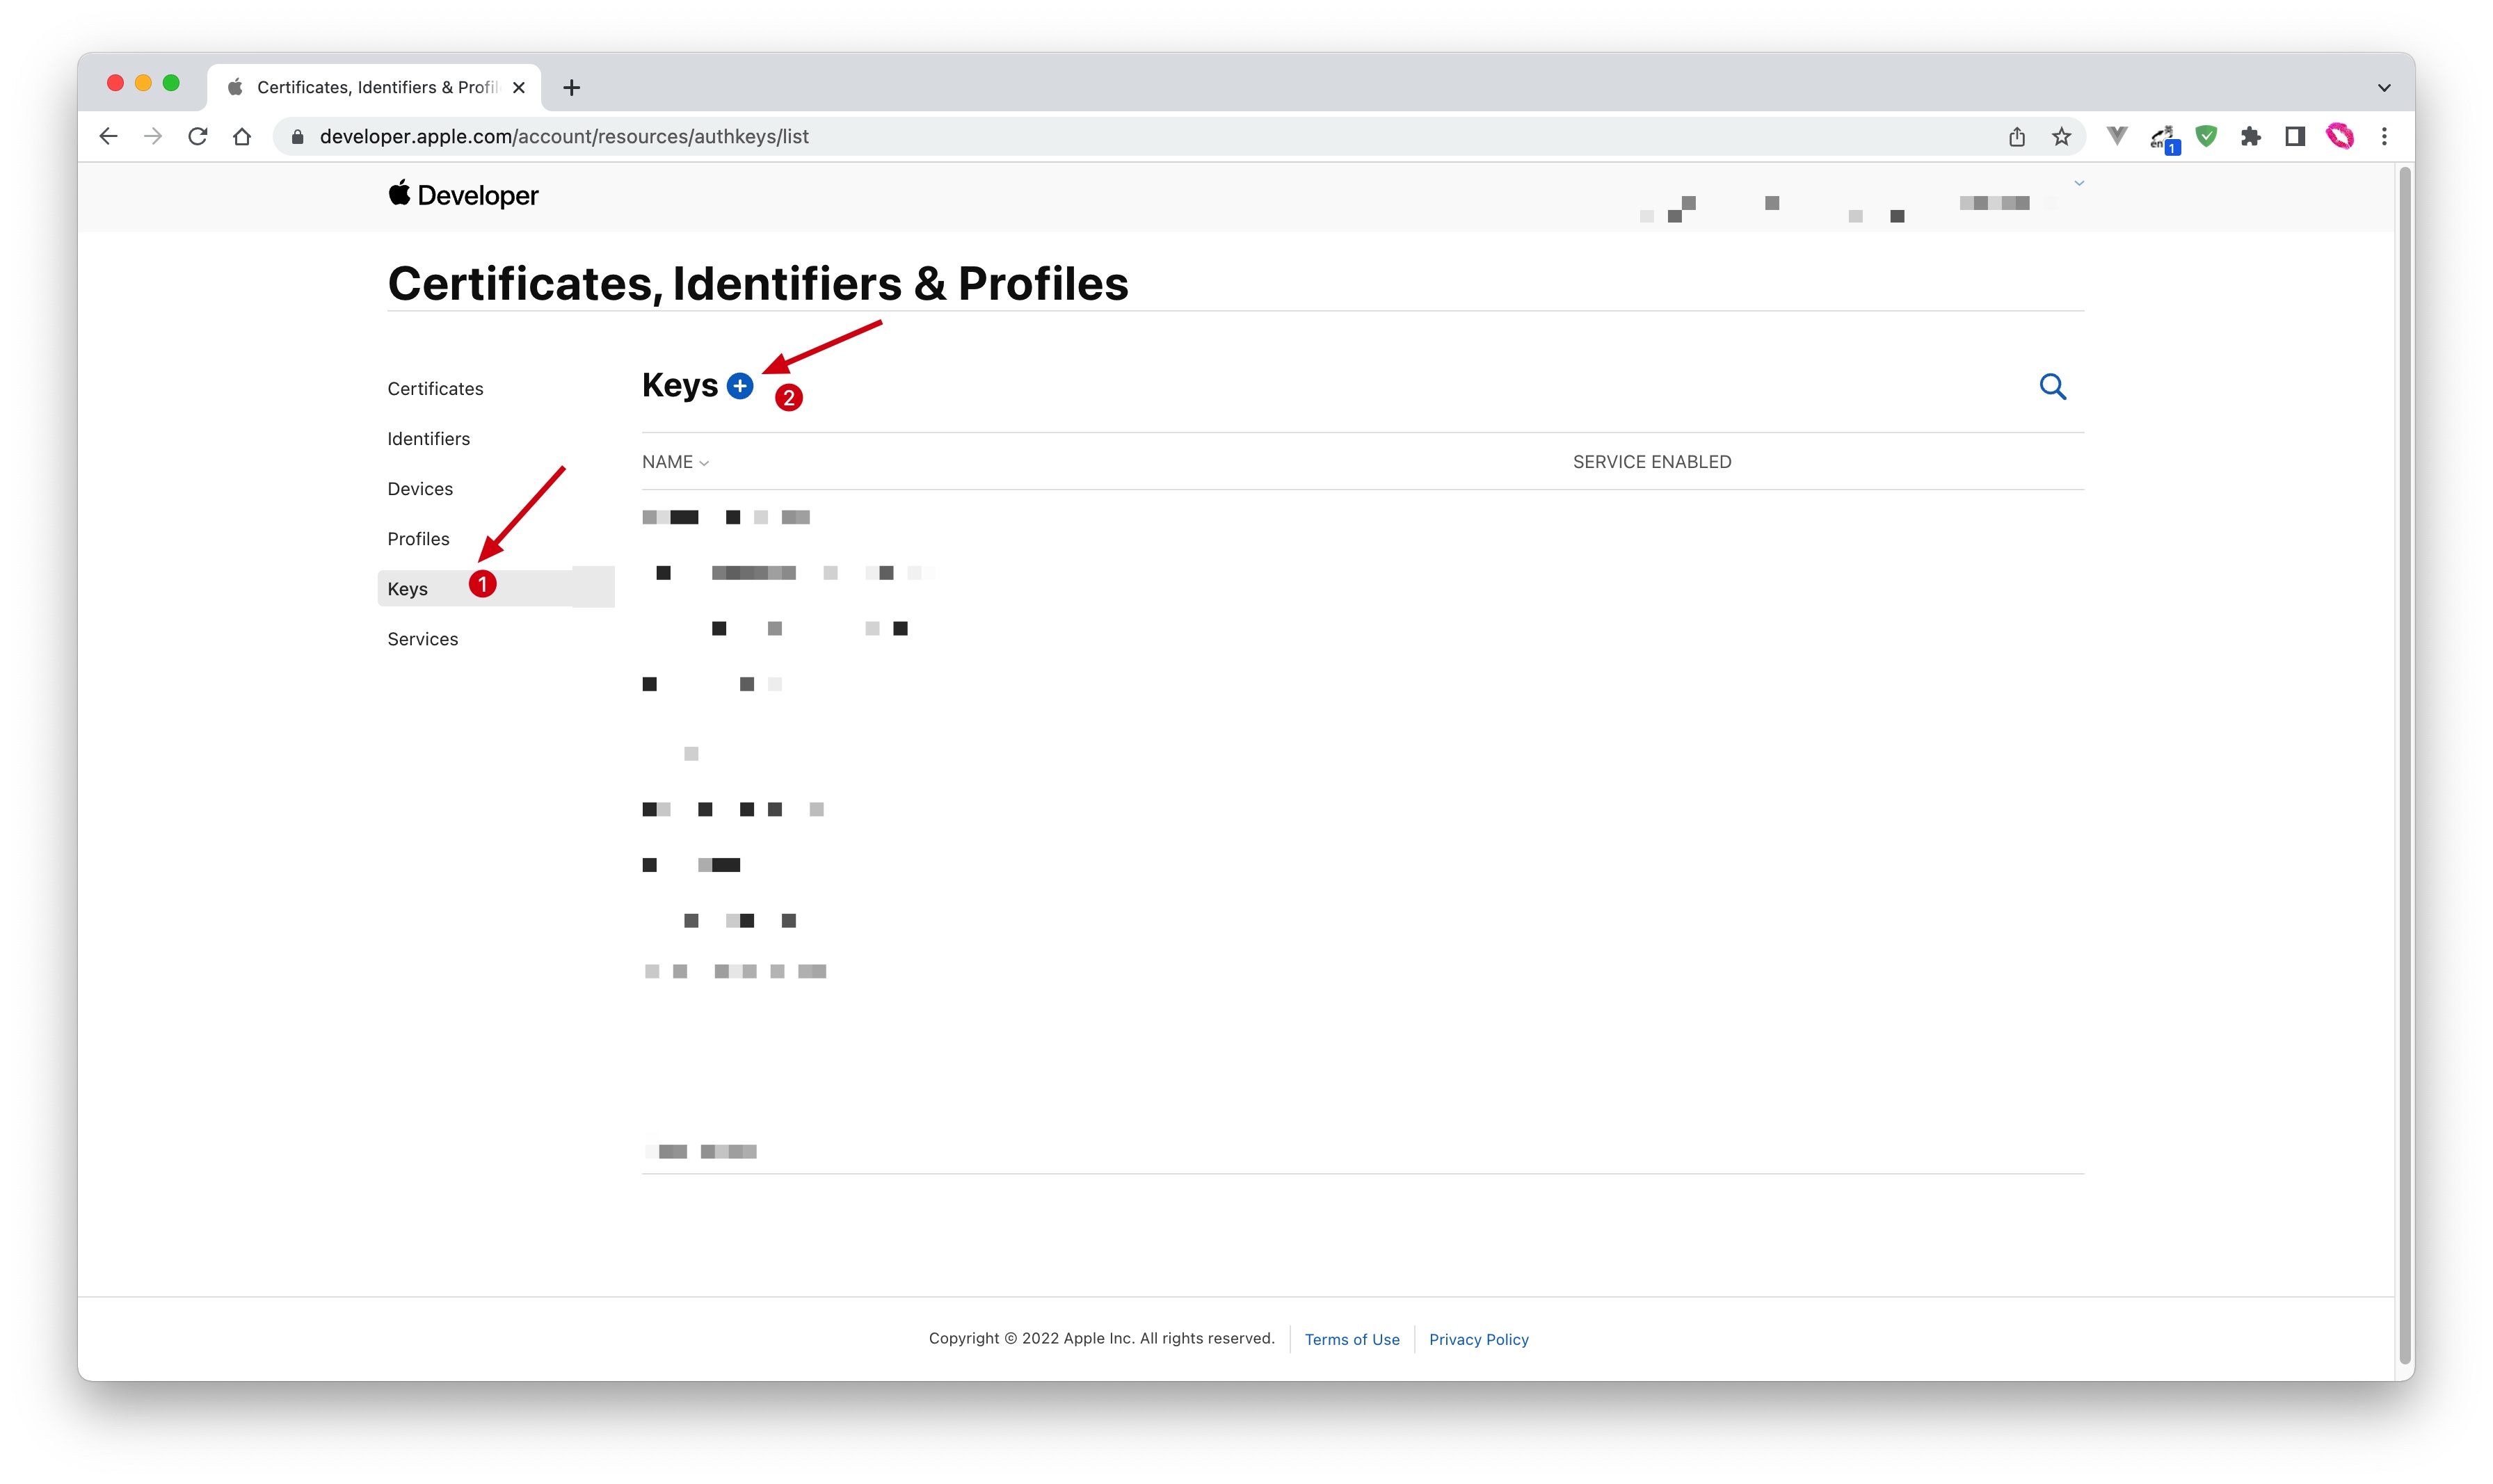
¶ Configure Signing Key
- Go back to the Certificates, Identifiers & Profiles page, switch to the Keys Tab, and click the ➕ icon:
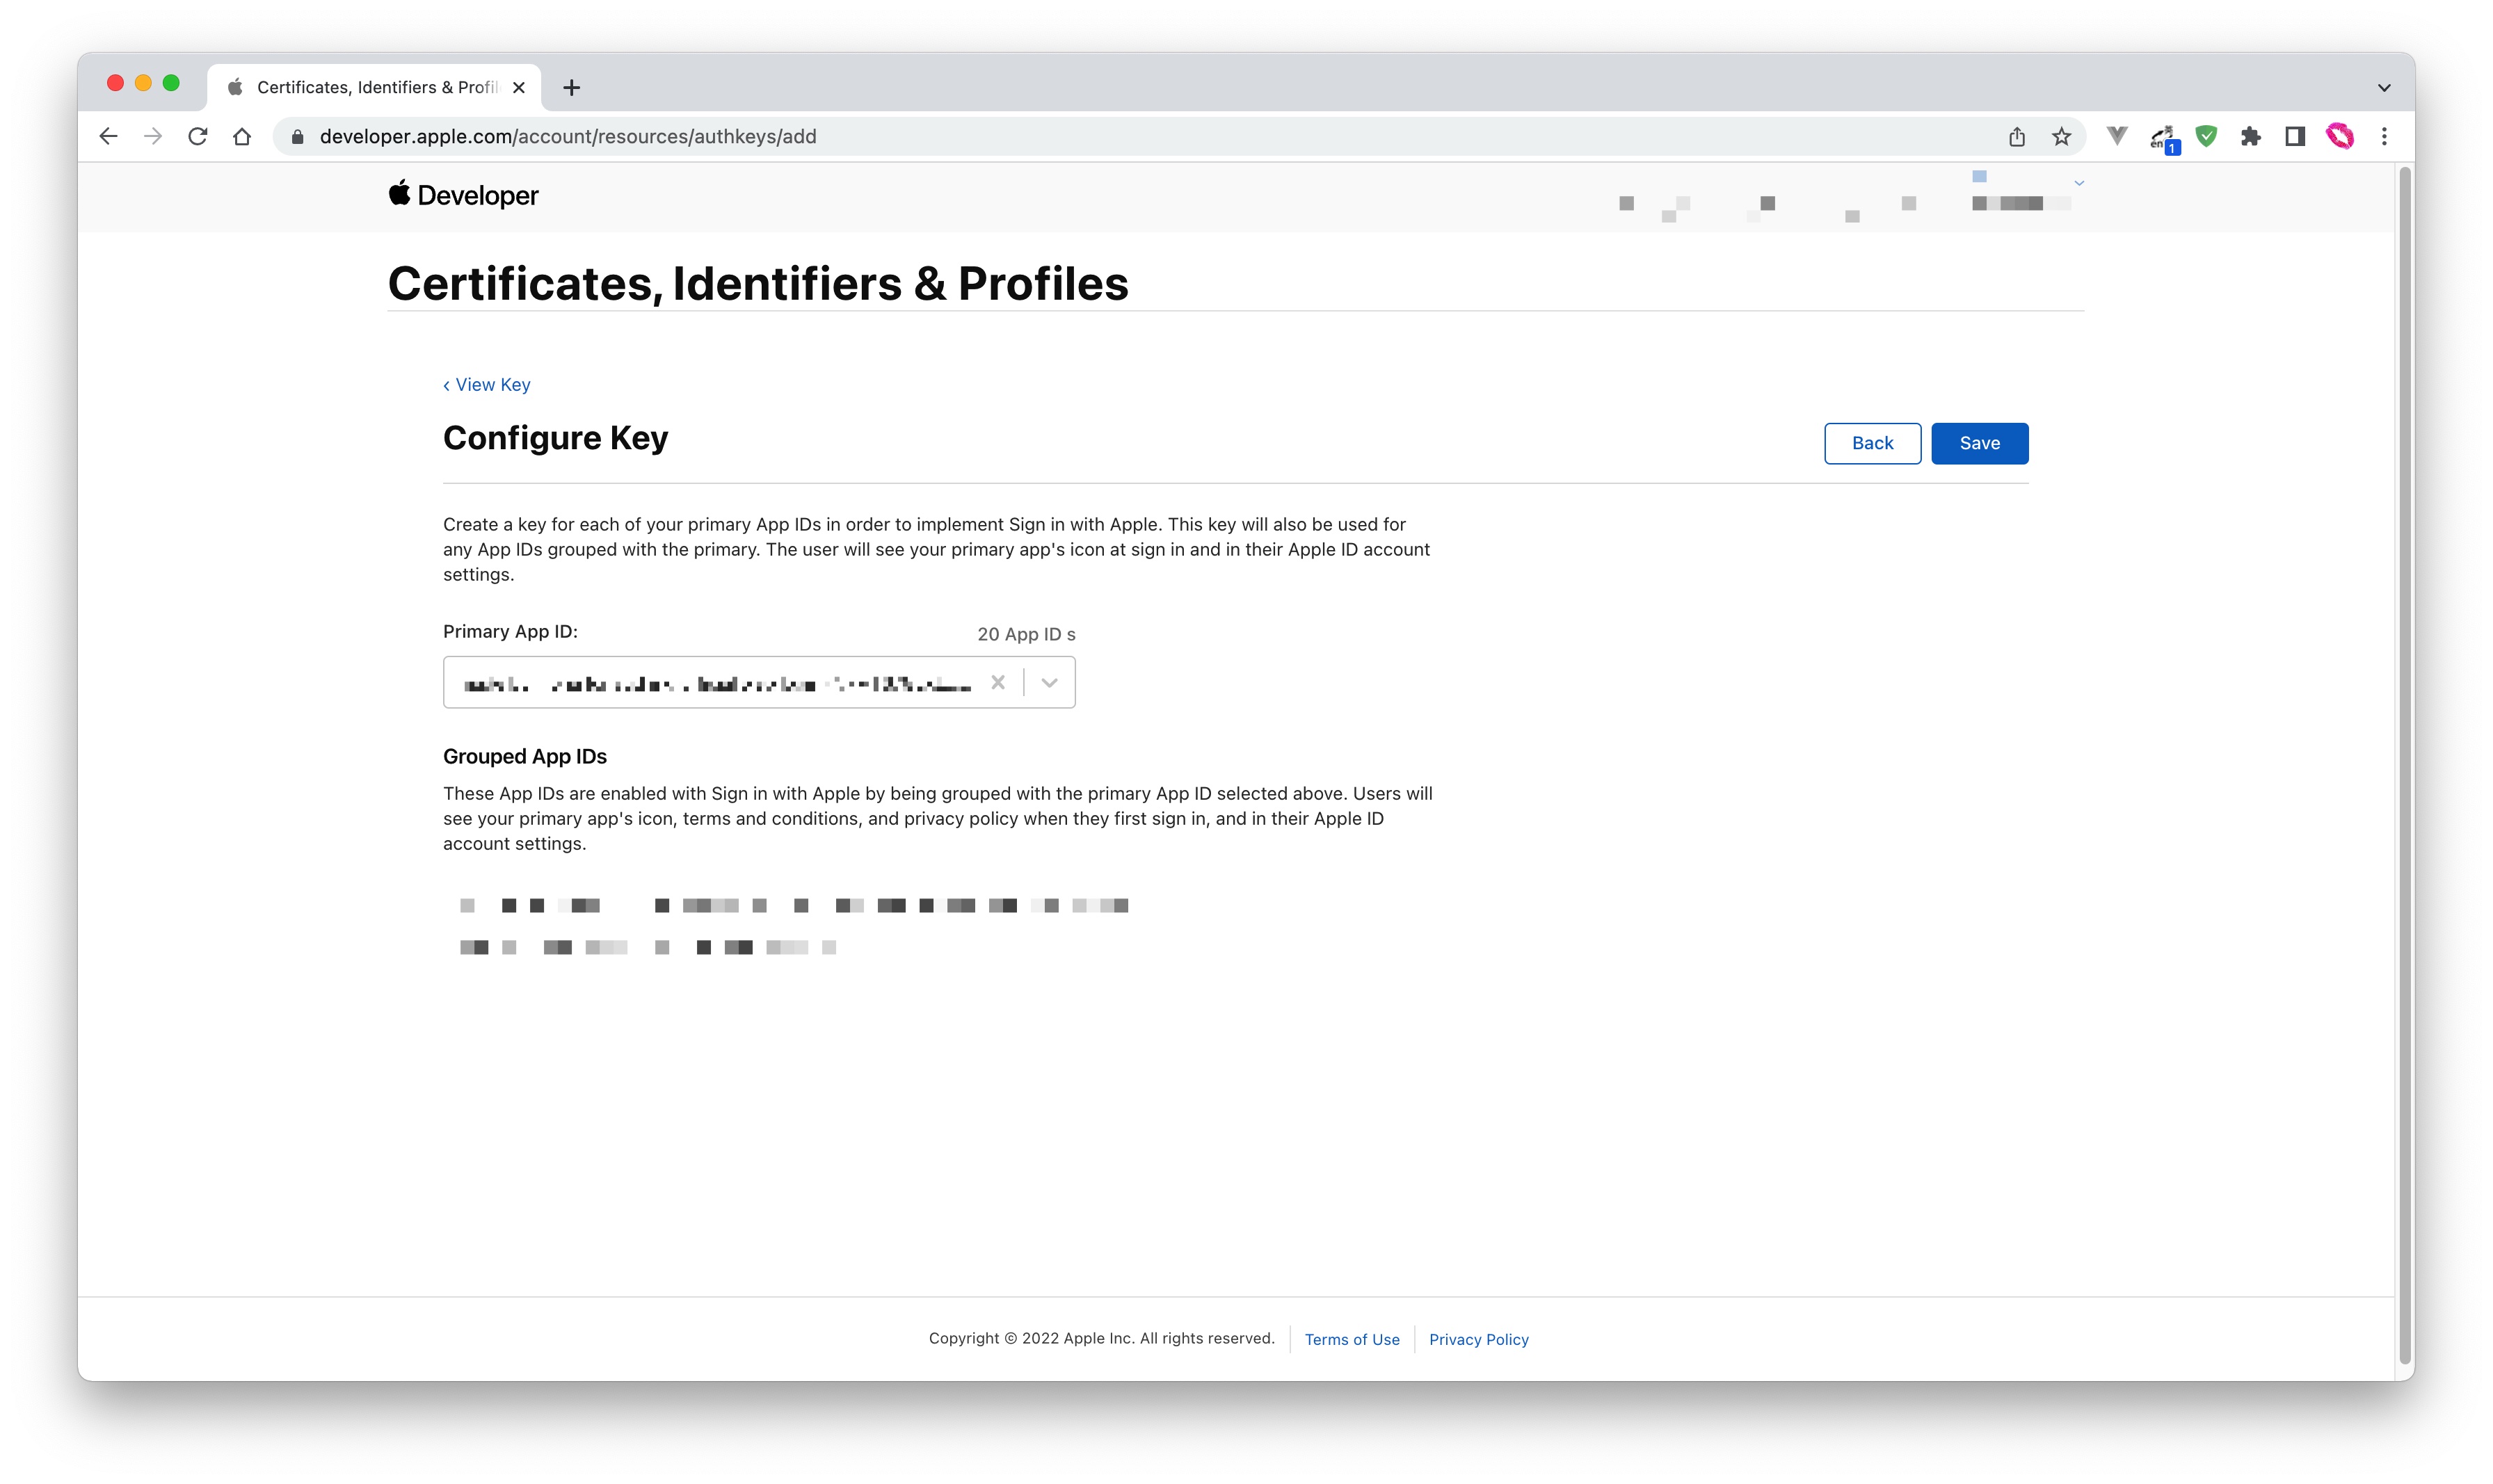
- Enter a name and check Sign in with Apple, click Configure to make sure the Primary App ID you selected is the one you just created:
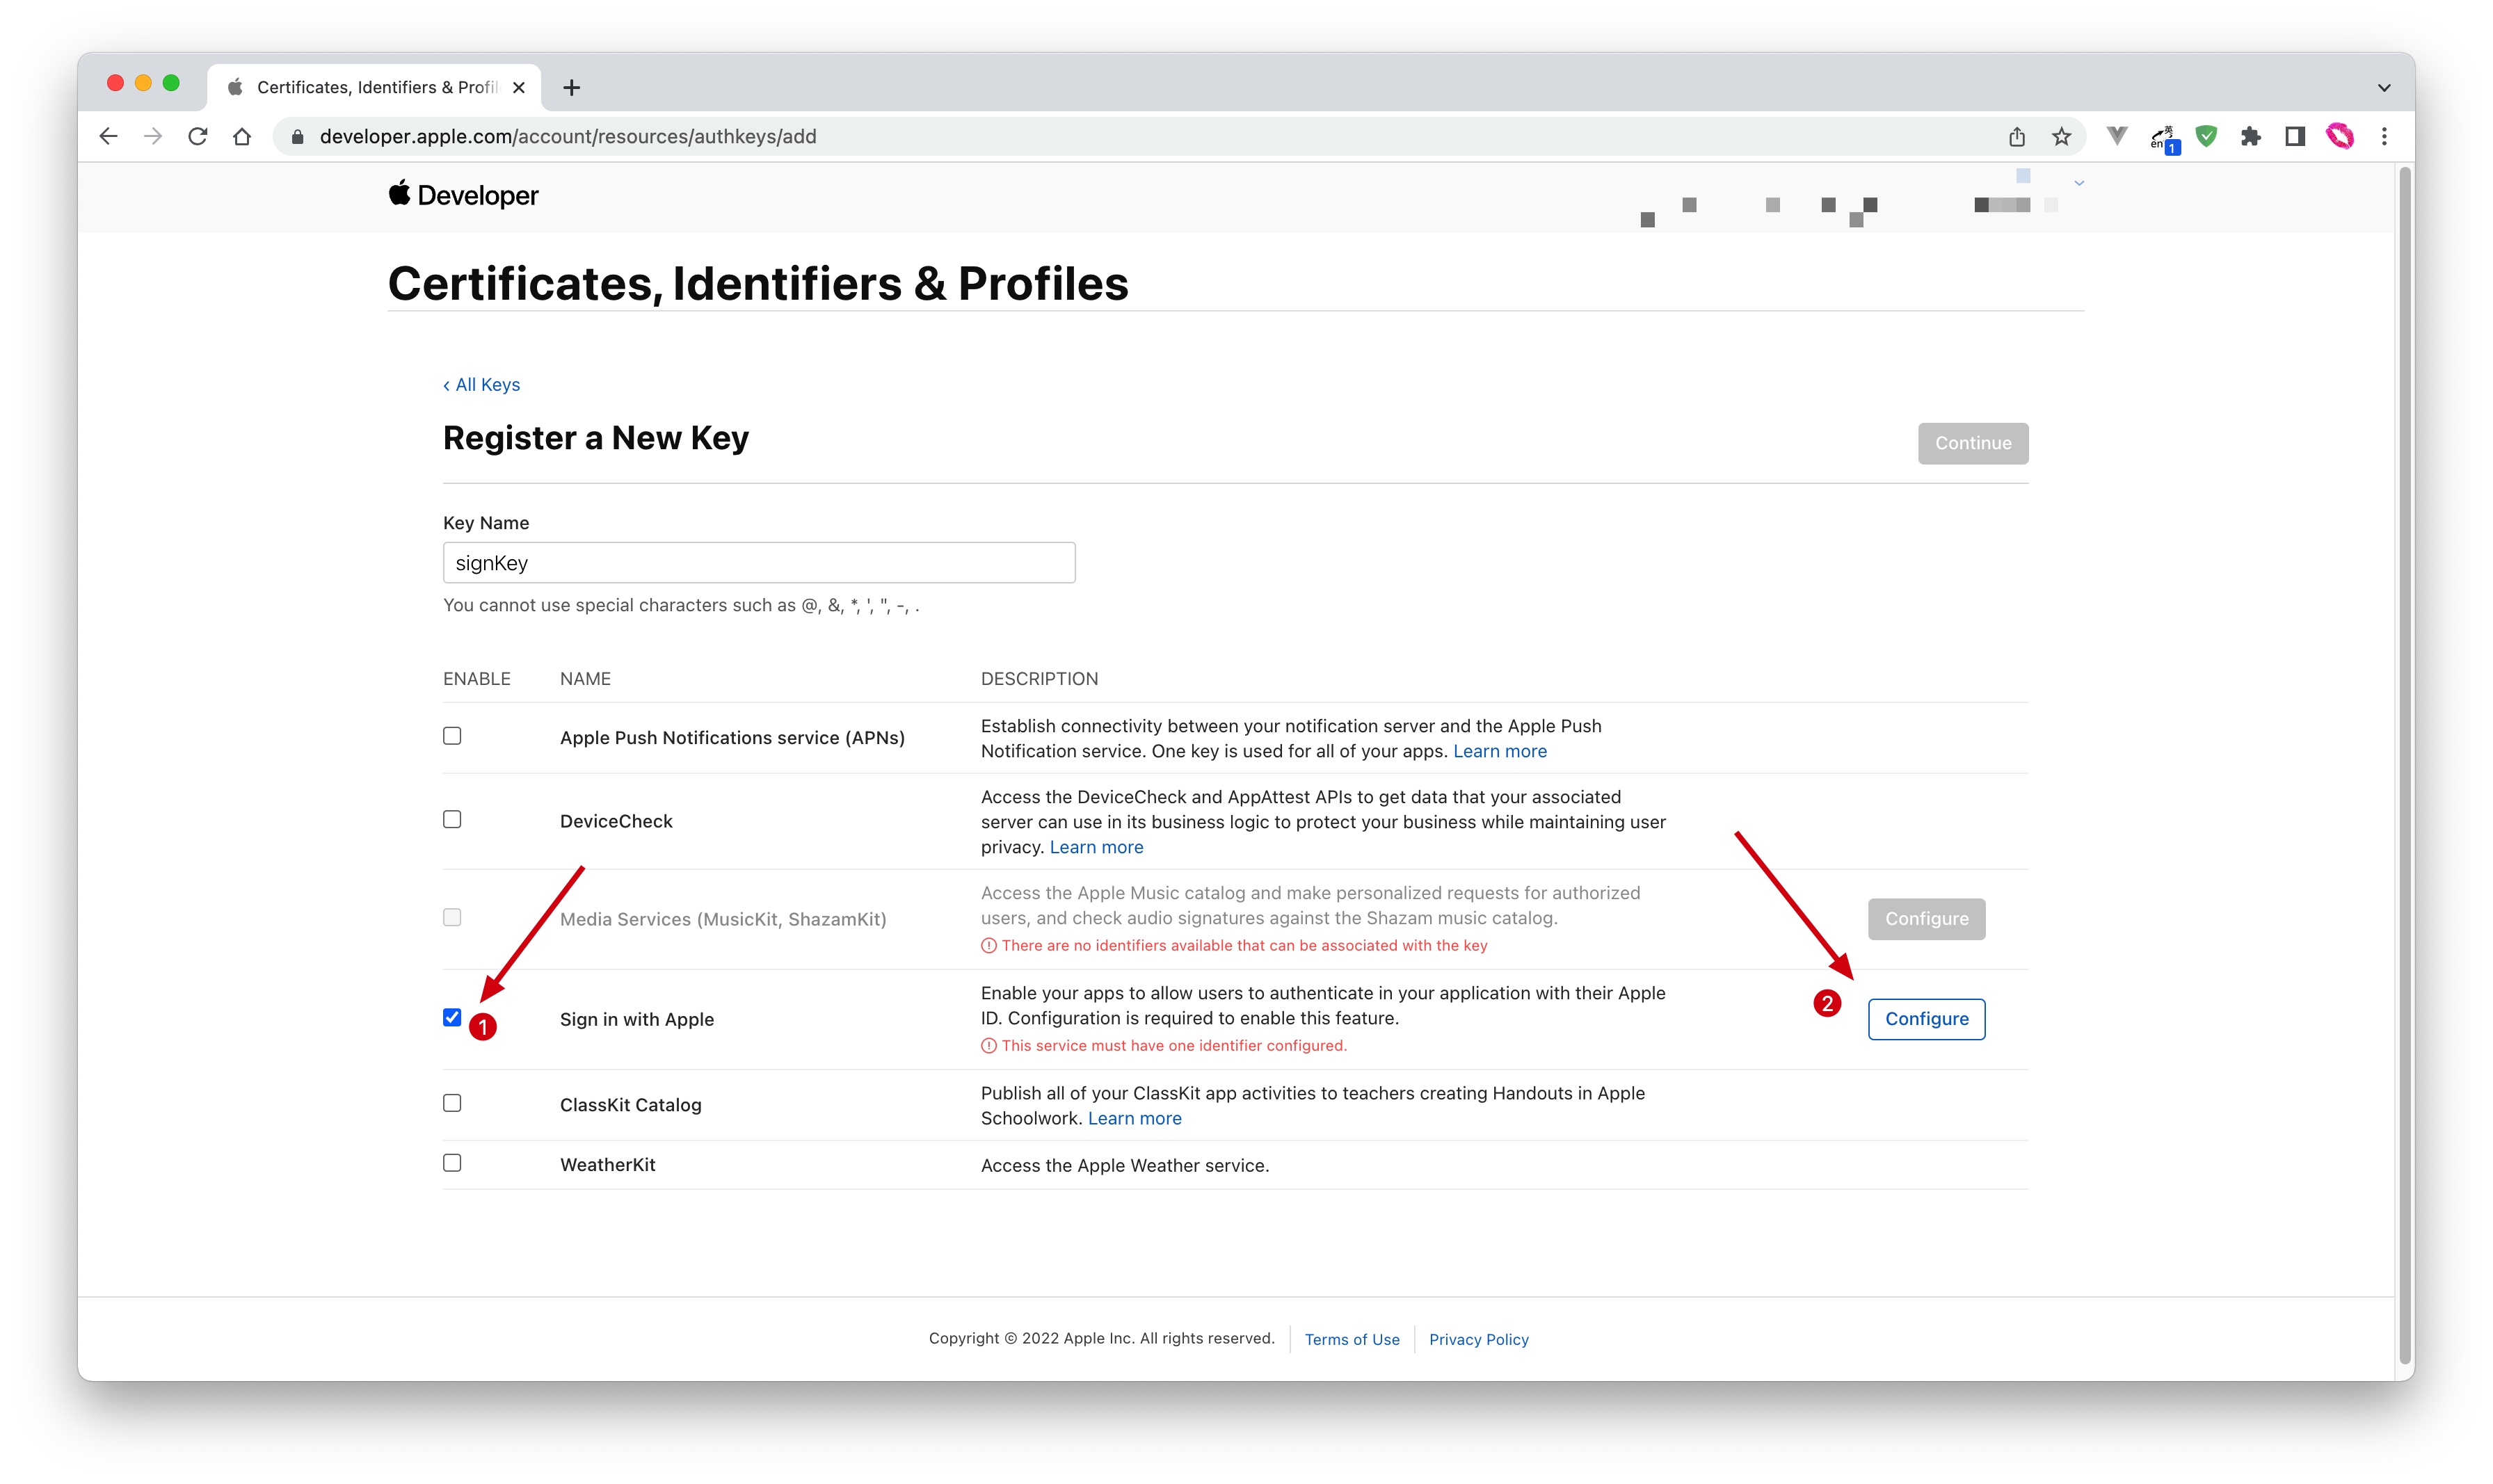
- Click Save, Continue, and finally Register.
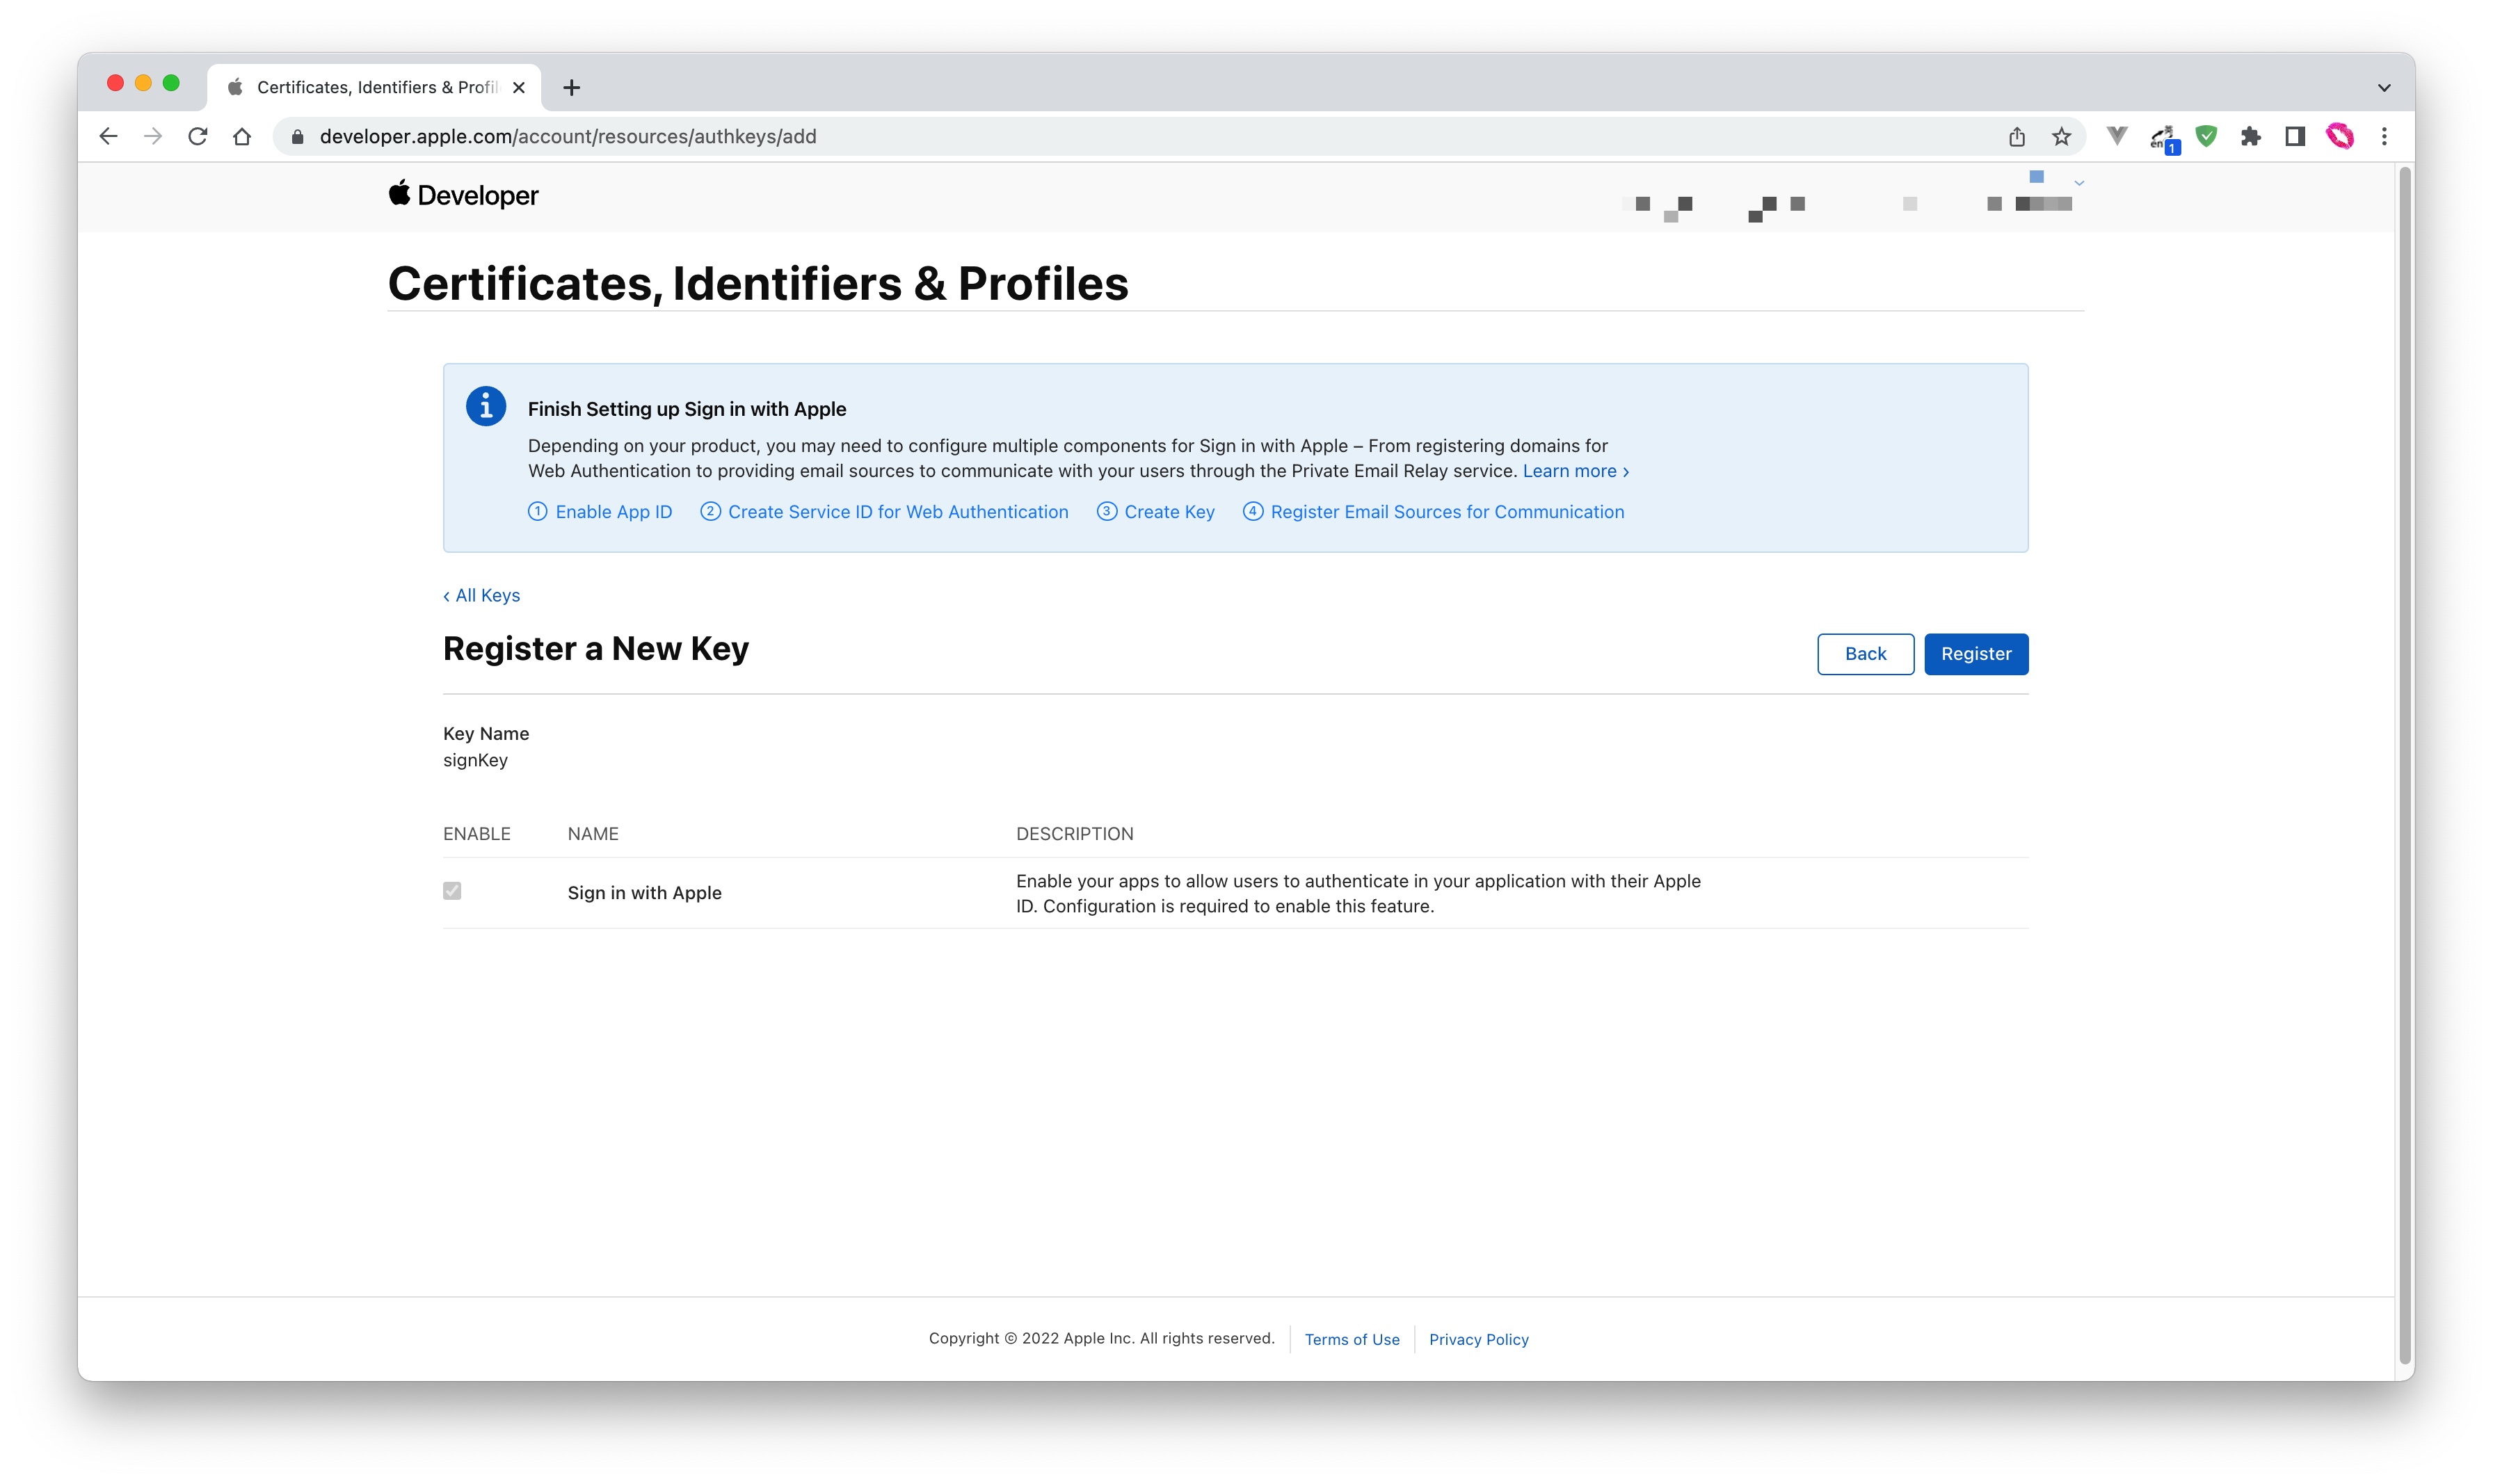
- Once created, record the Key ID and click Download to download the key:

¶ Step 2: Configure Apple in the Authing Console
2.1 On the "Social" page of the Authing Console, click the "Create Connection" button to enter the "Choosing a Social Identity Source" page.

2.2 On the "Choosing a Social Identity Source" page, click the "Apple" card. 
2.3 Continue to click the "Apple Web" login mode, or click "... Add". 
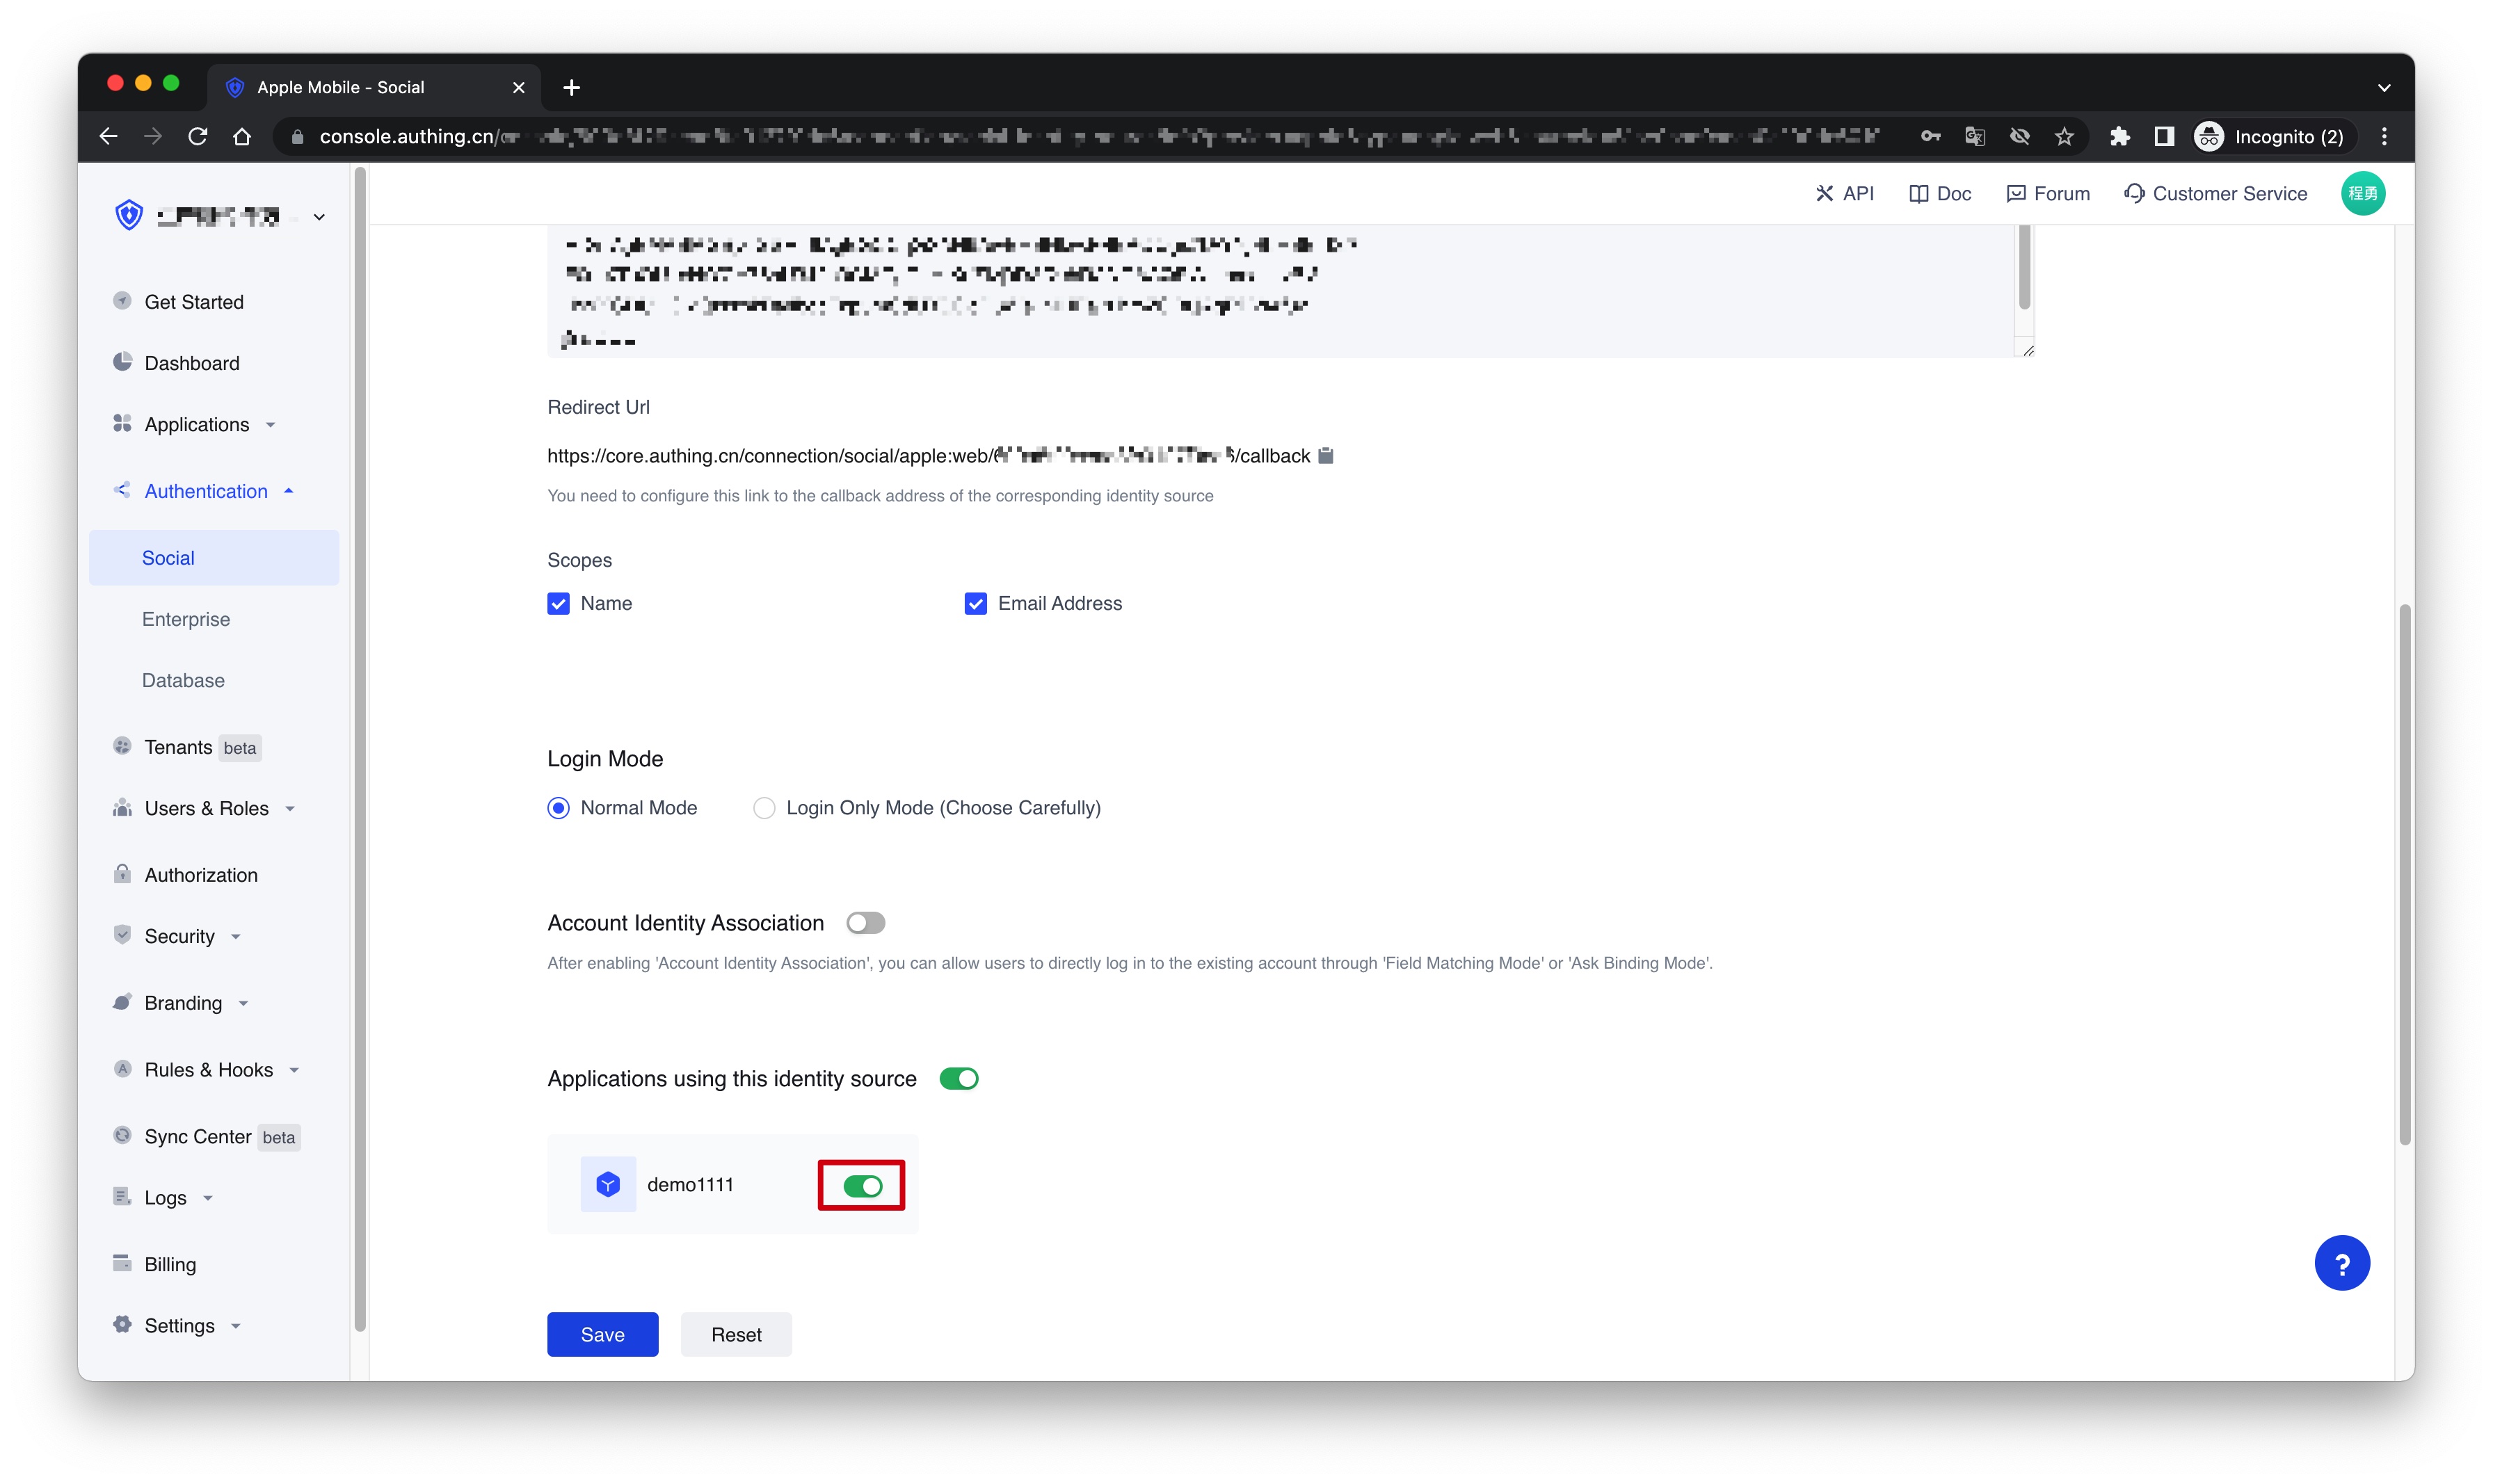
2.4 On the "Apple Web" configuration page, fill in the relevant field information. 
| Field | Description |
|---|---|
| Unique Identifier | a. The unique identifier consists of lowercase letters, numbers, and -, and the length is less than 32 digits. b. This is the unique identifier of this connection and cannot be modified after setting. |
| Display Name | This name will be displayed on the button on the end user's login screen. |
| Services Identifier | Apple Service ID |
| Team ID | Apple Team ID. |
| Key ID | Apple Signing Key ID. |
| Key | Contents of the Apple Signing Key. |
| Scopes | Name and Email Address can be checked. |
| Login Mode | After enabling the "Login Only Mode", you can only log in to an existing account and cannot create a new account. Please choose carefully. |
| Account Identity Association | When "Account Identity Association" is not enabled, a new user is created by default when a user logs in through an identity provider. After enabling "Account Identity Association", you can allow users to directly log in to existing accounts through "Field Matching" or "Ask Binding Mode". |
2.5 After the configuration is complete, click the "Create" or "Save" button to complete the creation.
¶ Step 3: Development access
Recommended development access method: Use a hosted login page
Description of advantages and disadvantages: The operation and maintenance are simple, and Authing is responsible for the operation and maintenance. Each user pool has an independent second-level domain name; if you need to embed it into your application, you need to use the pop-up mode to log in, that is: after clicking the login button, a window will pop up, the content is the login page hosted by Authing, or the browser The server redirects to the login page hosted by Authing.
Detailed access method:
3.1 Create an application in the Authing Console. For details, see: How to create an application in Authing
3.2 On the created "Apple Web" identity provider connection details page, open and associate an application created in the Authing Console
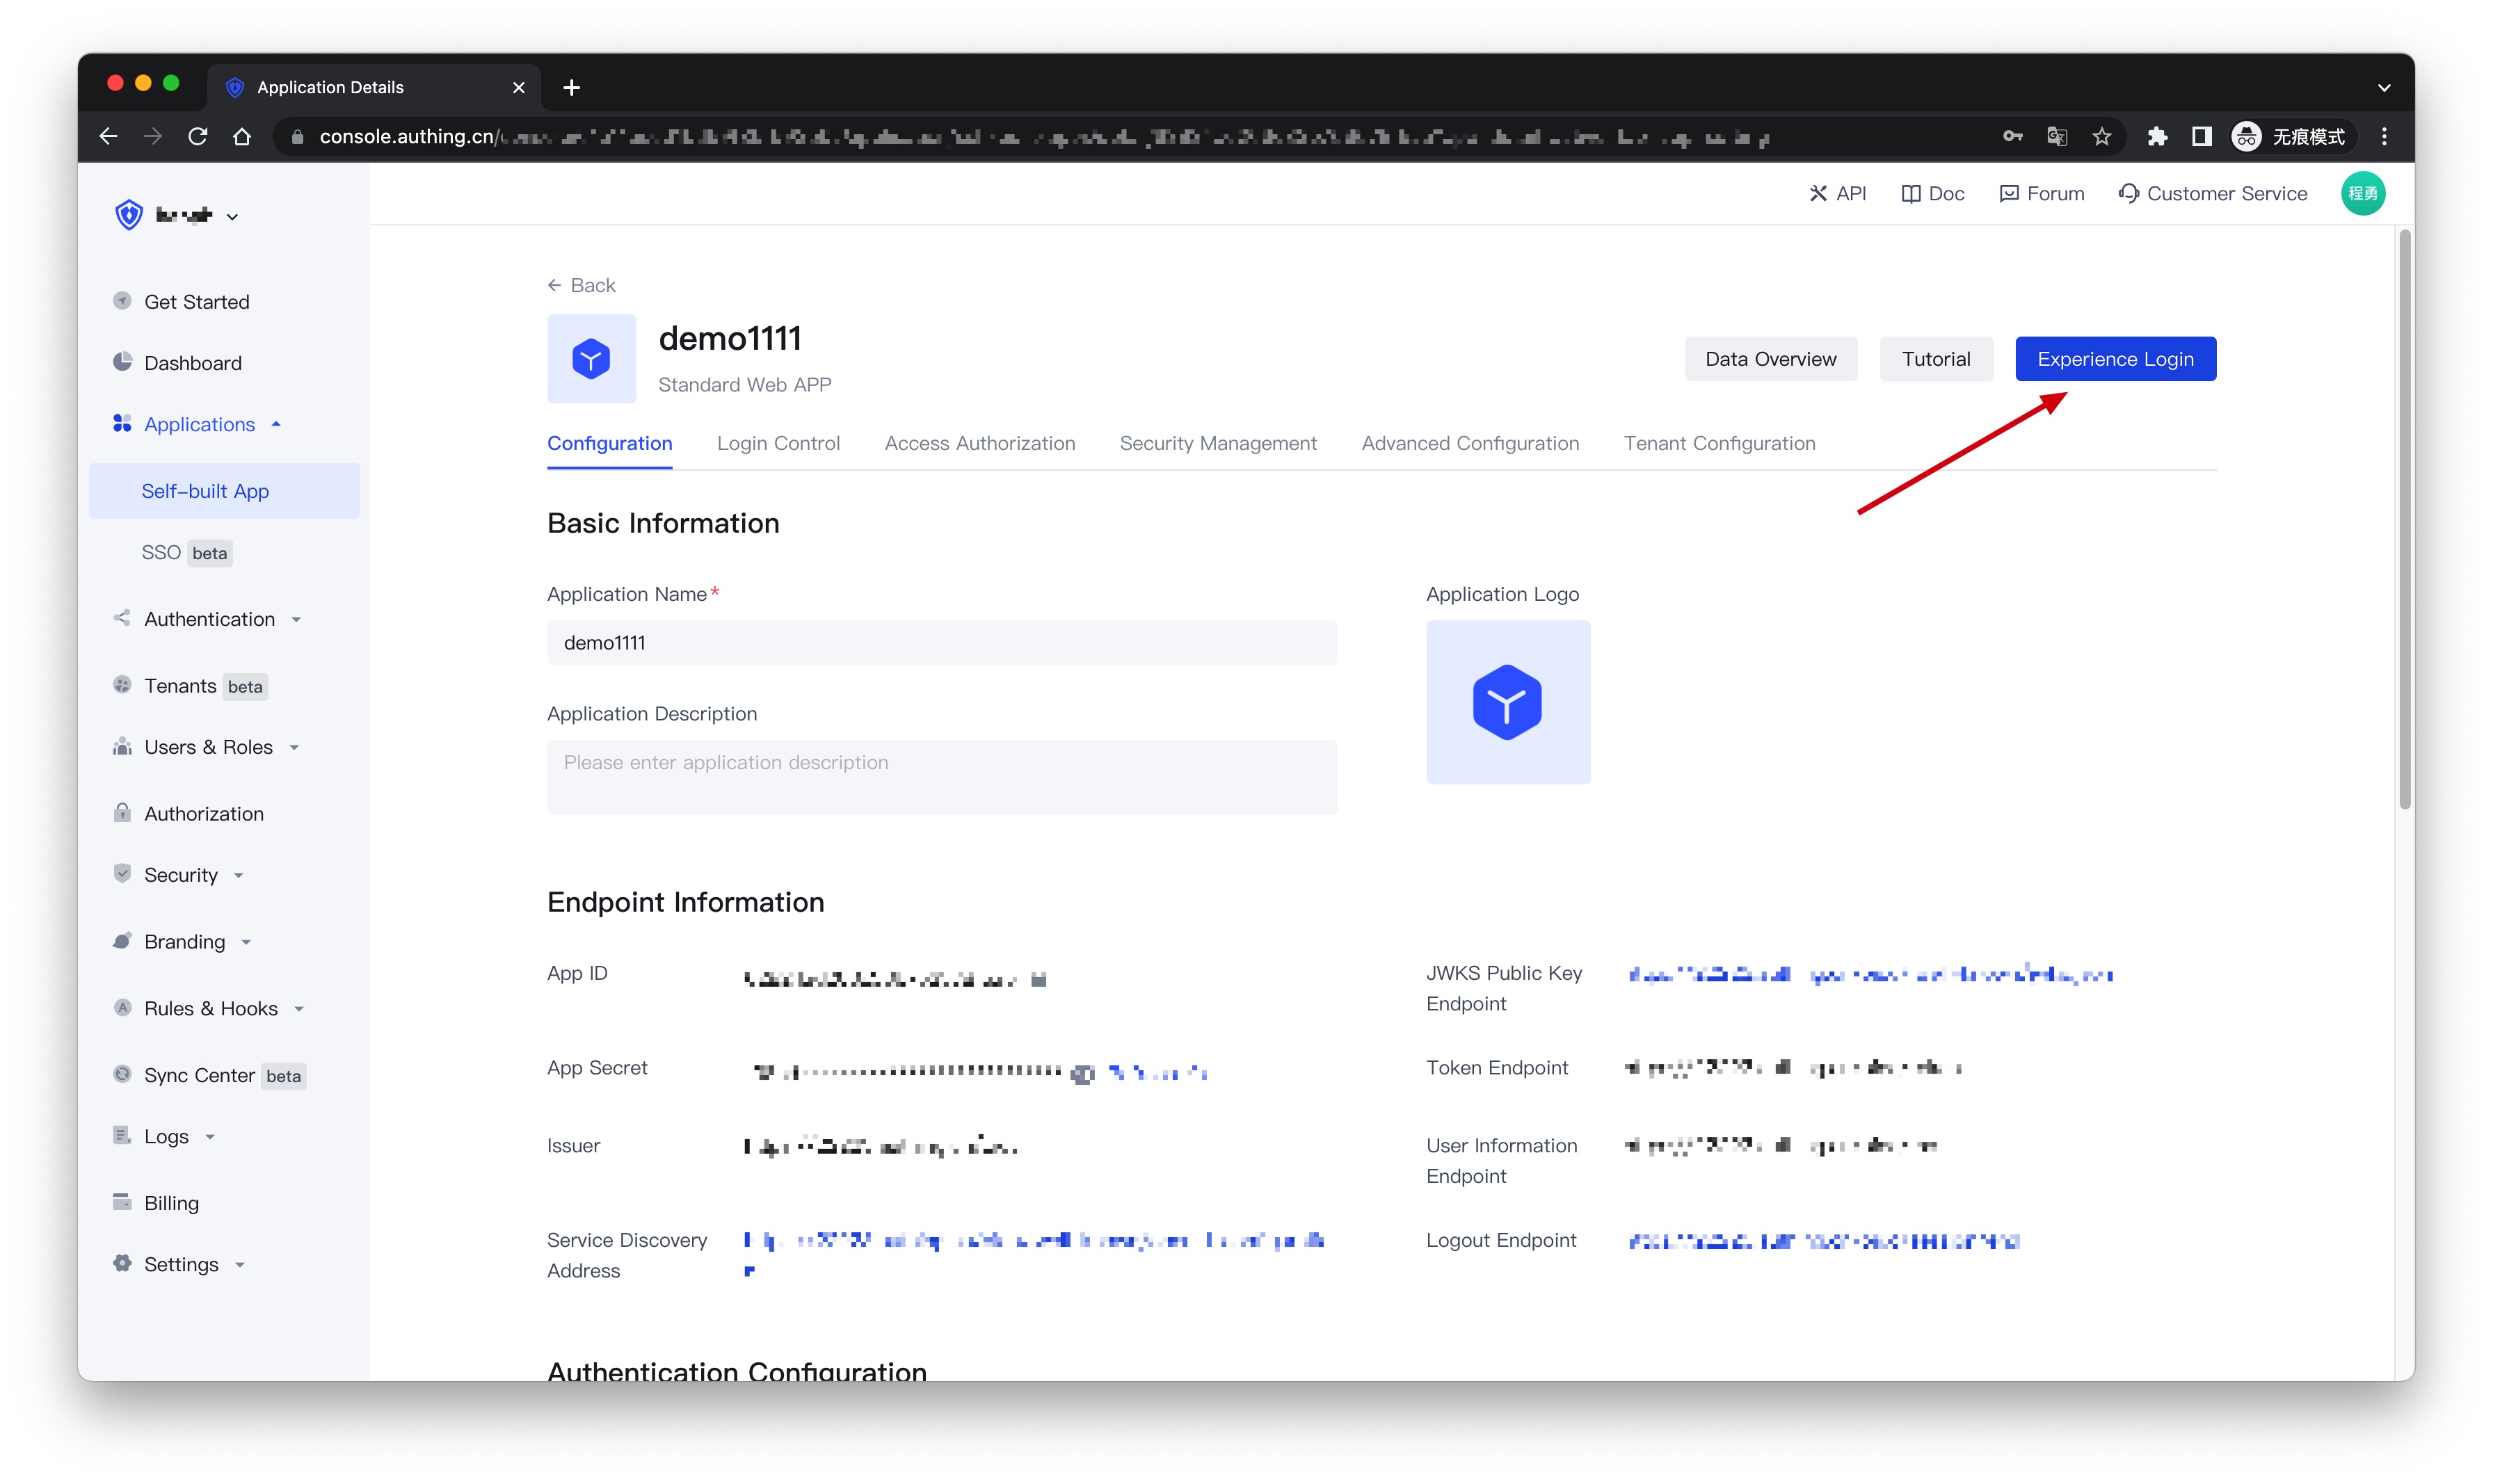
3.3 Click the "Experience Login" button of the app in the Authing Console, and experience the "Apple Web" login in the pop-up login window