WeCom Self-built App QR Code Login(Delegated Development Mode)
¶ Introduction
- Overview: WeCom internal application code login (proxy development mode) is to provide proxy development application by the service provider, and third-party enterprise code authorization form, for the third enterprise to achieve the WeCom as the identity source to securely login to third-party applications or websites. By configuring Authing and enabling the enterprise login in Authing, you can quickly get the basic open information of WeCom and help users to realize the password-free login function.
- Application Scenario: PC website
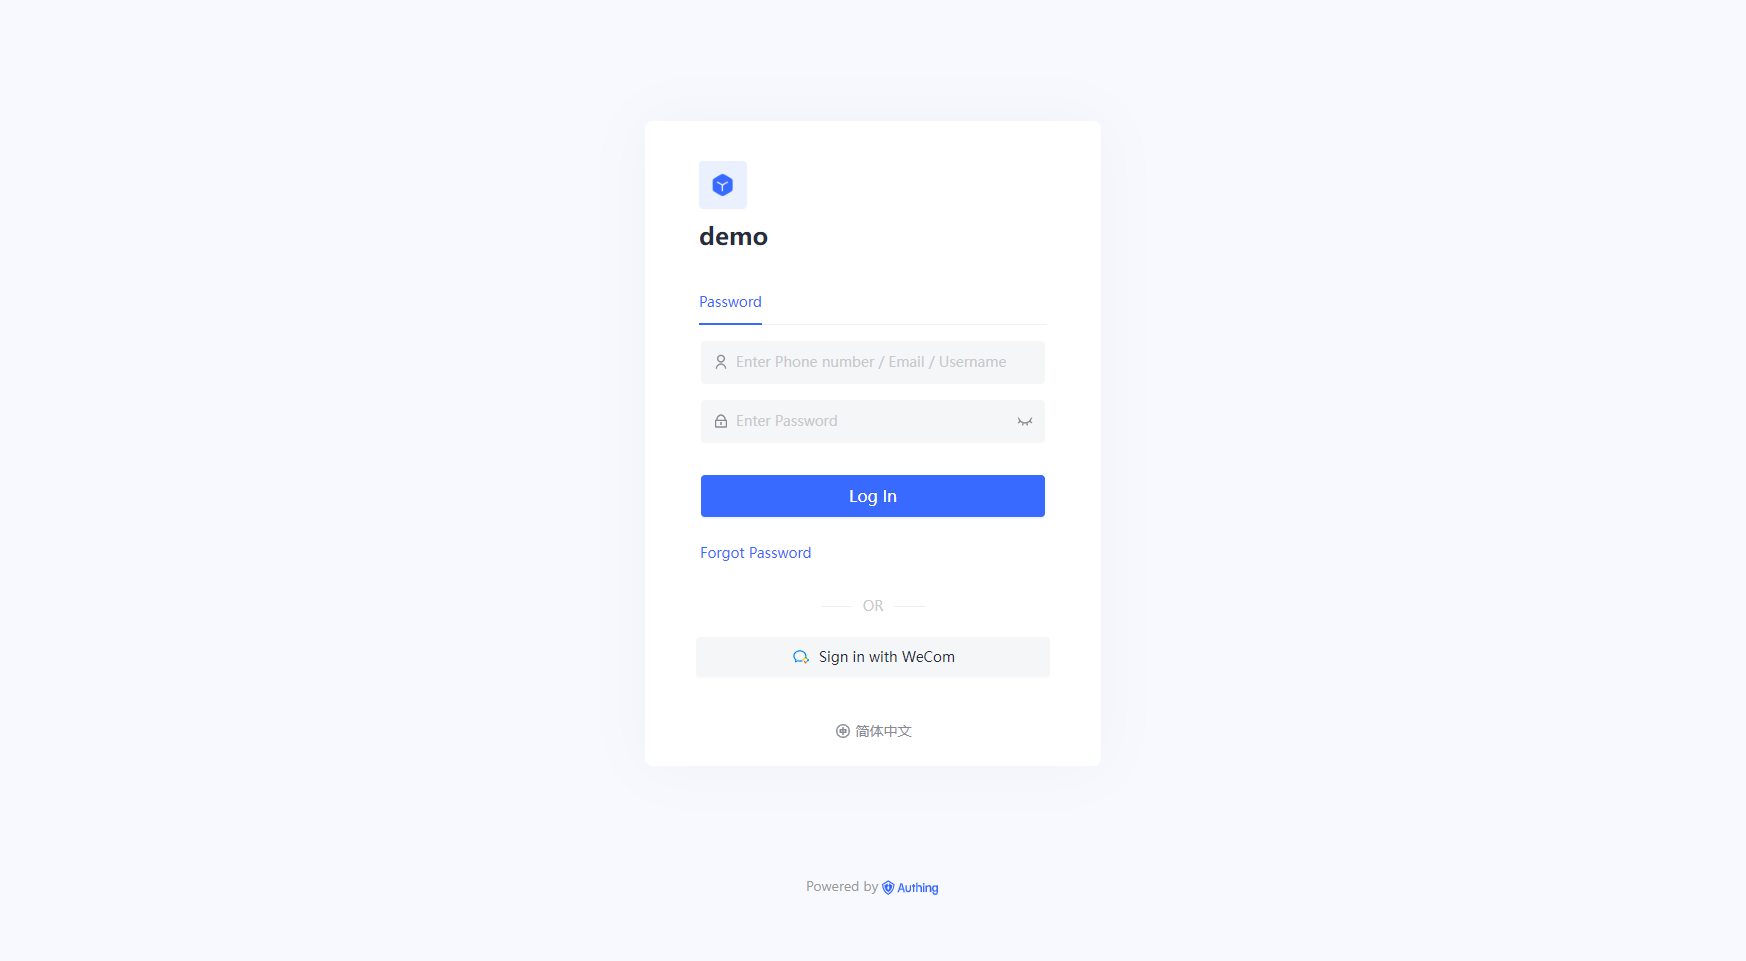
- End-user preview image.
¶ Caution.
- If you do not have an WeCom Service Provider account, please go to WeCom Service Provider website (opens new window) and click on Become a WeCom Service Provider first.
- During the development process, you also need an WeCom enterprise administrator account to authorize the operation of the application template developed on your behalf, you can modify the administrator rights at WeCom rights management page (opens new window).
- If you do not have a Authing console account, please go to Authing Console console (opens new window) to register a developer account first.
¶ Step 1: Create a surrogate application
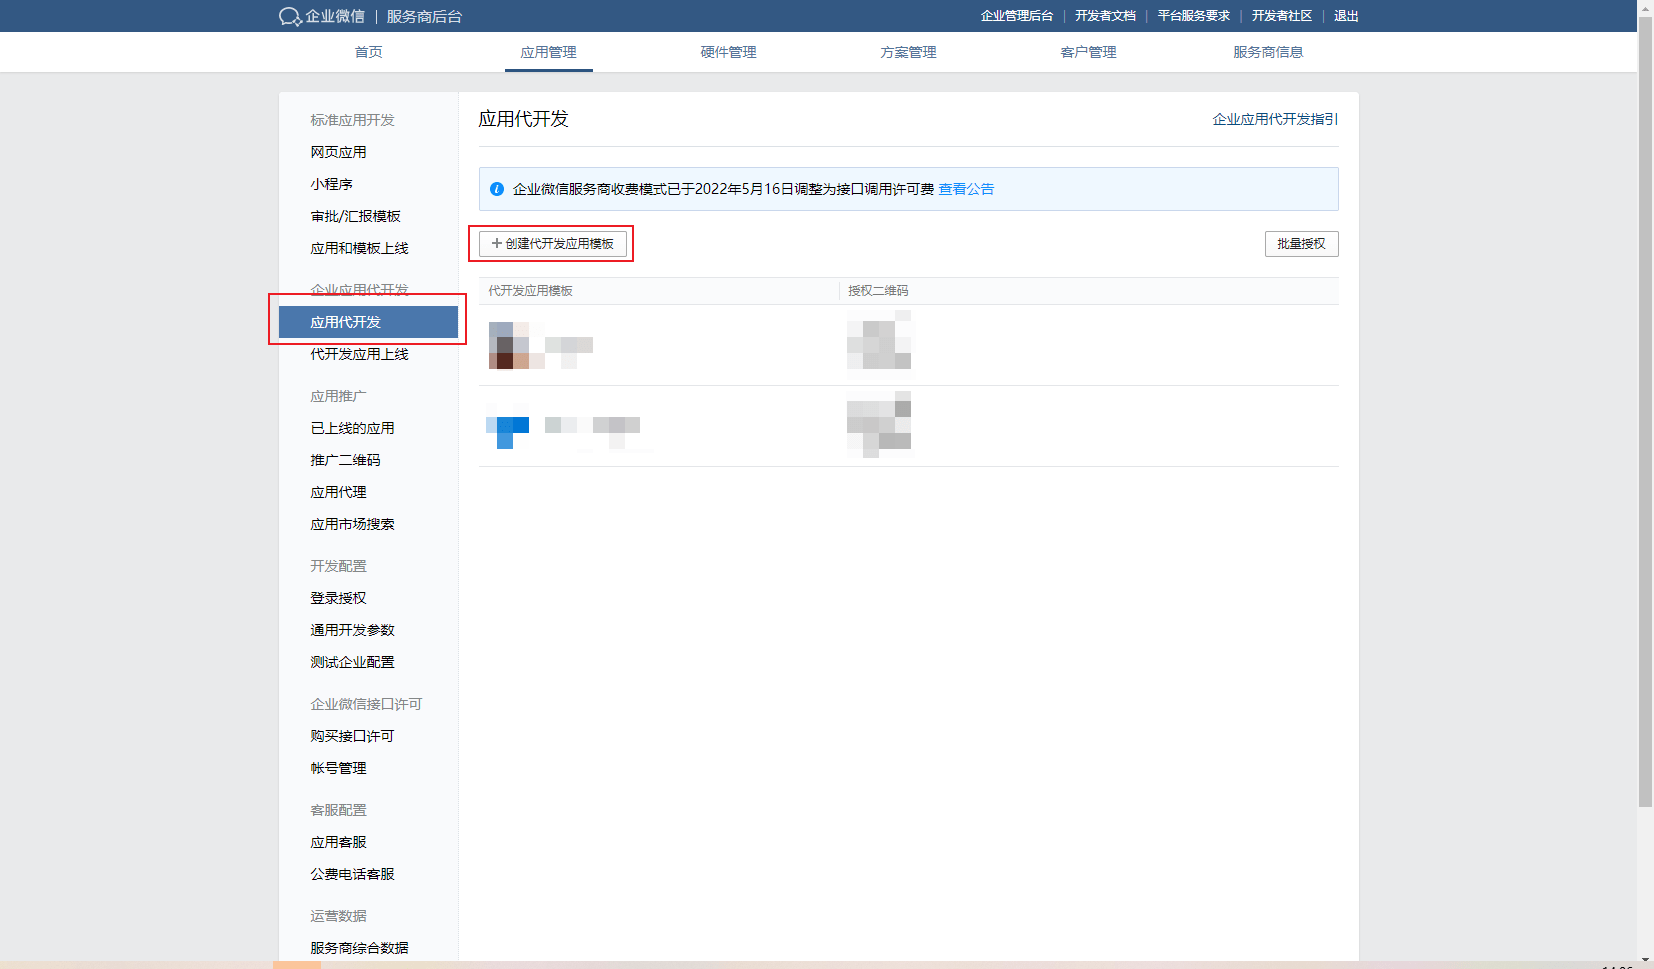
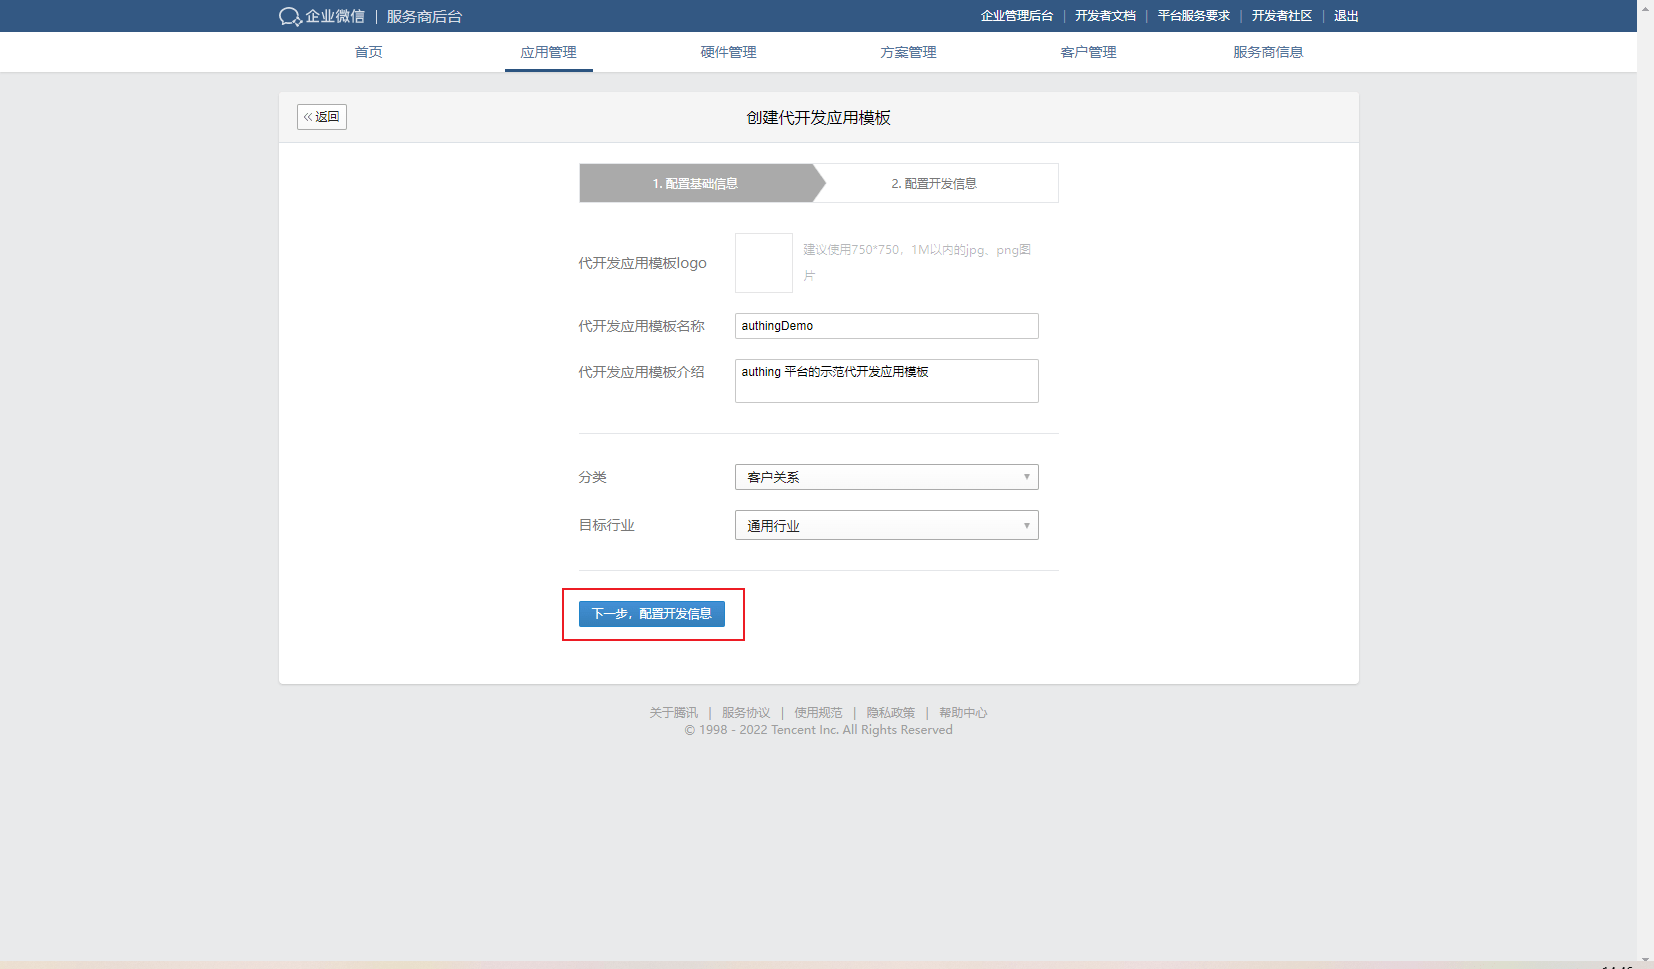
Go to WeCom Service Provider Backend (opens new window), click Application Generation Development, select Create Generation Development Application Template, and fill in the corresponding content. Go to the Configure Development Information page
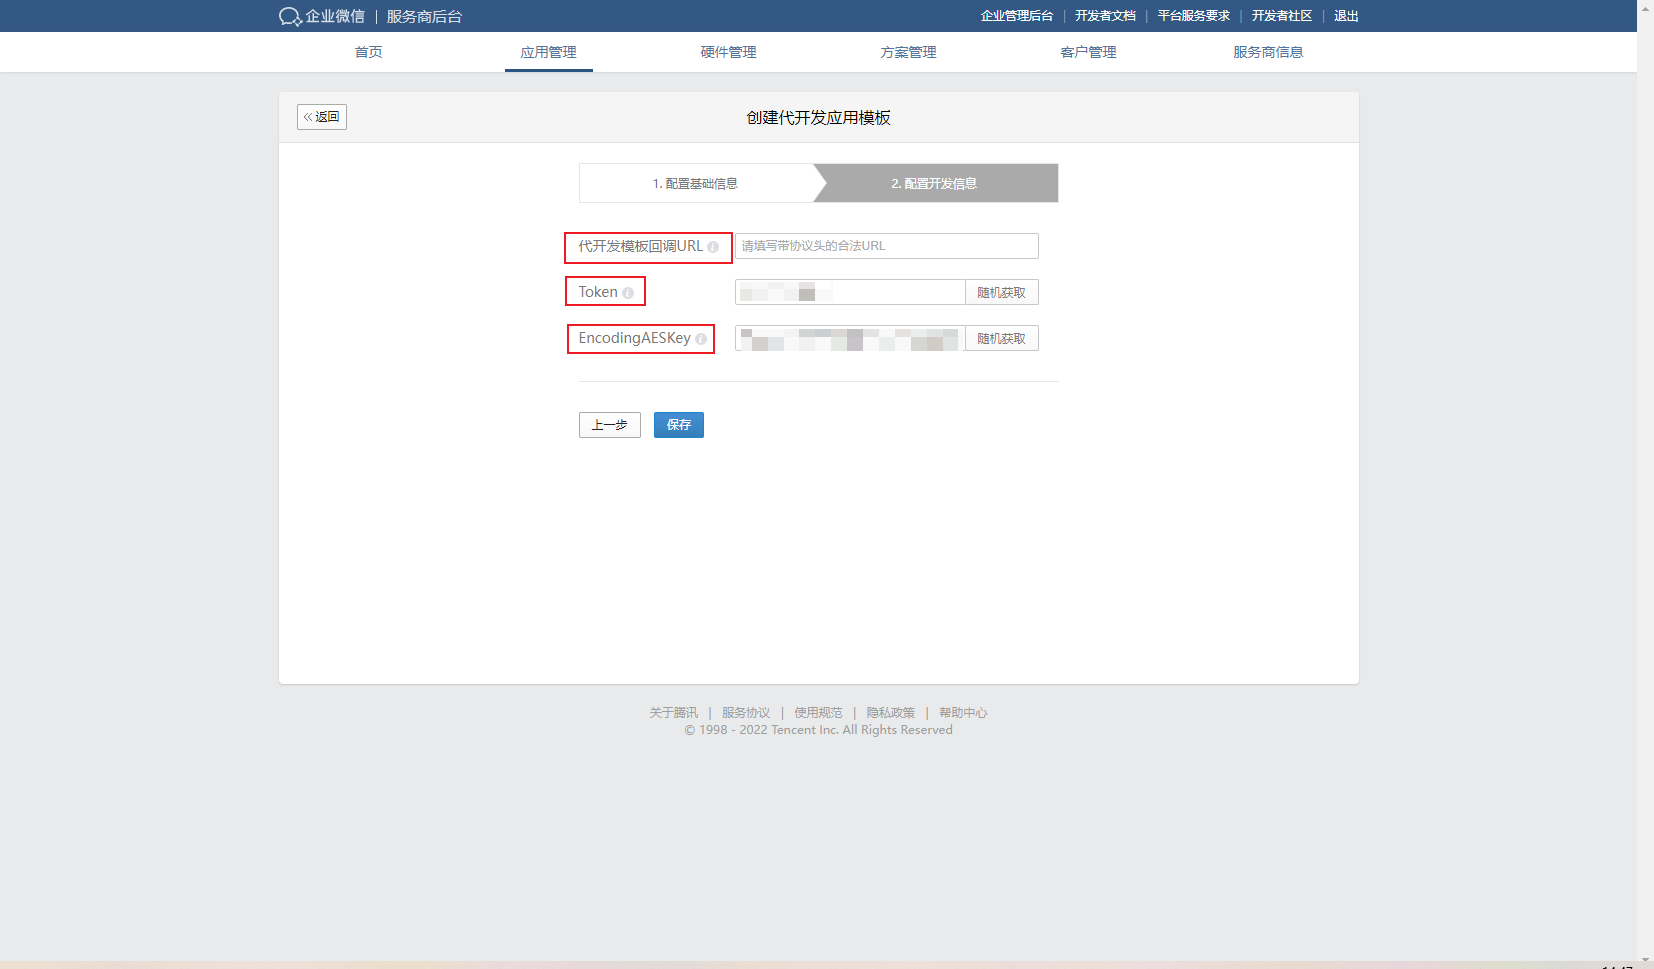
On the Configure Development Information page, click Random Get to generate the Token and EncodingAESKey; the callback URL for the development template needs to be generated after the app is created in the Authing console and verified by the WeChat server, so let's keep the page here first and open the Authing console.
¶ Step 2: ConfigureWeCom Self-built App QR Code Login(Delegated Development Mode) in Authing console
2.1 In the Authing Console, on the "Enterprise Identity Source" page, click the "Create Enterprise Identity Source" button, go to the "Select Enterprise Identity Source" page, and click the "WeCom" identity source button
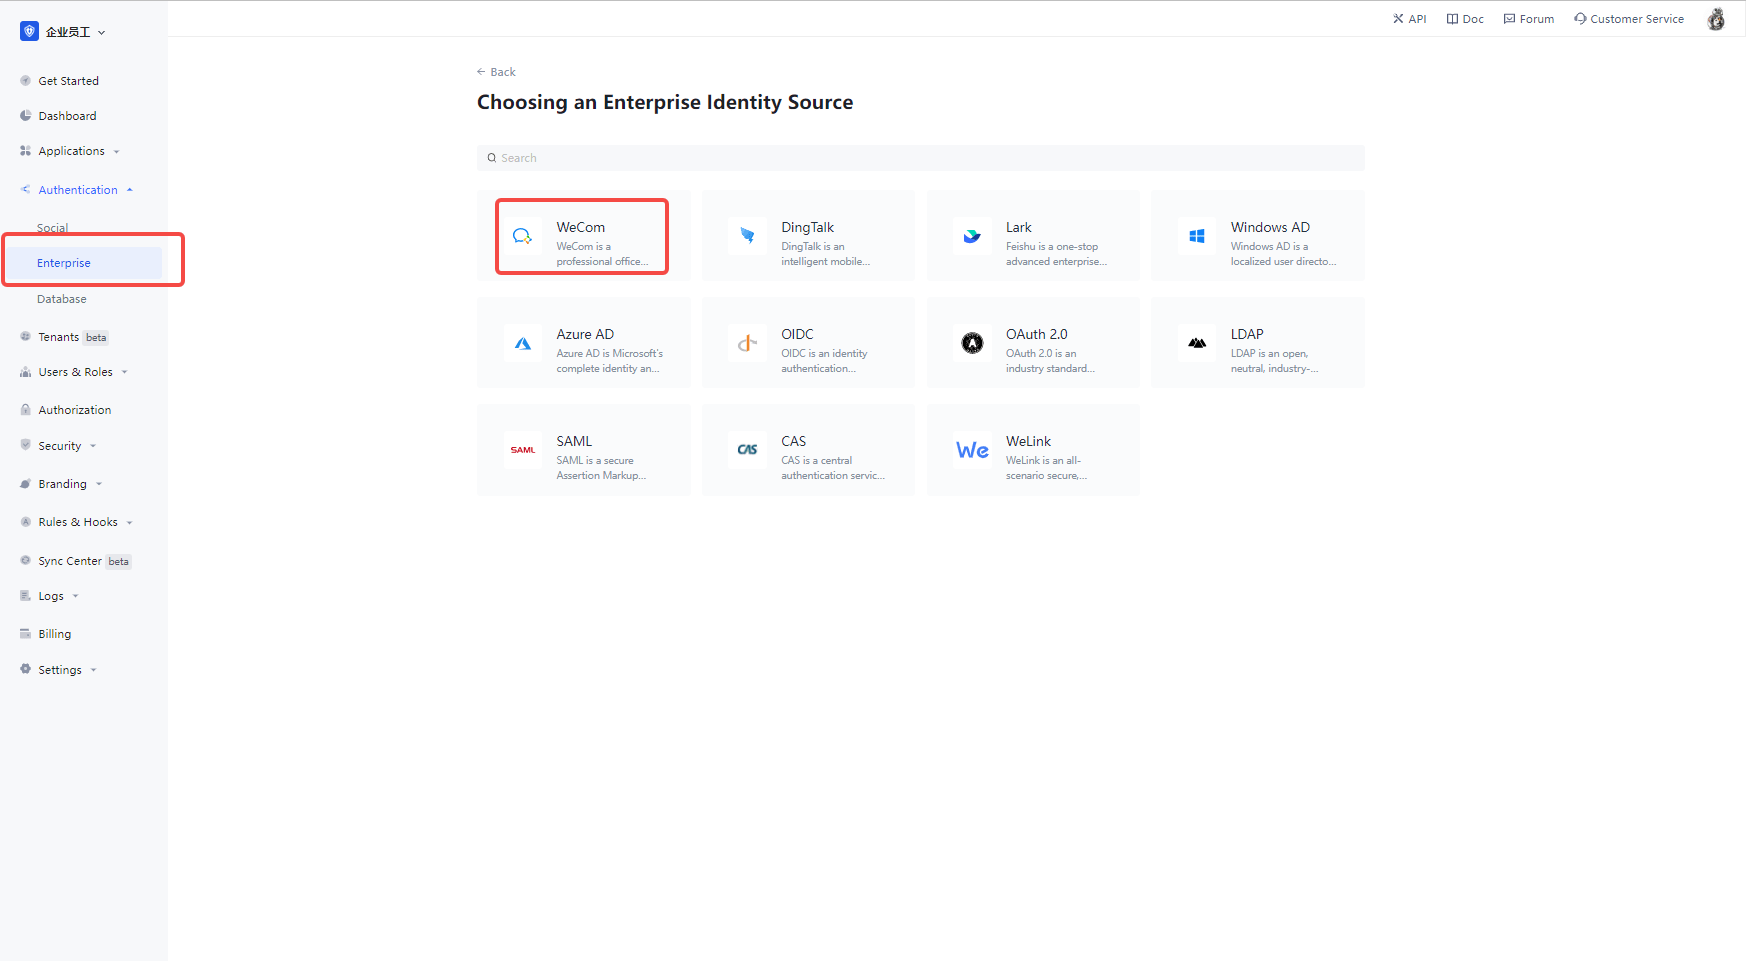
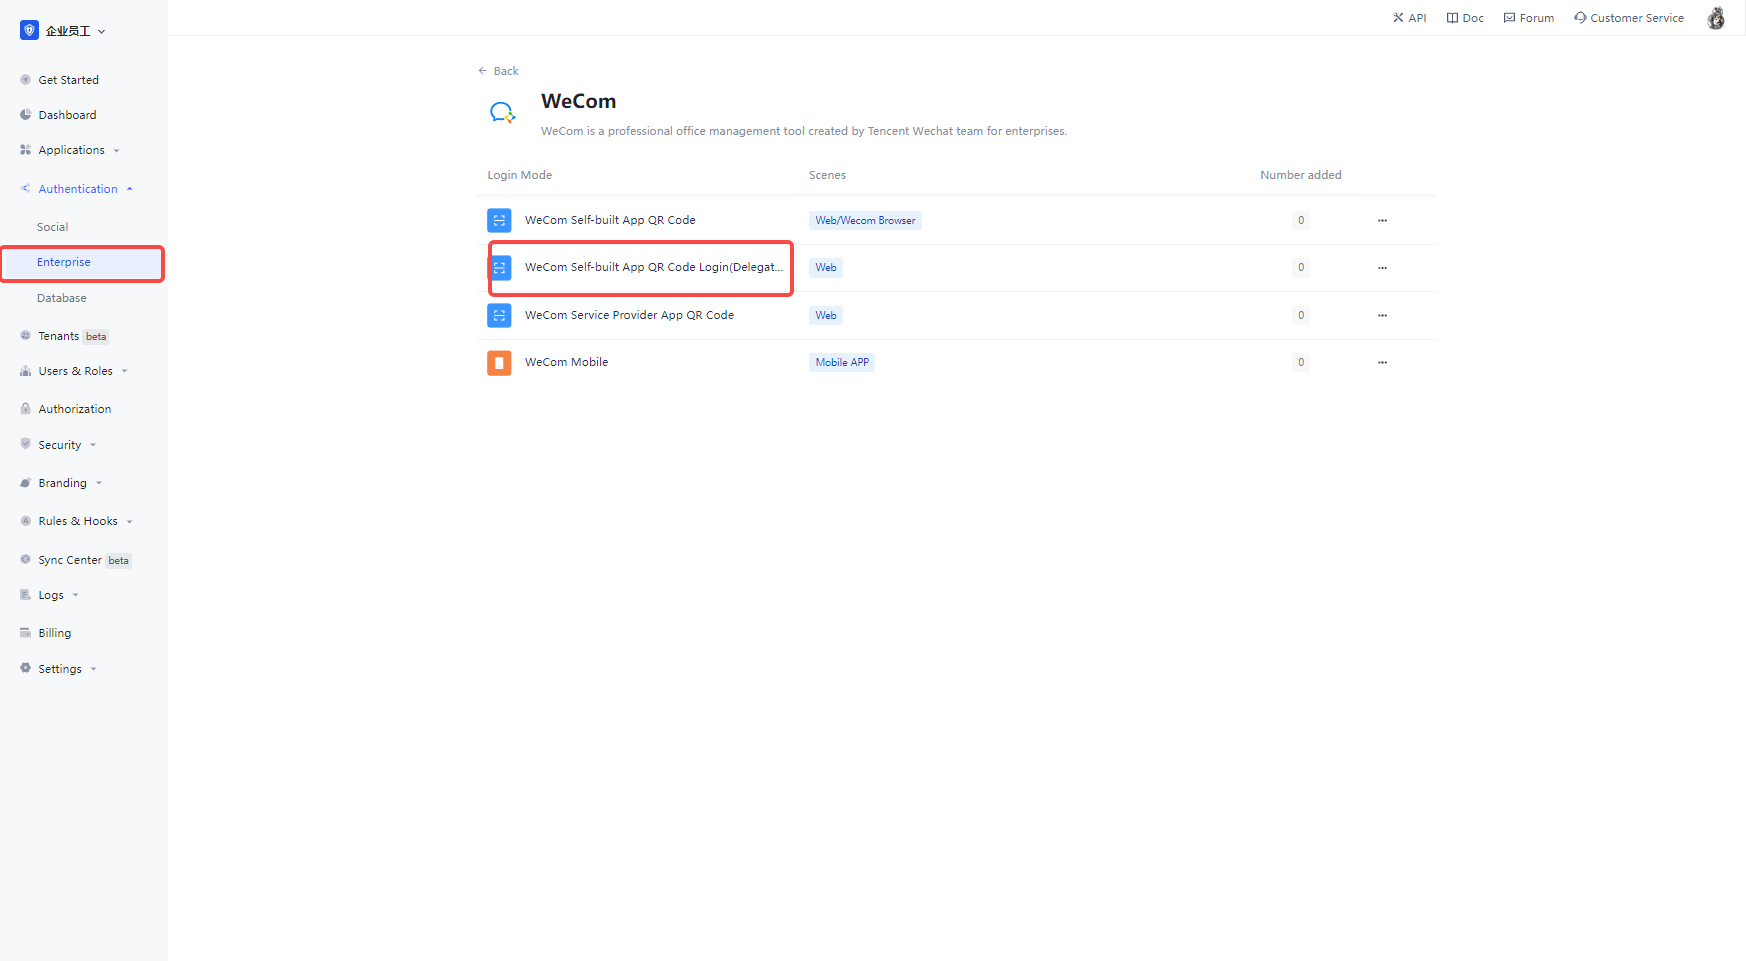
2.2 Select "WeCom Internal App Sweep Login (Surrogate Development Mode)".
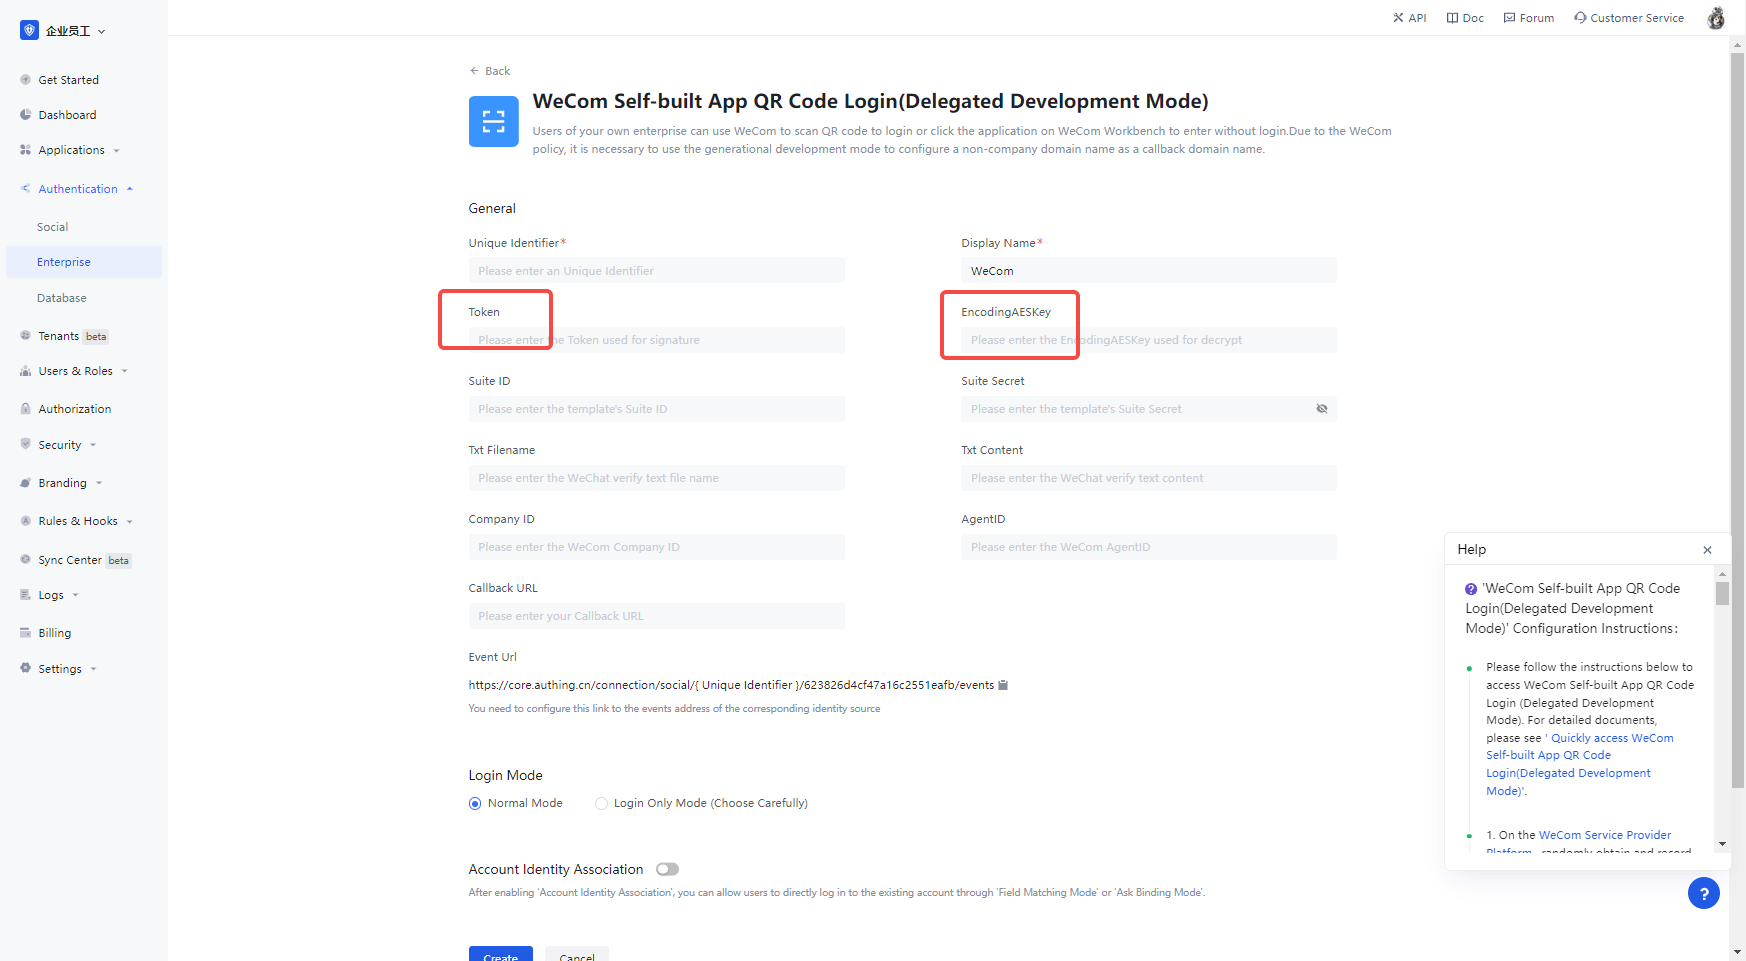
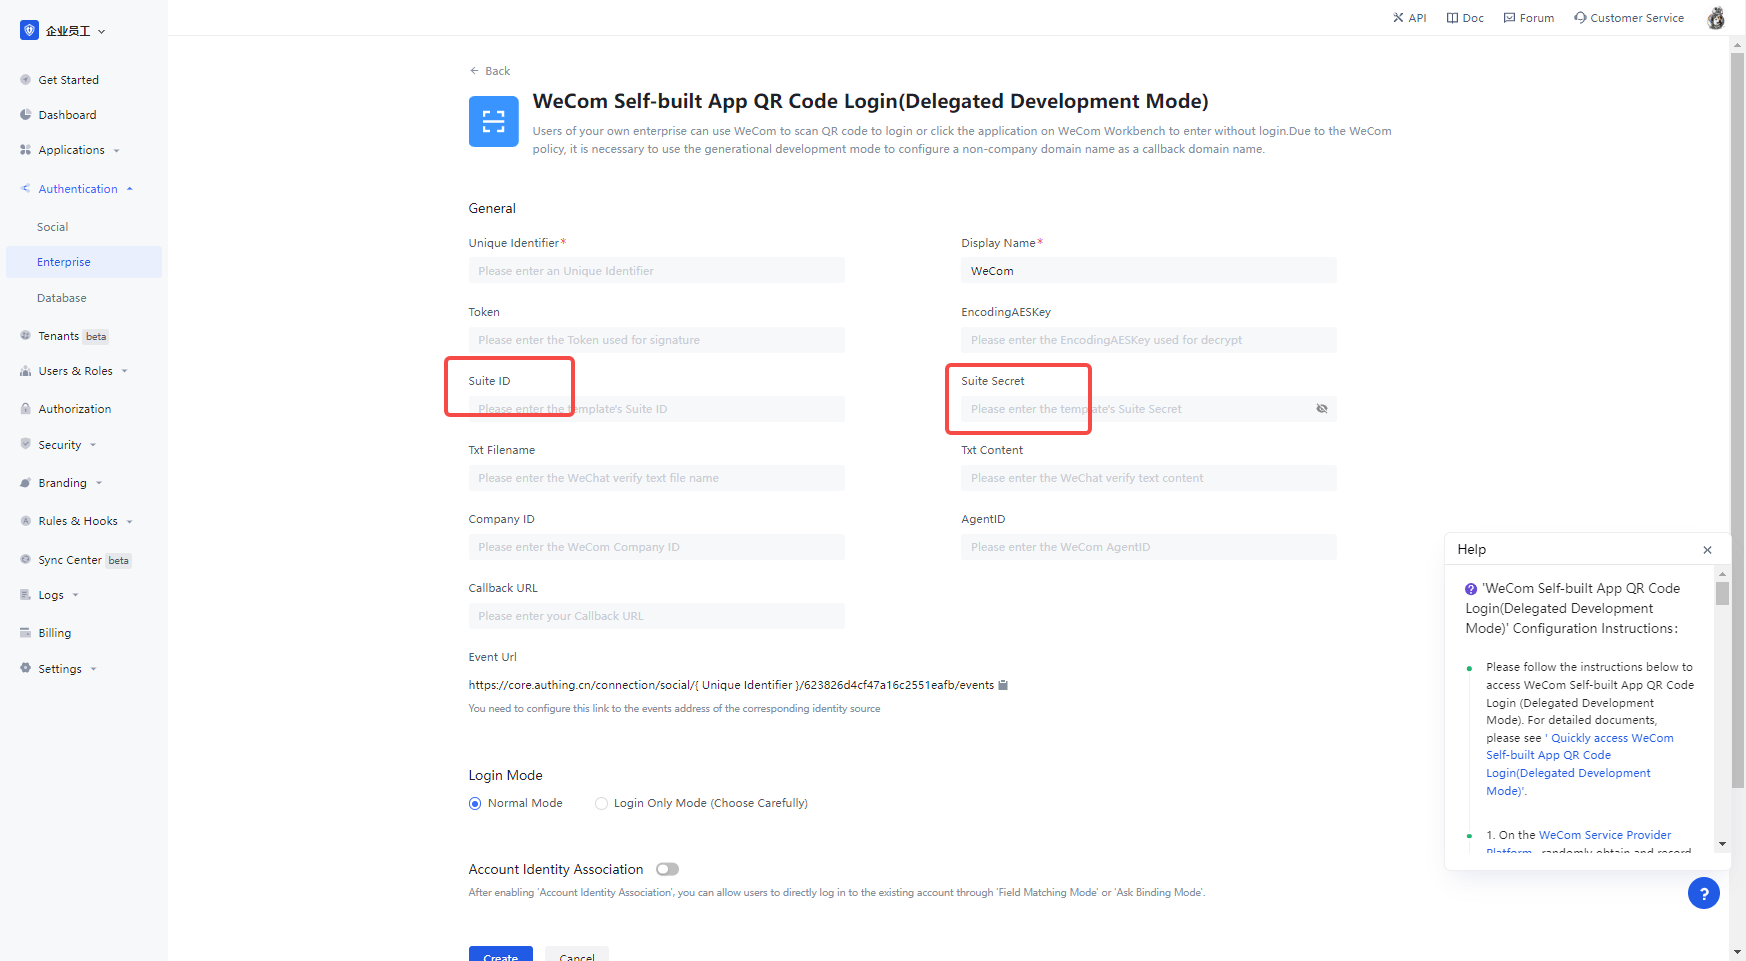
2.3 Please fill in the Token and EncodingAESKey obtained from WeCom service provider backend configuration development information page on the "WeCom internal app code login (proxy development mode)" page.

Click Save and the Authing console will automatically jump to the identity source details page, copying the URL displayed in the event address at the bottom of the page. note that must click Save and follow up, otherwise the WeChat callback verification will not pass.
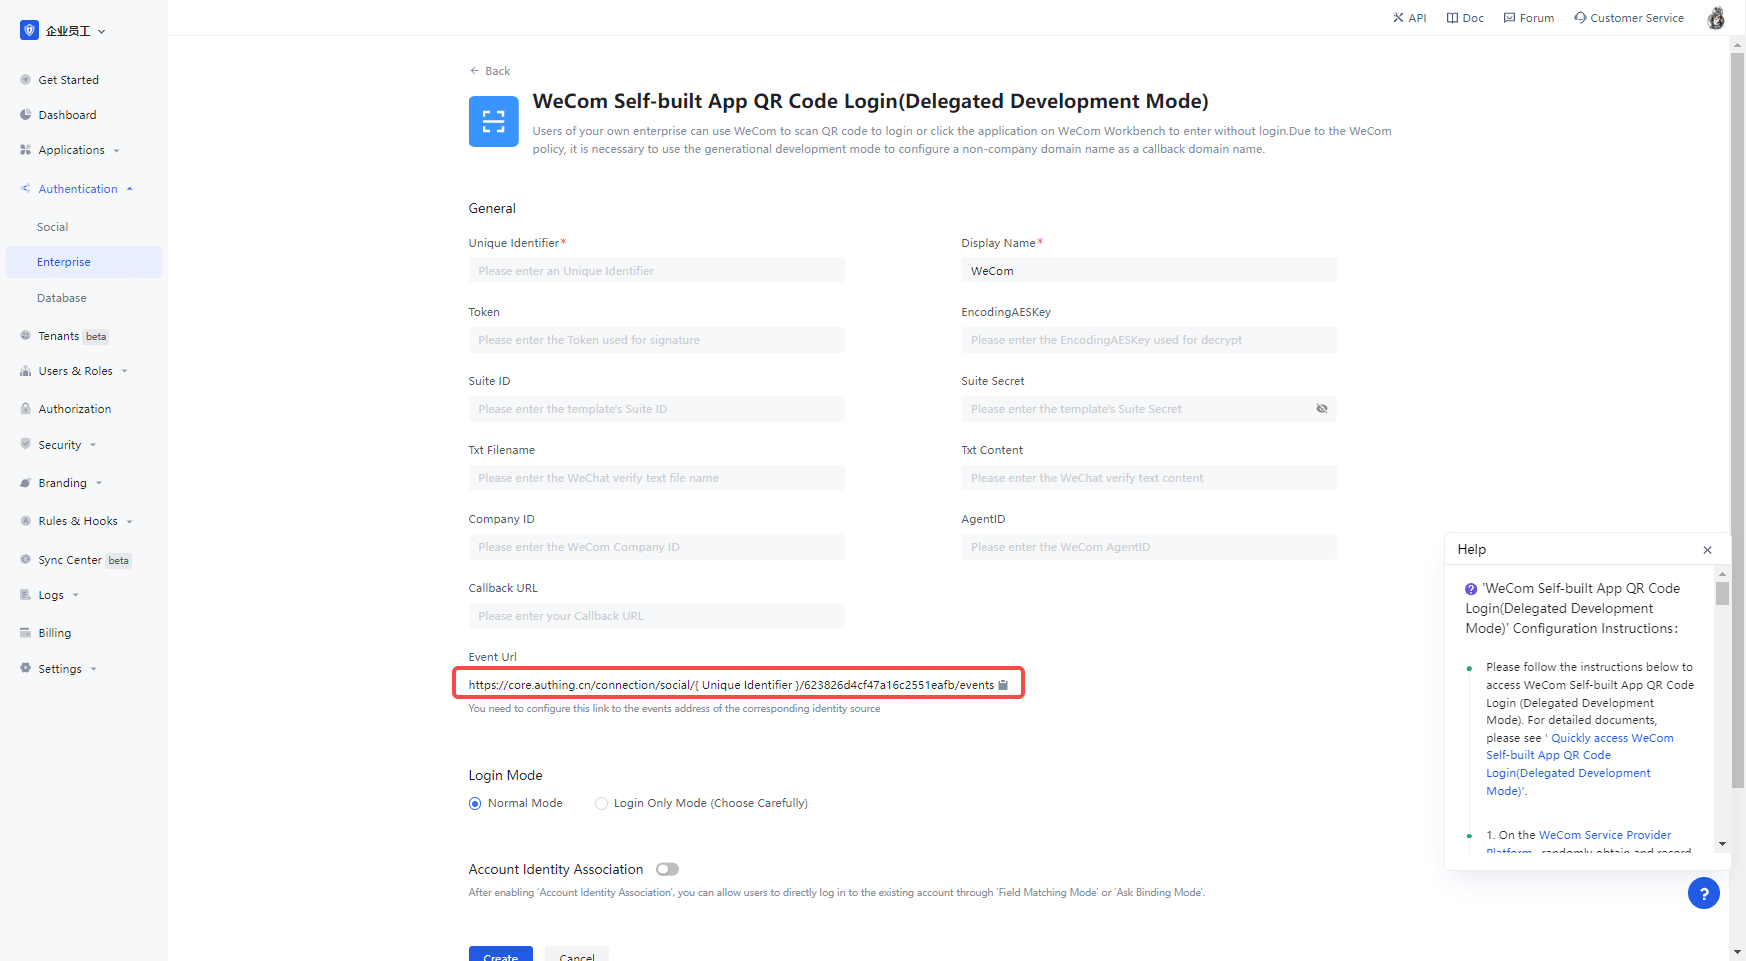
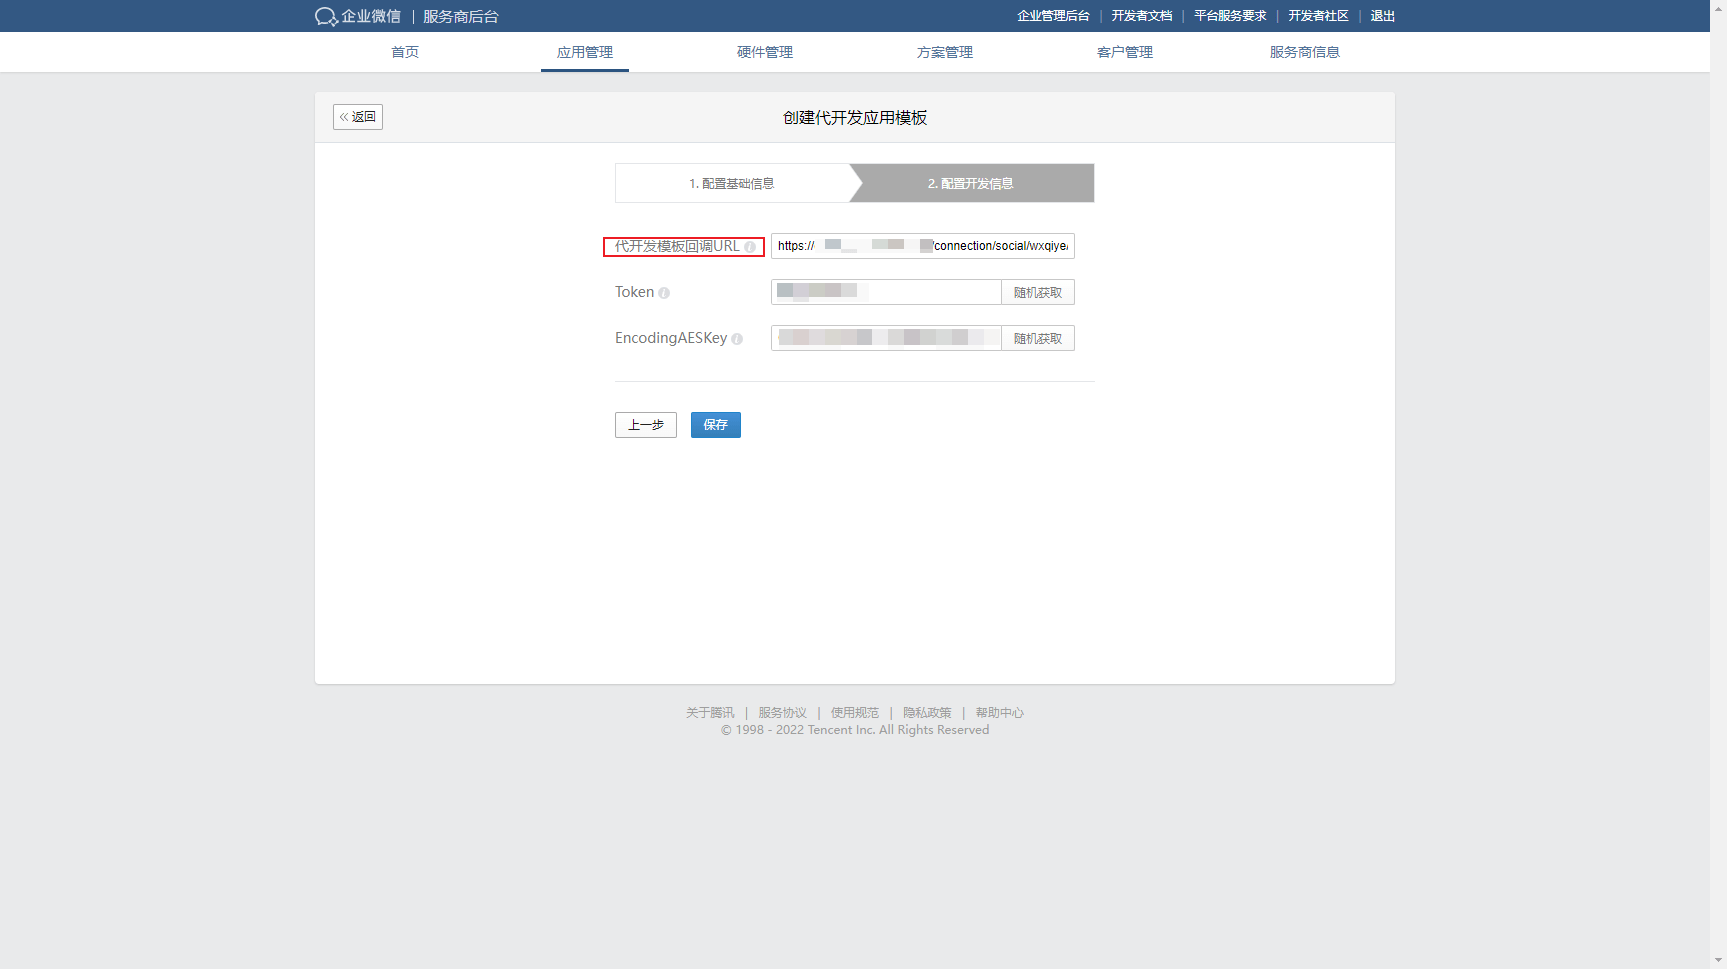
Fill in the URL of the event address obtained from the Authing console into the generation development template callback URL in the WeCom service provider backend, configuration development information, and then click Save
¶ Step 3: Go live with the WeCom Generation Development Application Template
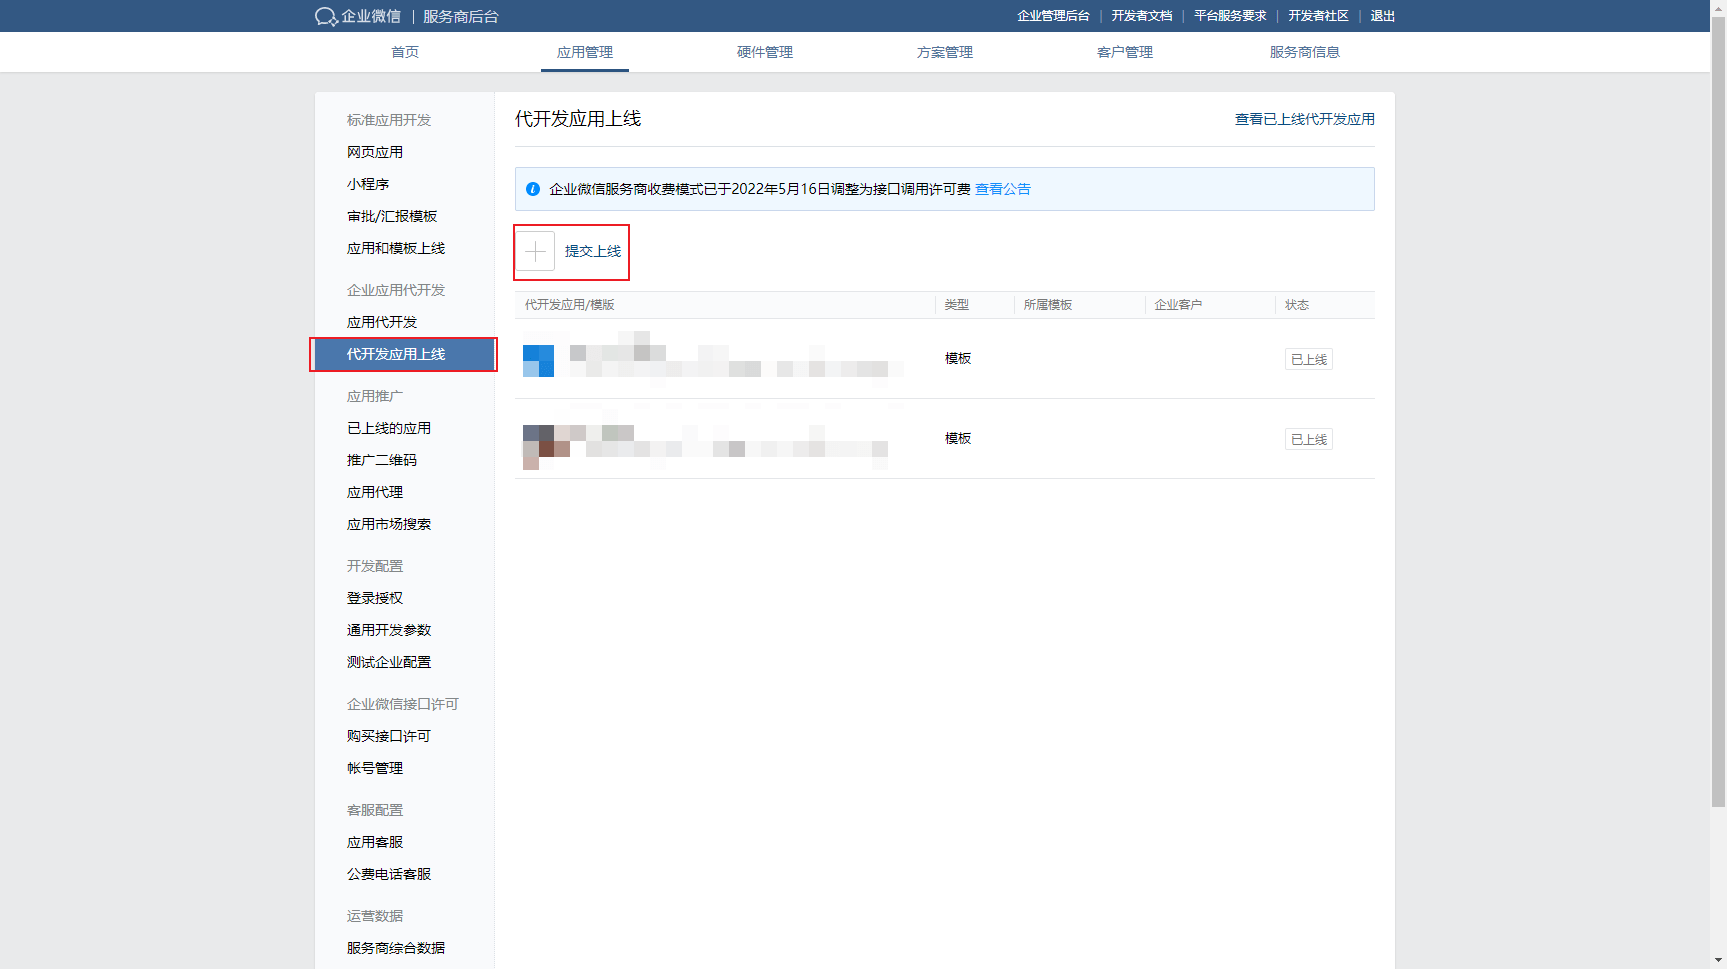
3.1 In the WeCom service provider backend, select Application Management, and in Online Application Development, click the Submit Online button to submit the development template you just created
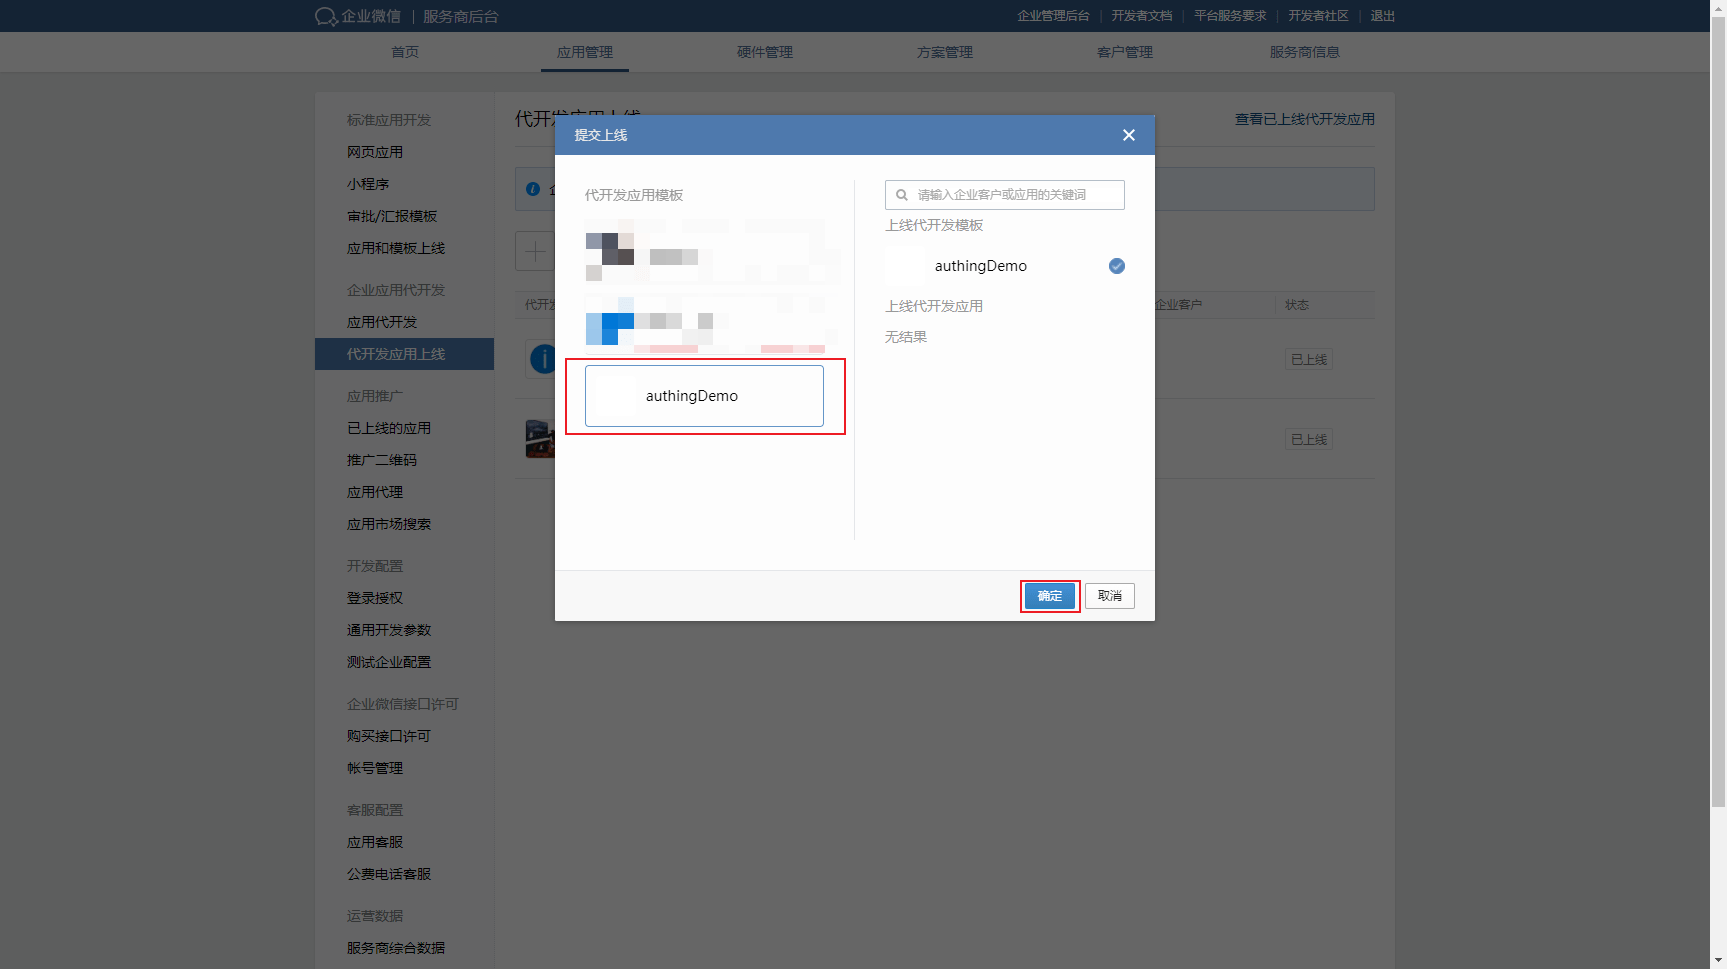
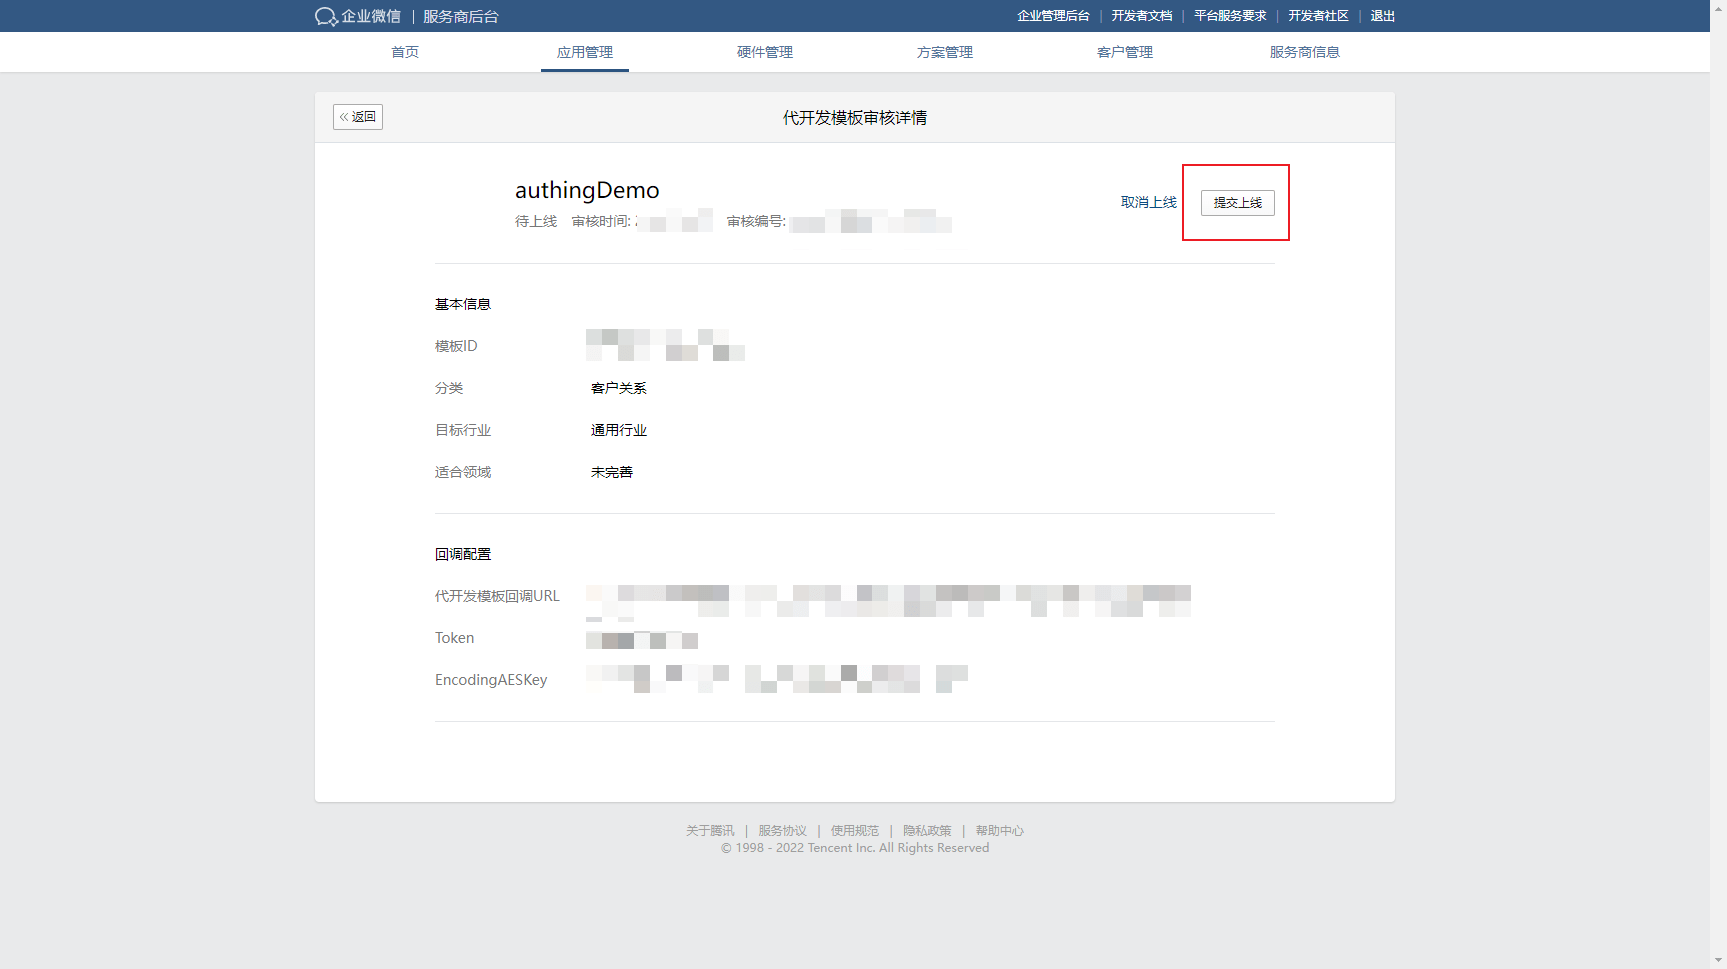
3.2 WeCom will review the development templates, after the review, click on the template, enter the development template review details, and select Submit to go live 
3.3 On the WeCom App Development page, select App Development, select the app template that needs to be authorized, and click View Template Information
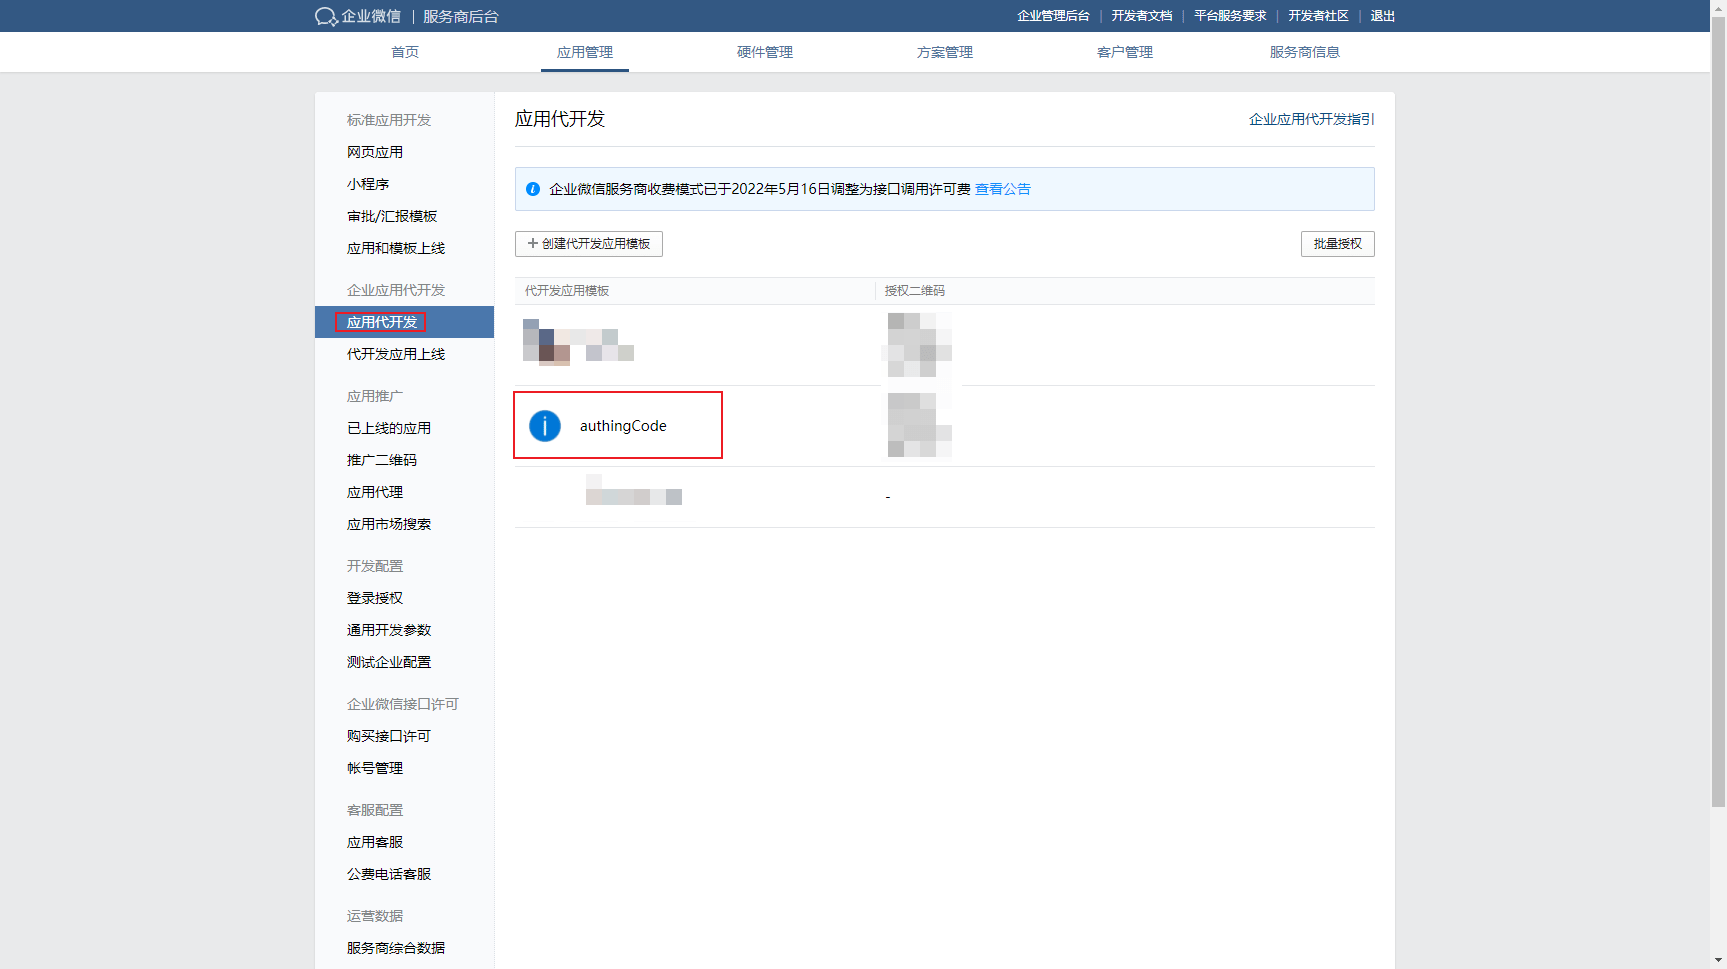
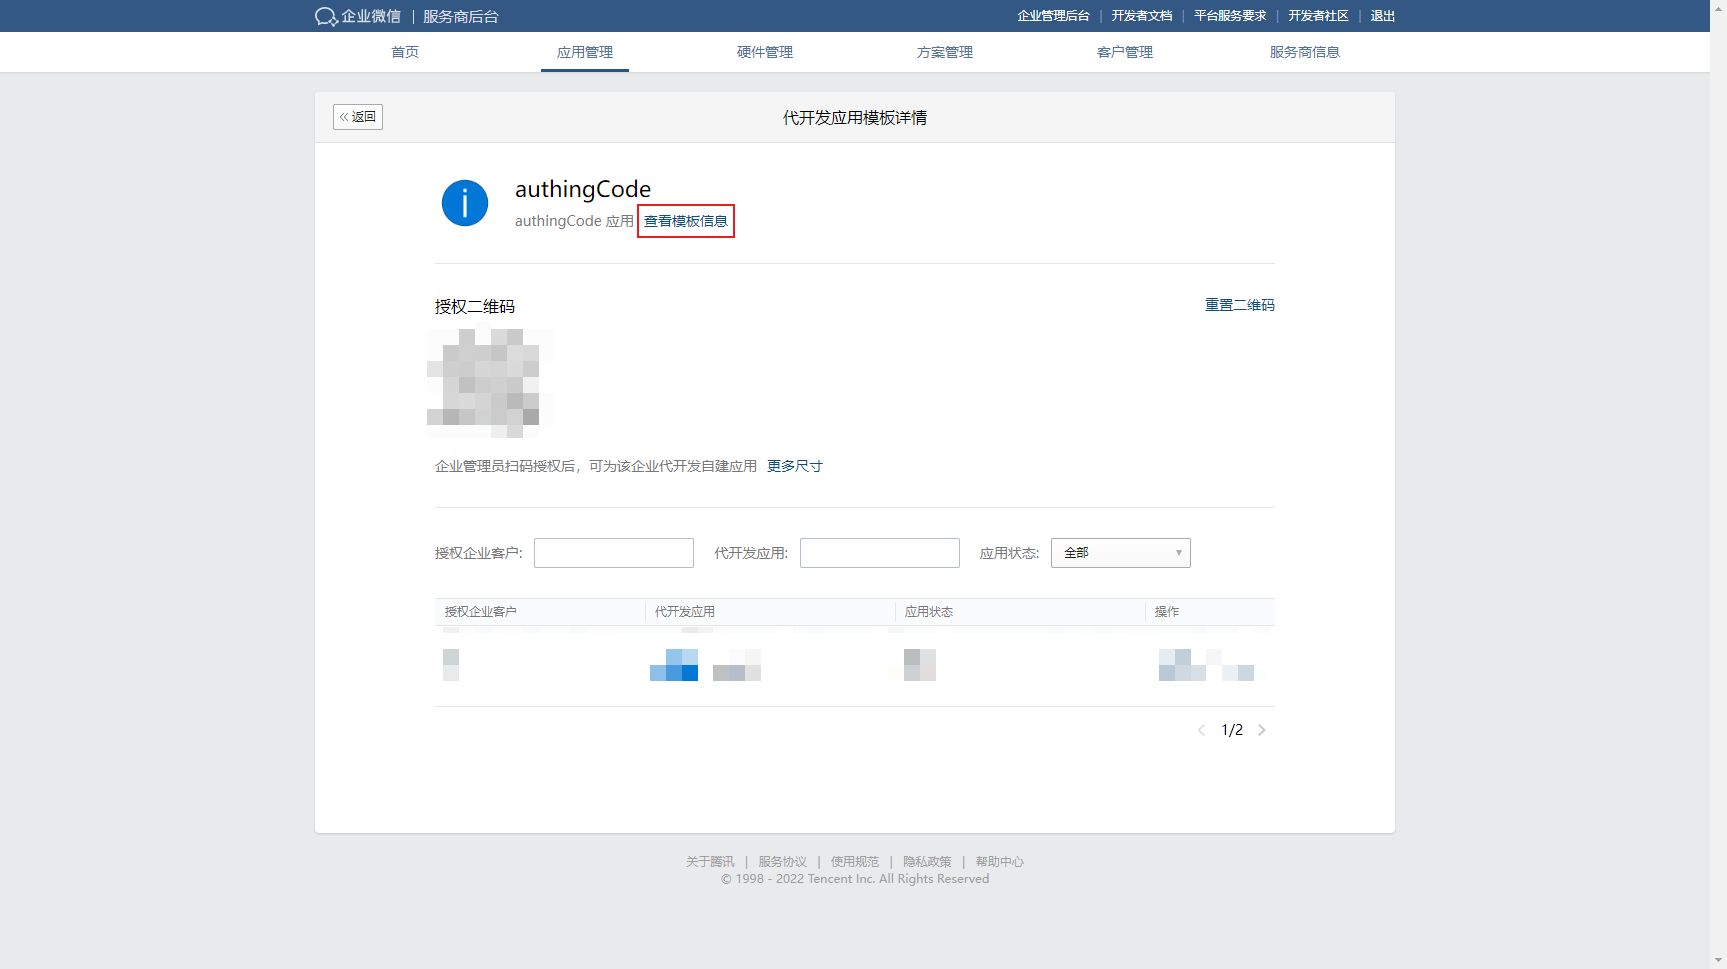
3.4 Fill the template ID and template Secret into the Authing console's identity source information separately 
3.5 In the backend of WeCom service provider, Service provider information page, select basic information, IP allowlist you need to add the server IP address of Authing, click Authing server IP list (opens new window) to get it 
¶ Step 4: Enterprise license surrogate development template and develop the surrogate application
4.1 On the app development page, click on the app development template you just created and the enterprise administrator scans the authorization QR code.
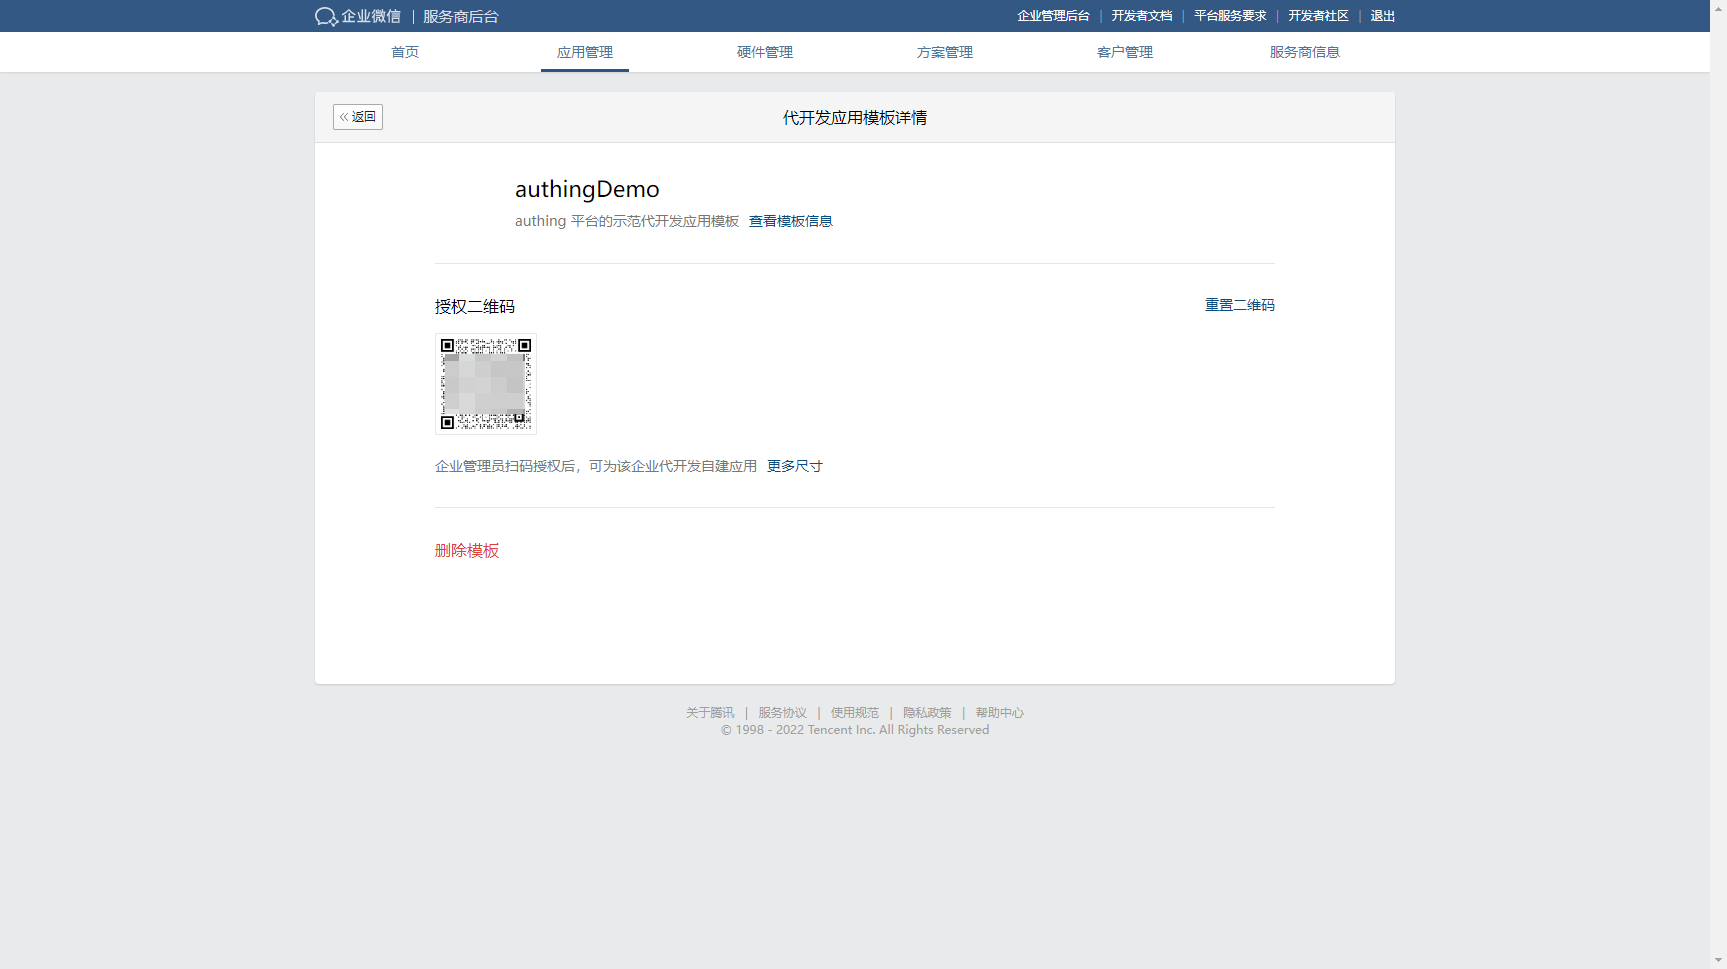
Refresh the page
Under the Modern Application Development page, click Start Application Development 
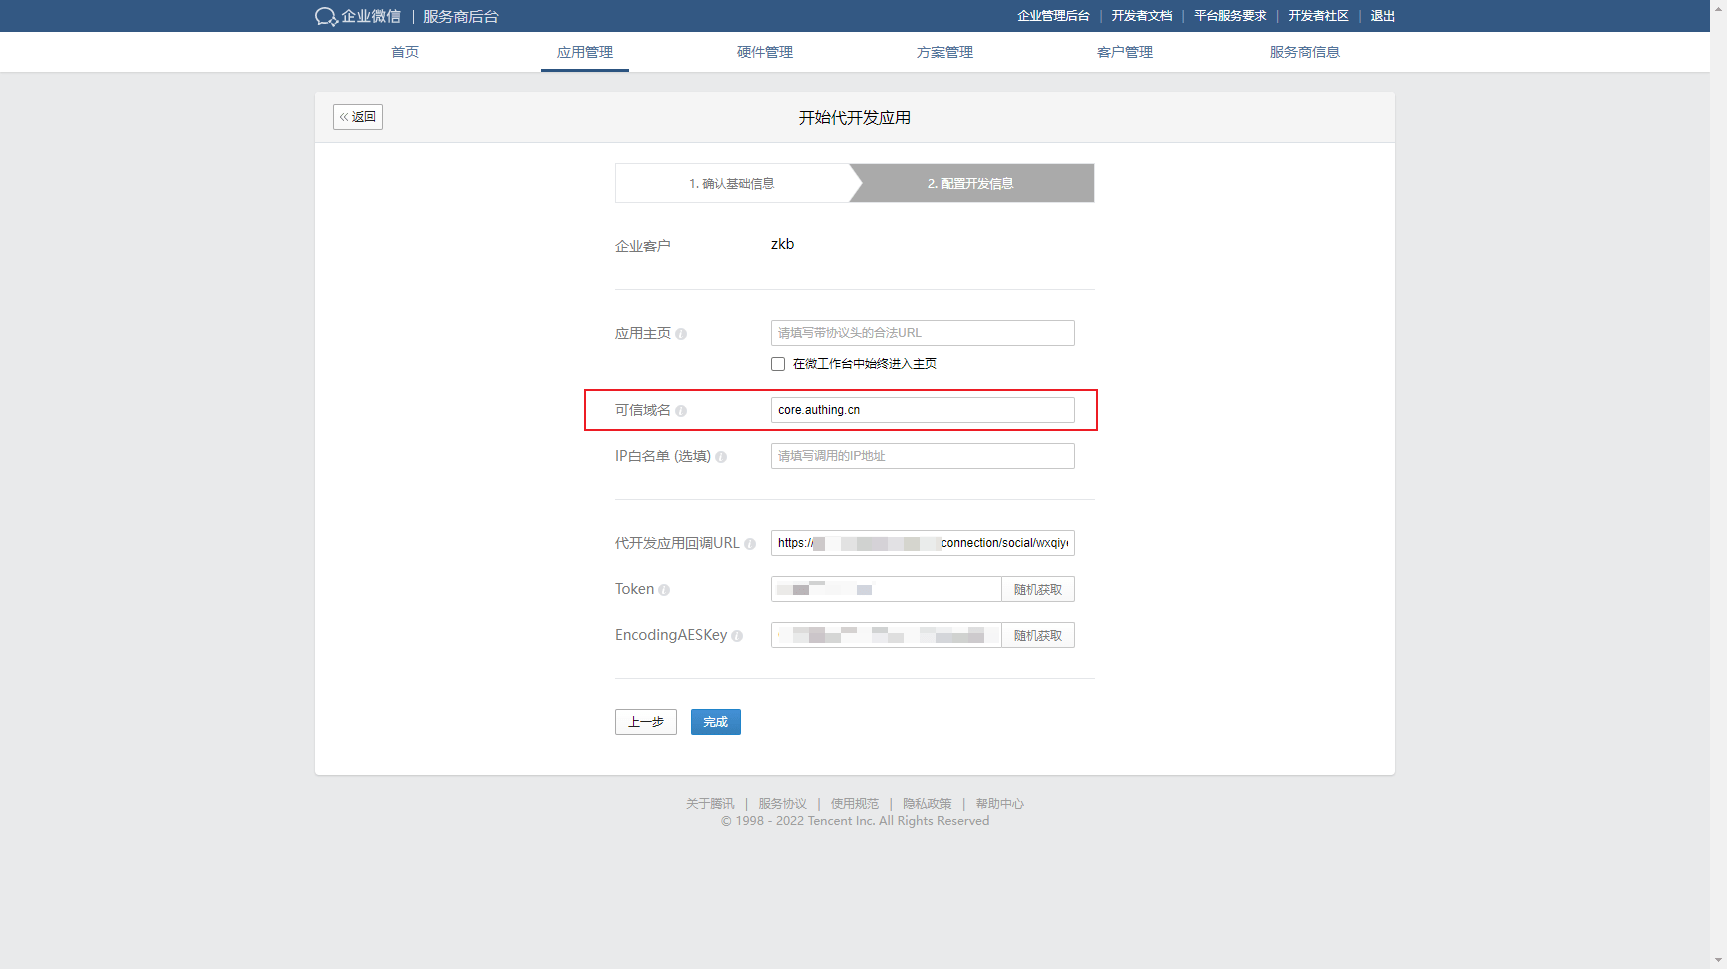
After confirming the base information, configure the development information and fill in core.authing.cn in the trusted domain
¶ Step 5: Configure and bring the surrogate app online
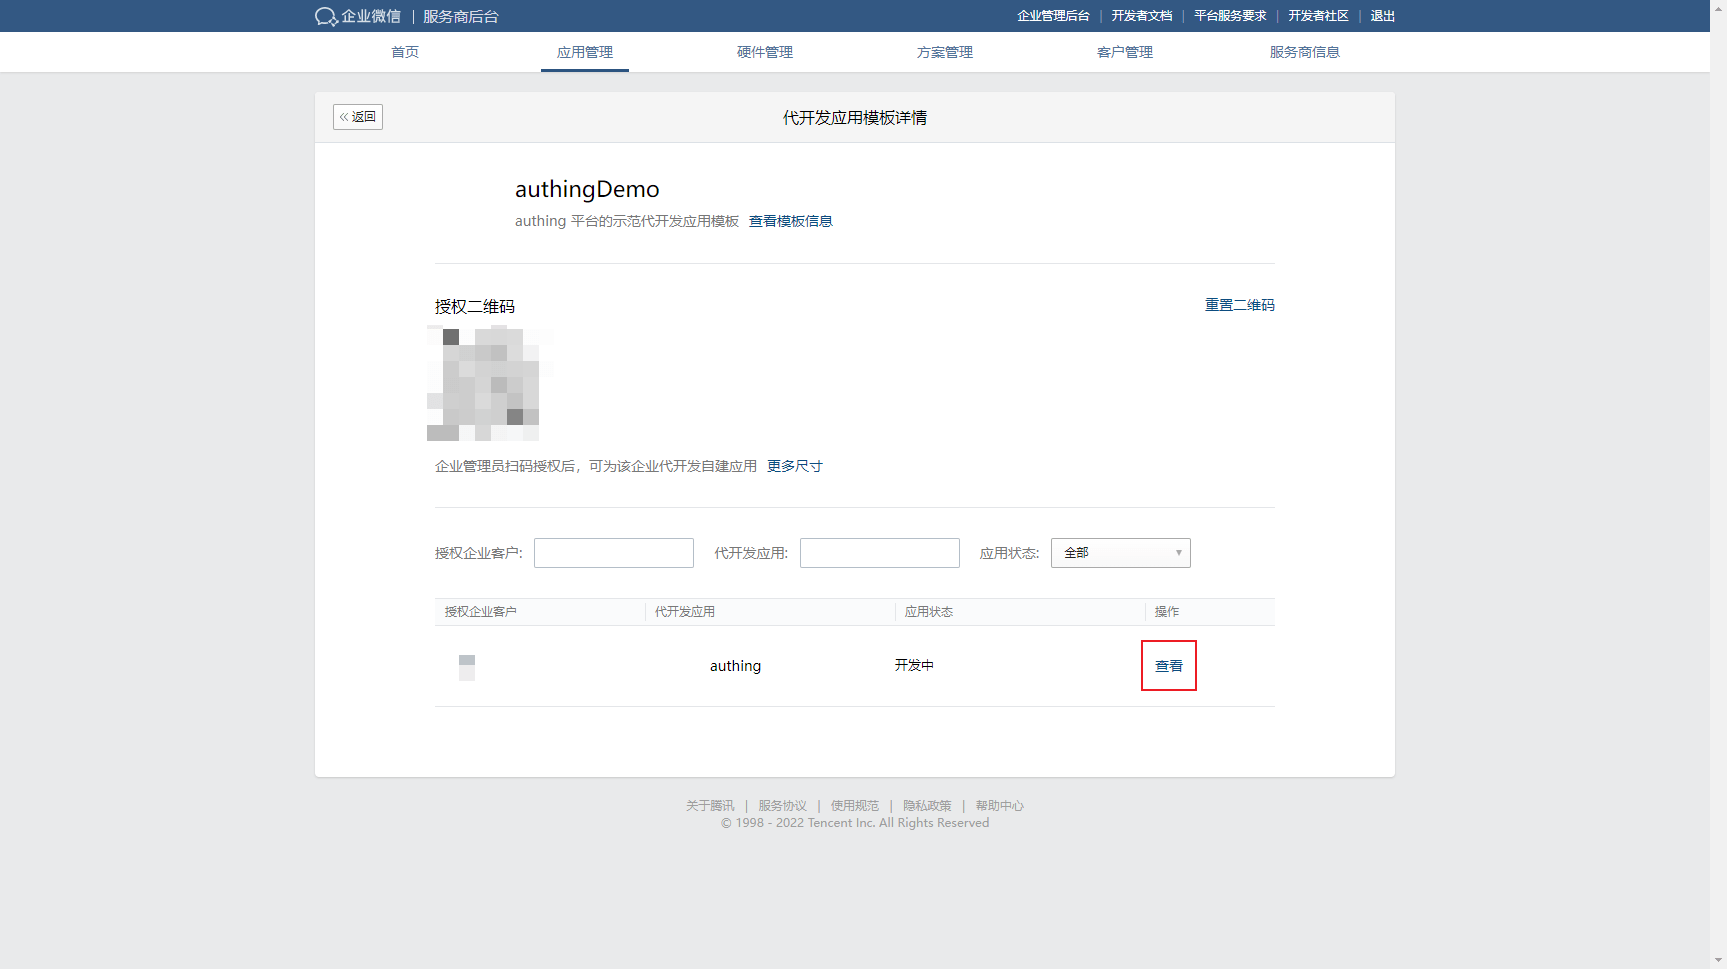
After clicking Finish, go back to the surrogate app template details page and click View
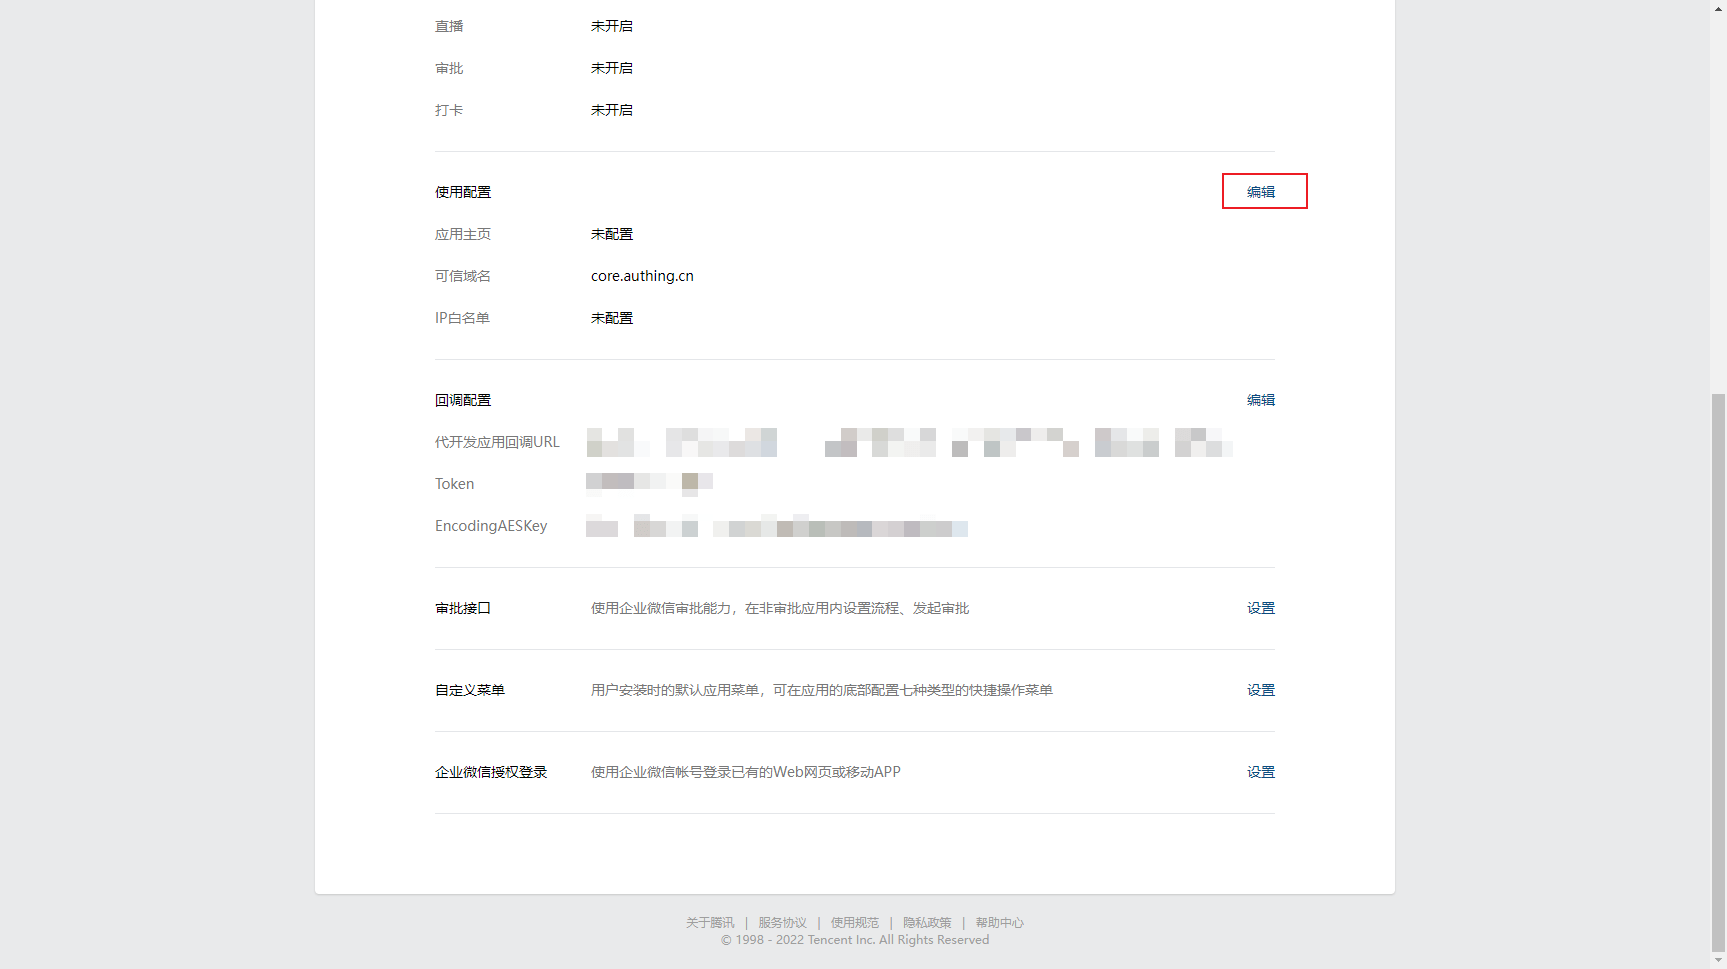
Edit the usage configuration
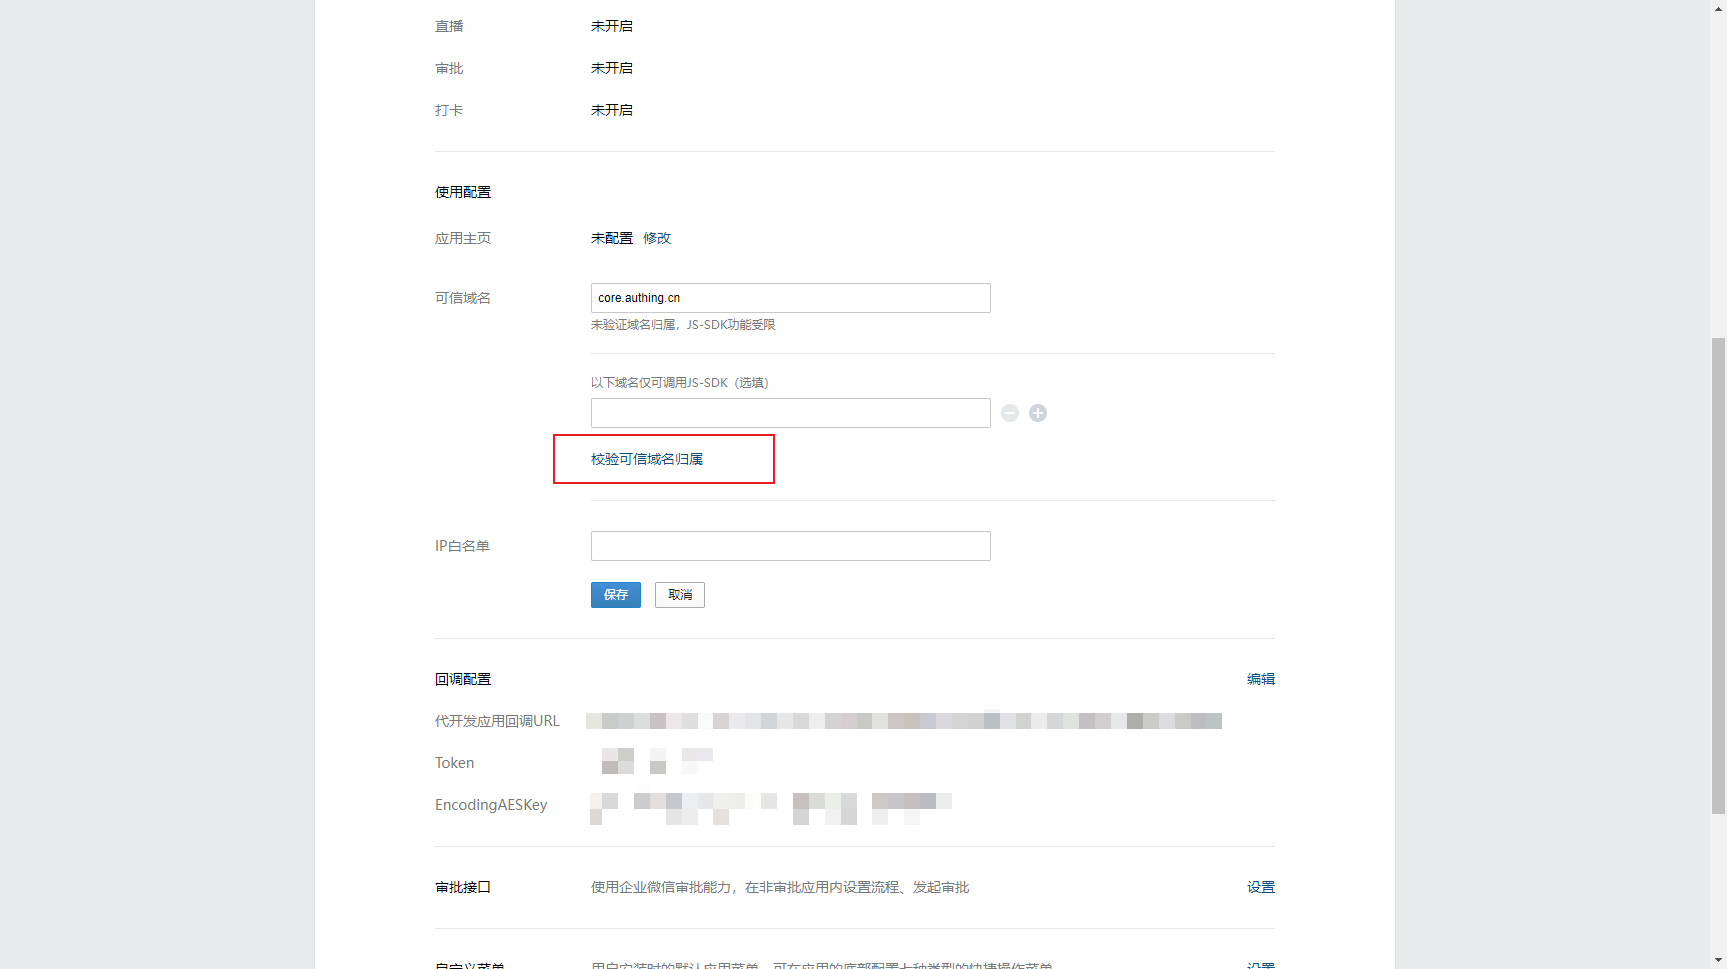
Click Verify Trusted Domain Attribution
In the pop-up window, select Download File 
Fill in the Txt Filename and Txt Content of Authing with the filename and content, and click Save 
Click the Save button on the Use Configuration on the WeChat platform to save.
Set up WeCom Authorized Login 
Fill in core.authing.cn in the authorization callback field in the web page
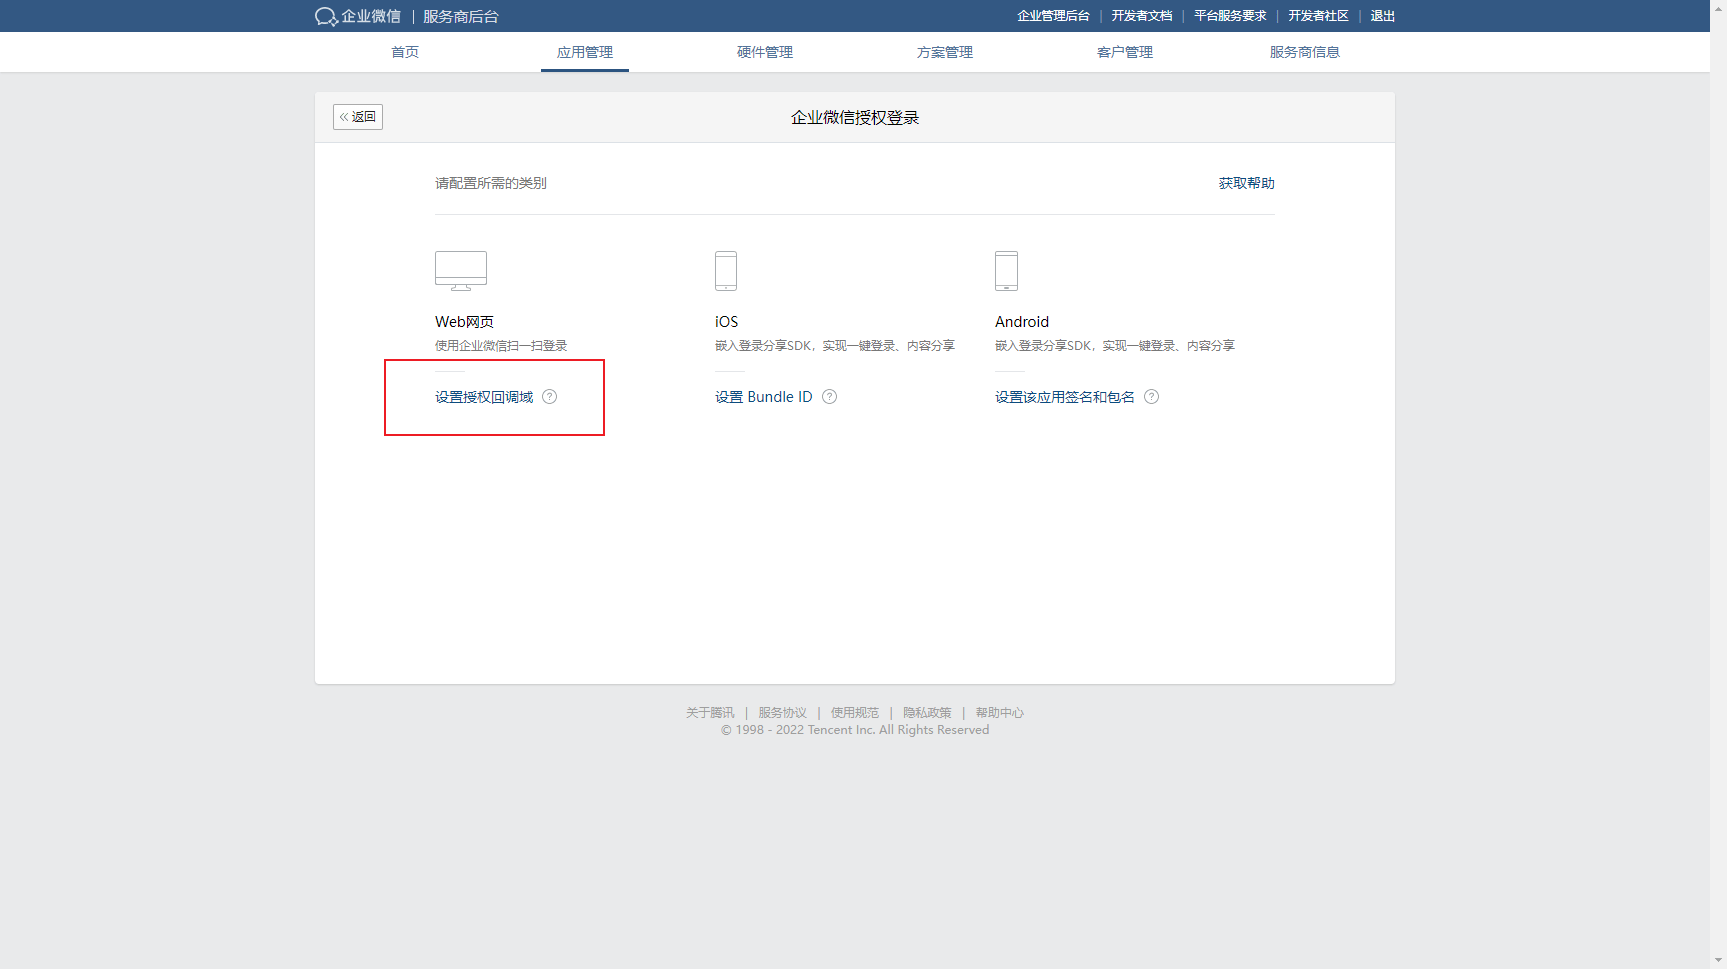
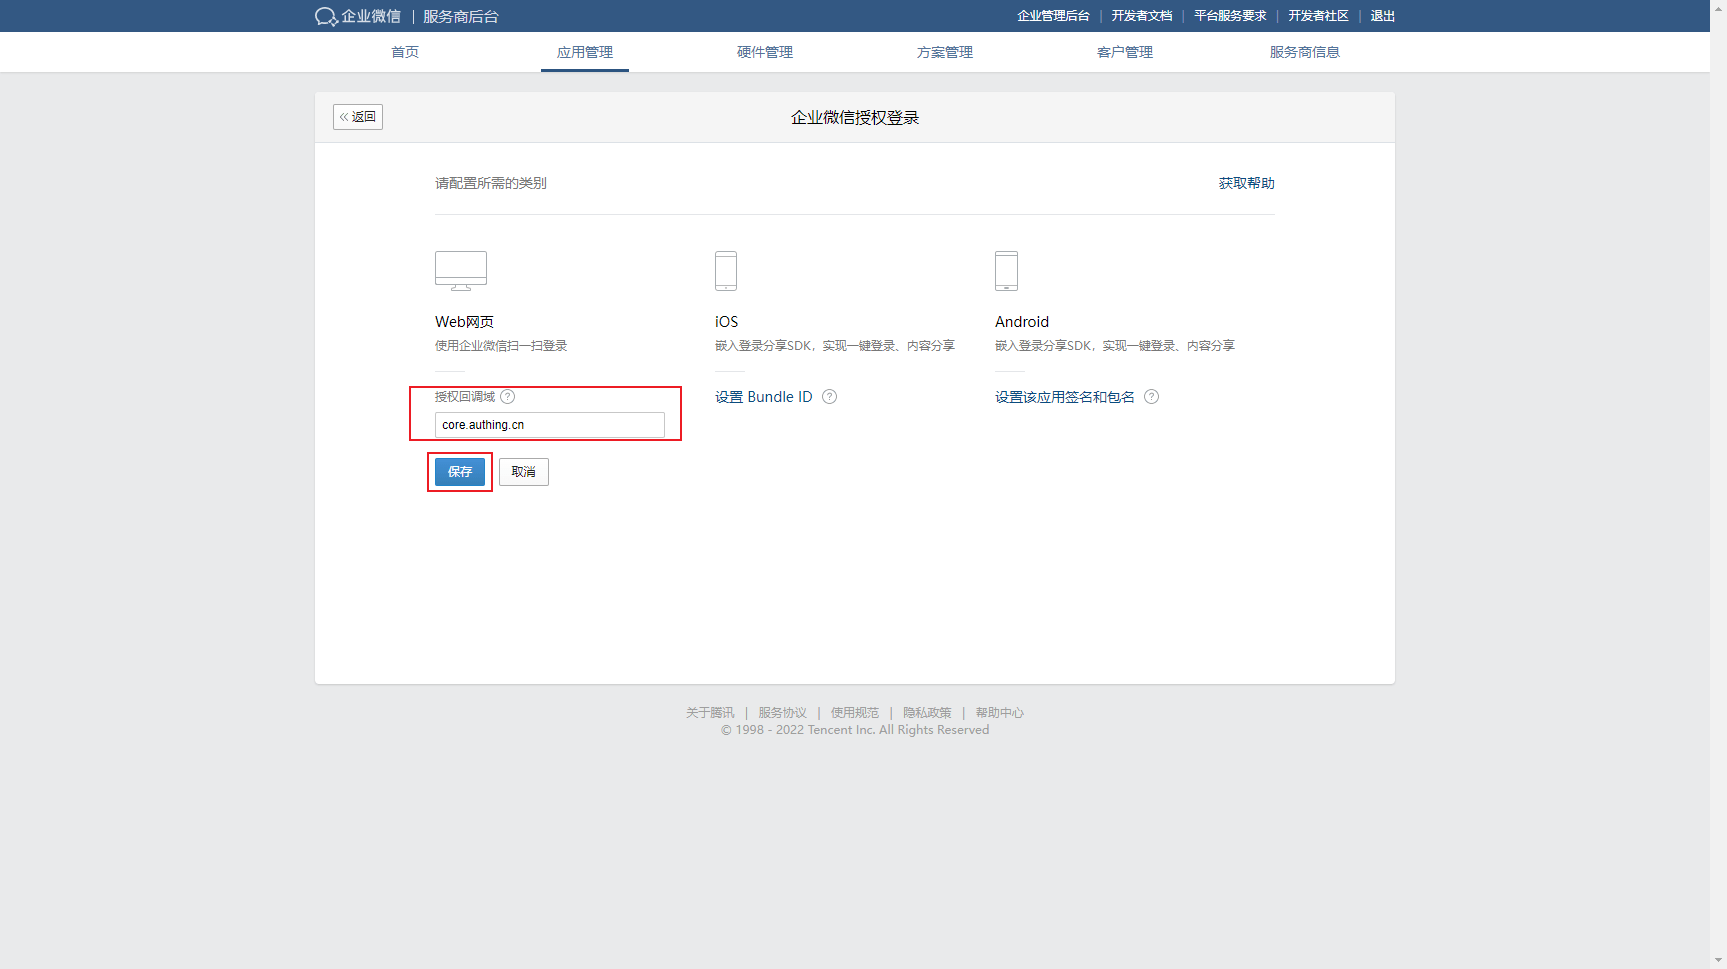
After the configuration is complete, the app is submitted live and reviewed on behalf of the developer
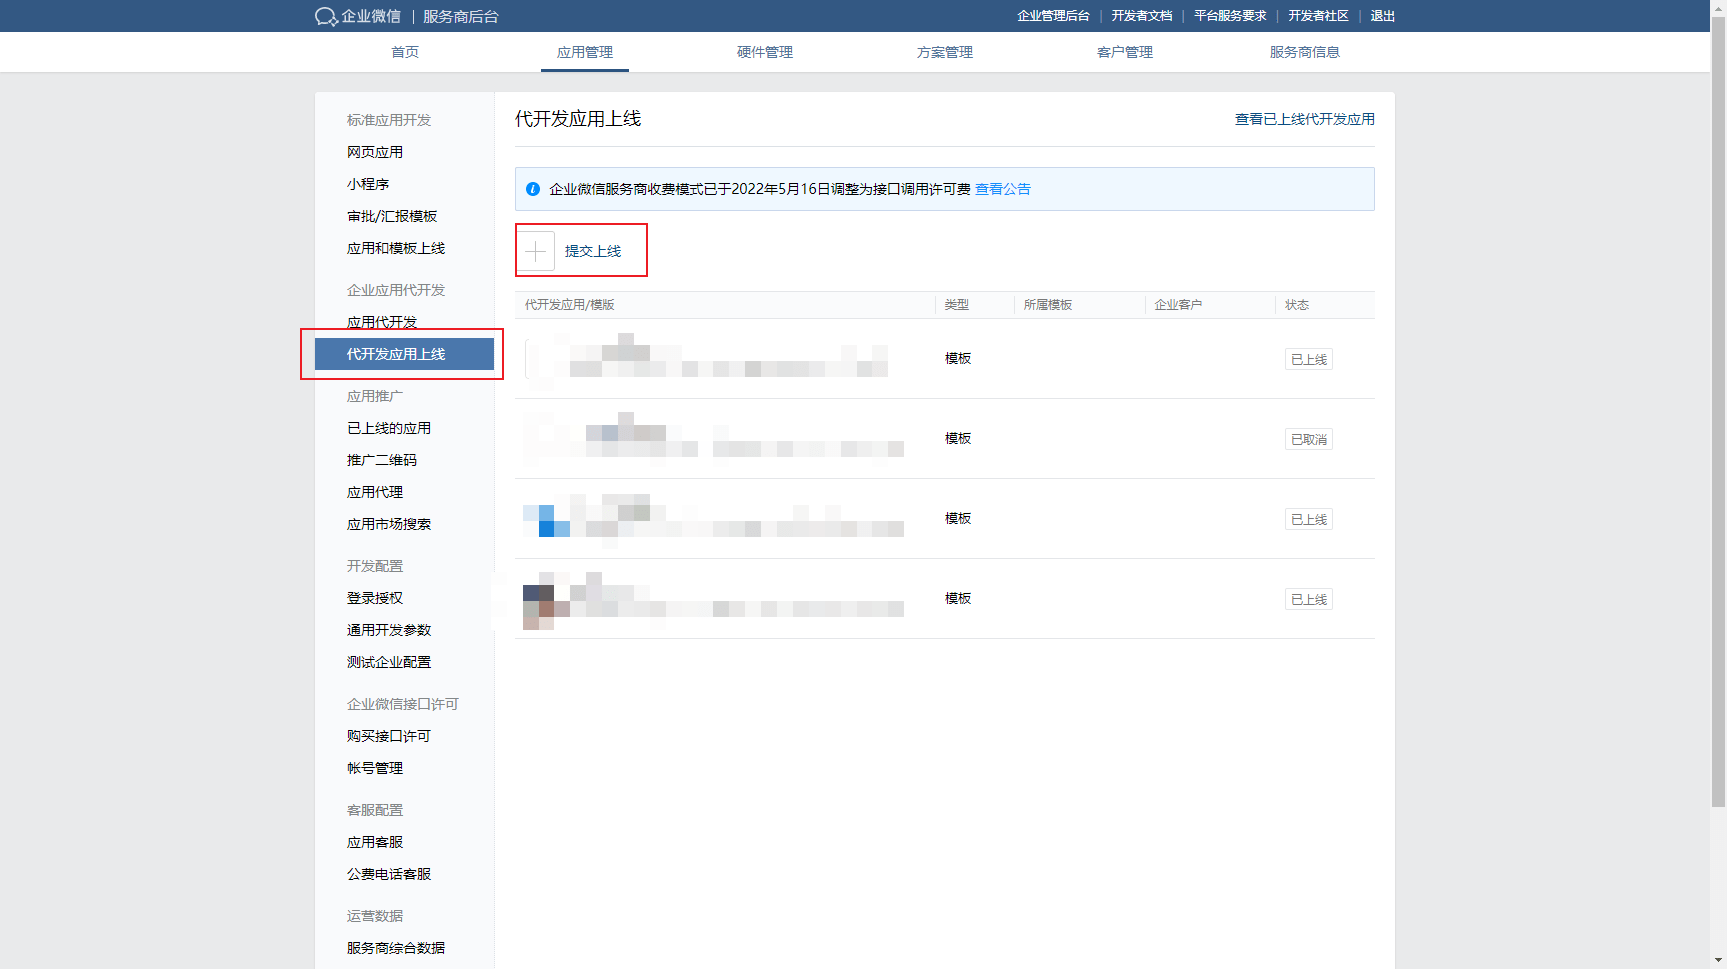
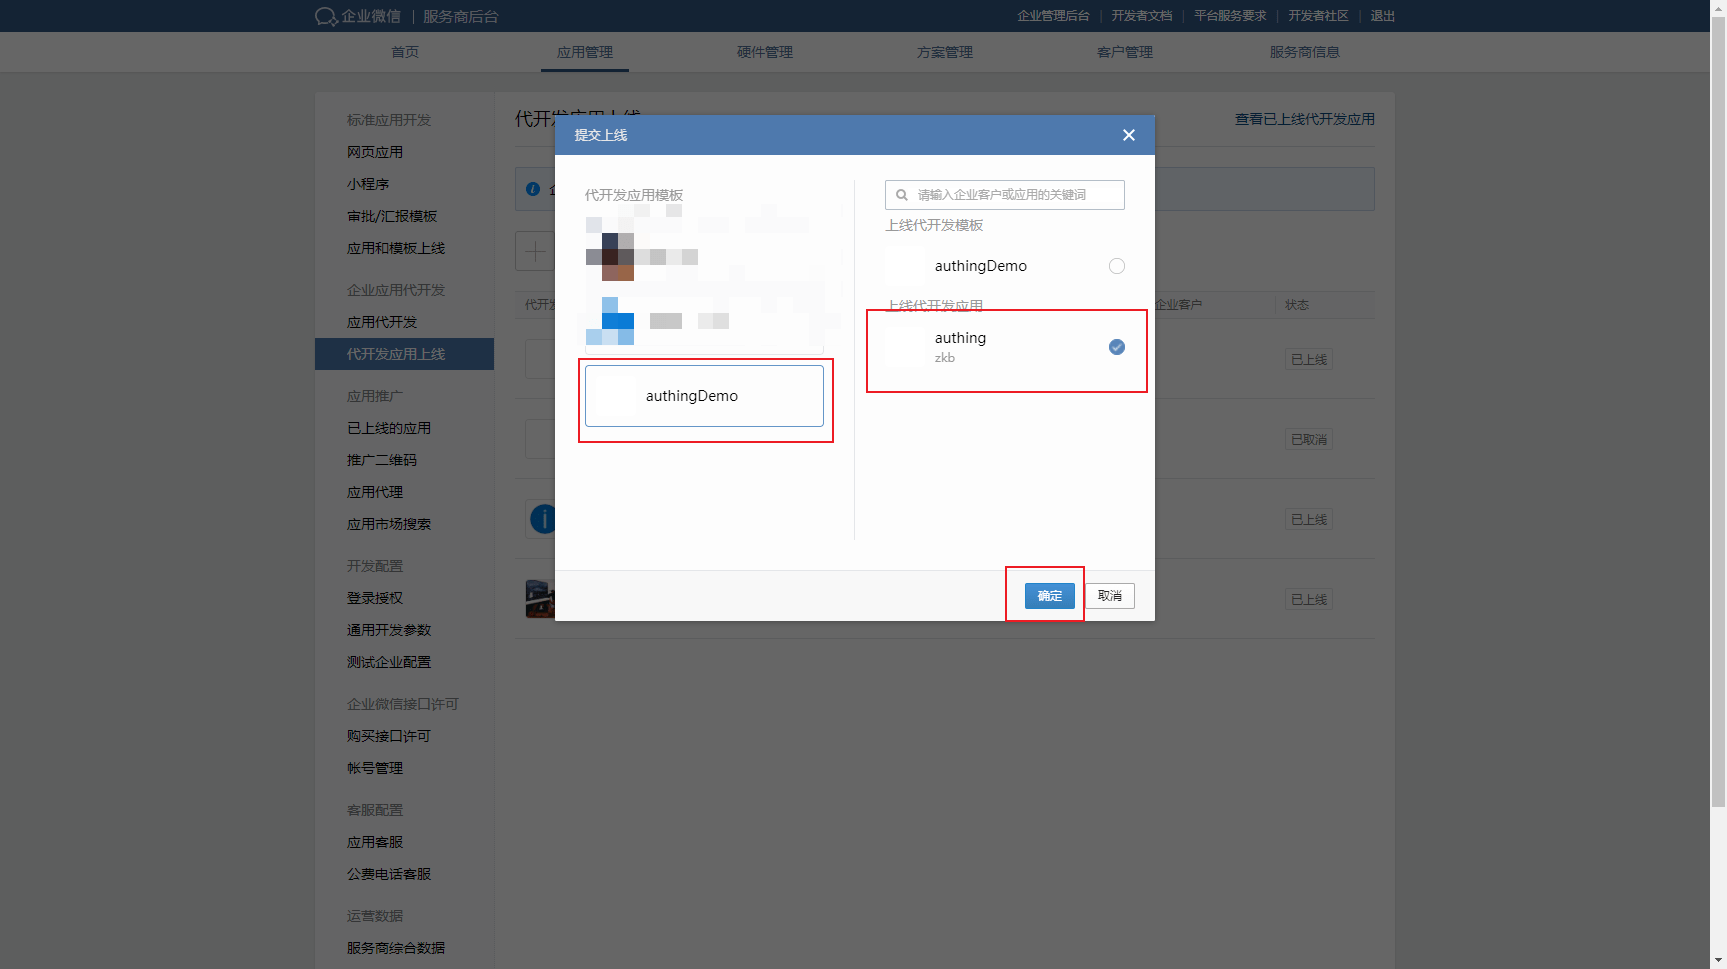
After the review, the app status changes to Pending 
Click into the pending app and submit it to go live 
In the Enterprise Admin backend, My Enterprise View Enterprise ID 
Fill in the Enterprise ID in Authing with the Enterprise ID 
Fill in the AgentId in Authing in the self-built application in the enterprise admin backend 
Click the edit button to add a visible scope so that only members of the selected organization can log in using Authing 
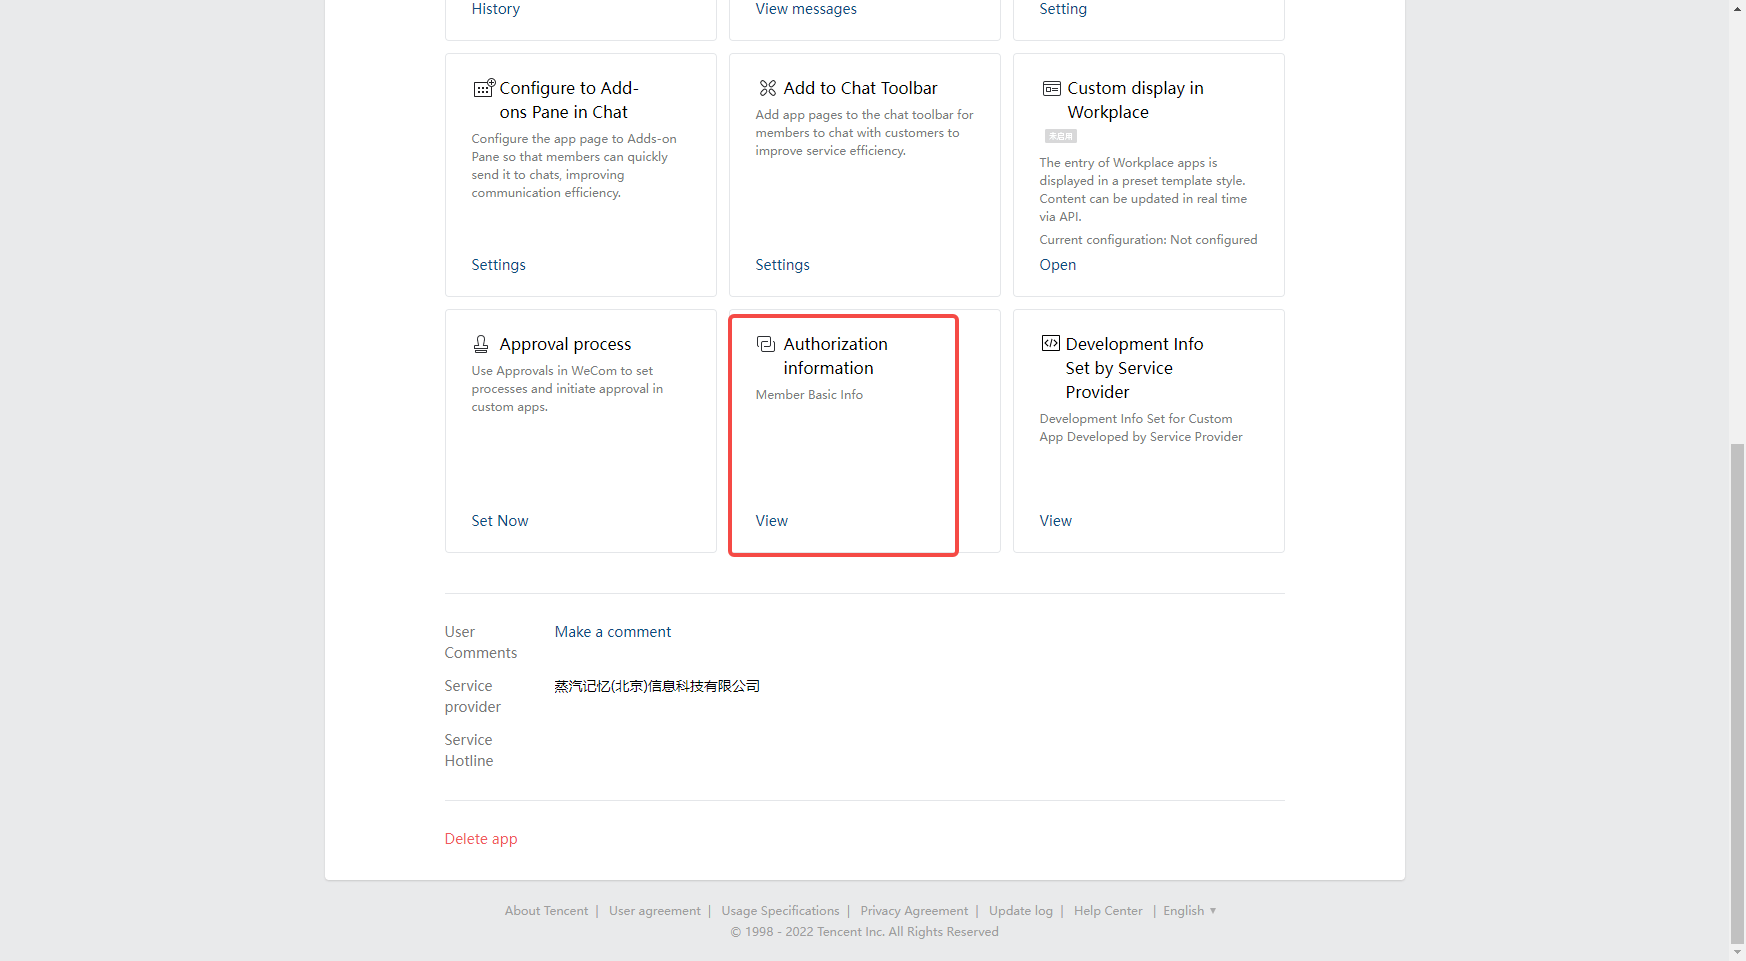
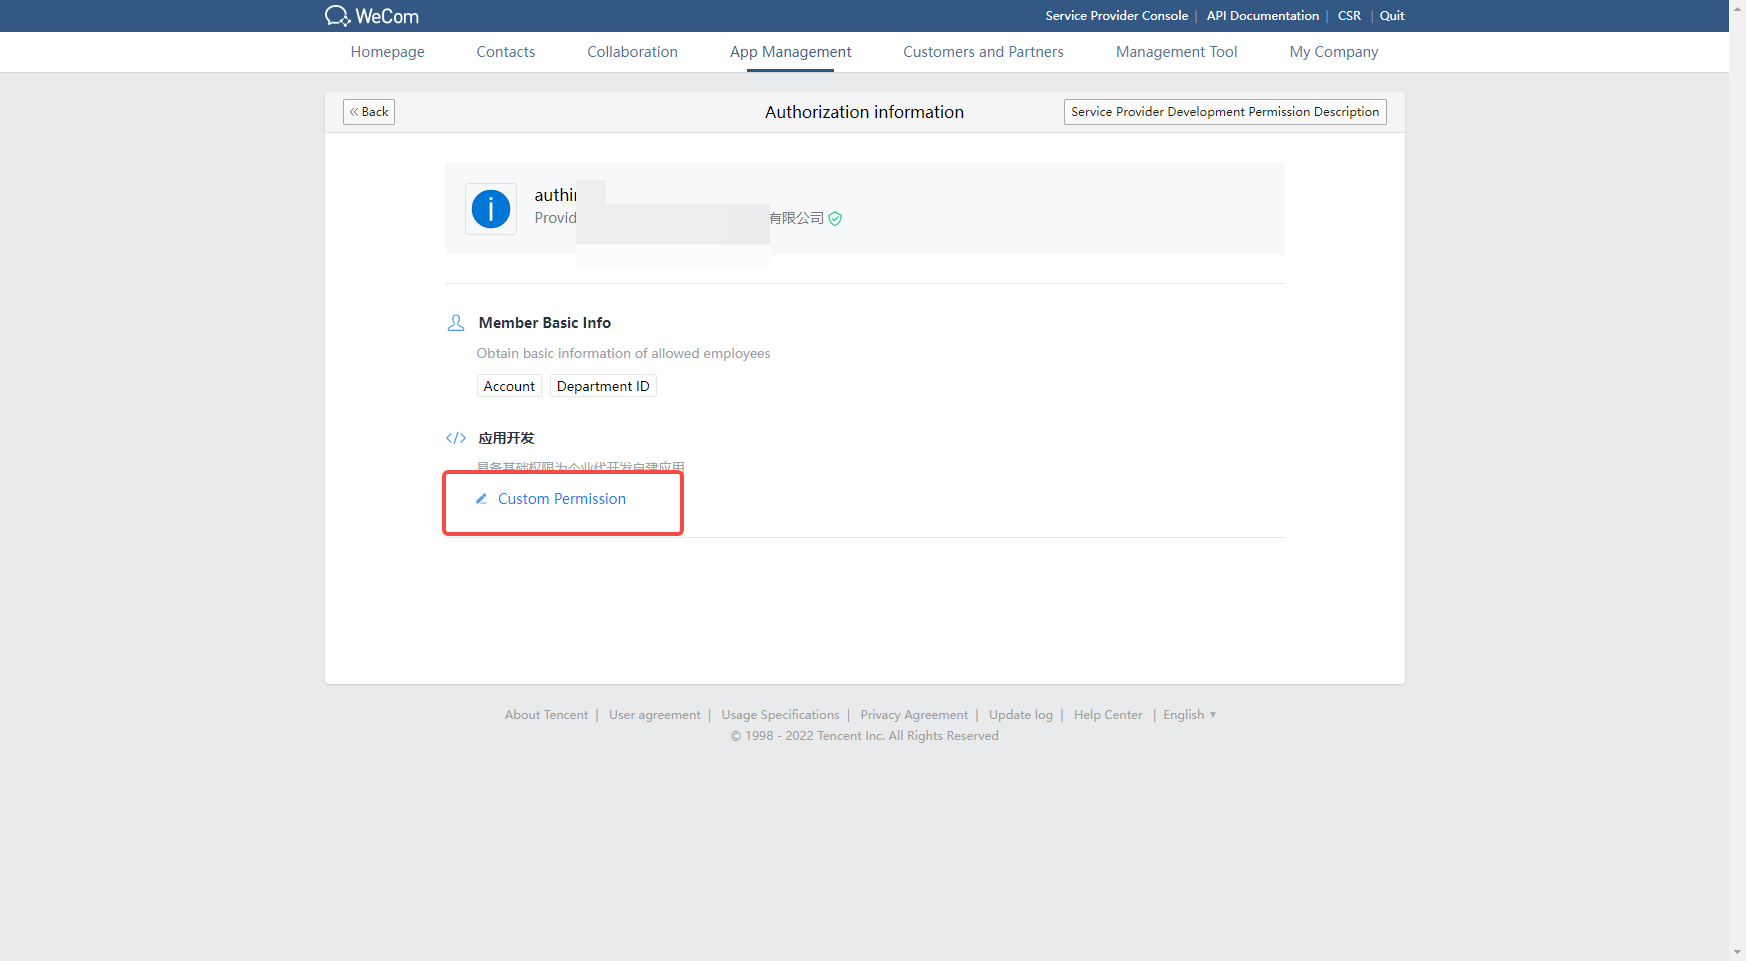
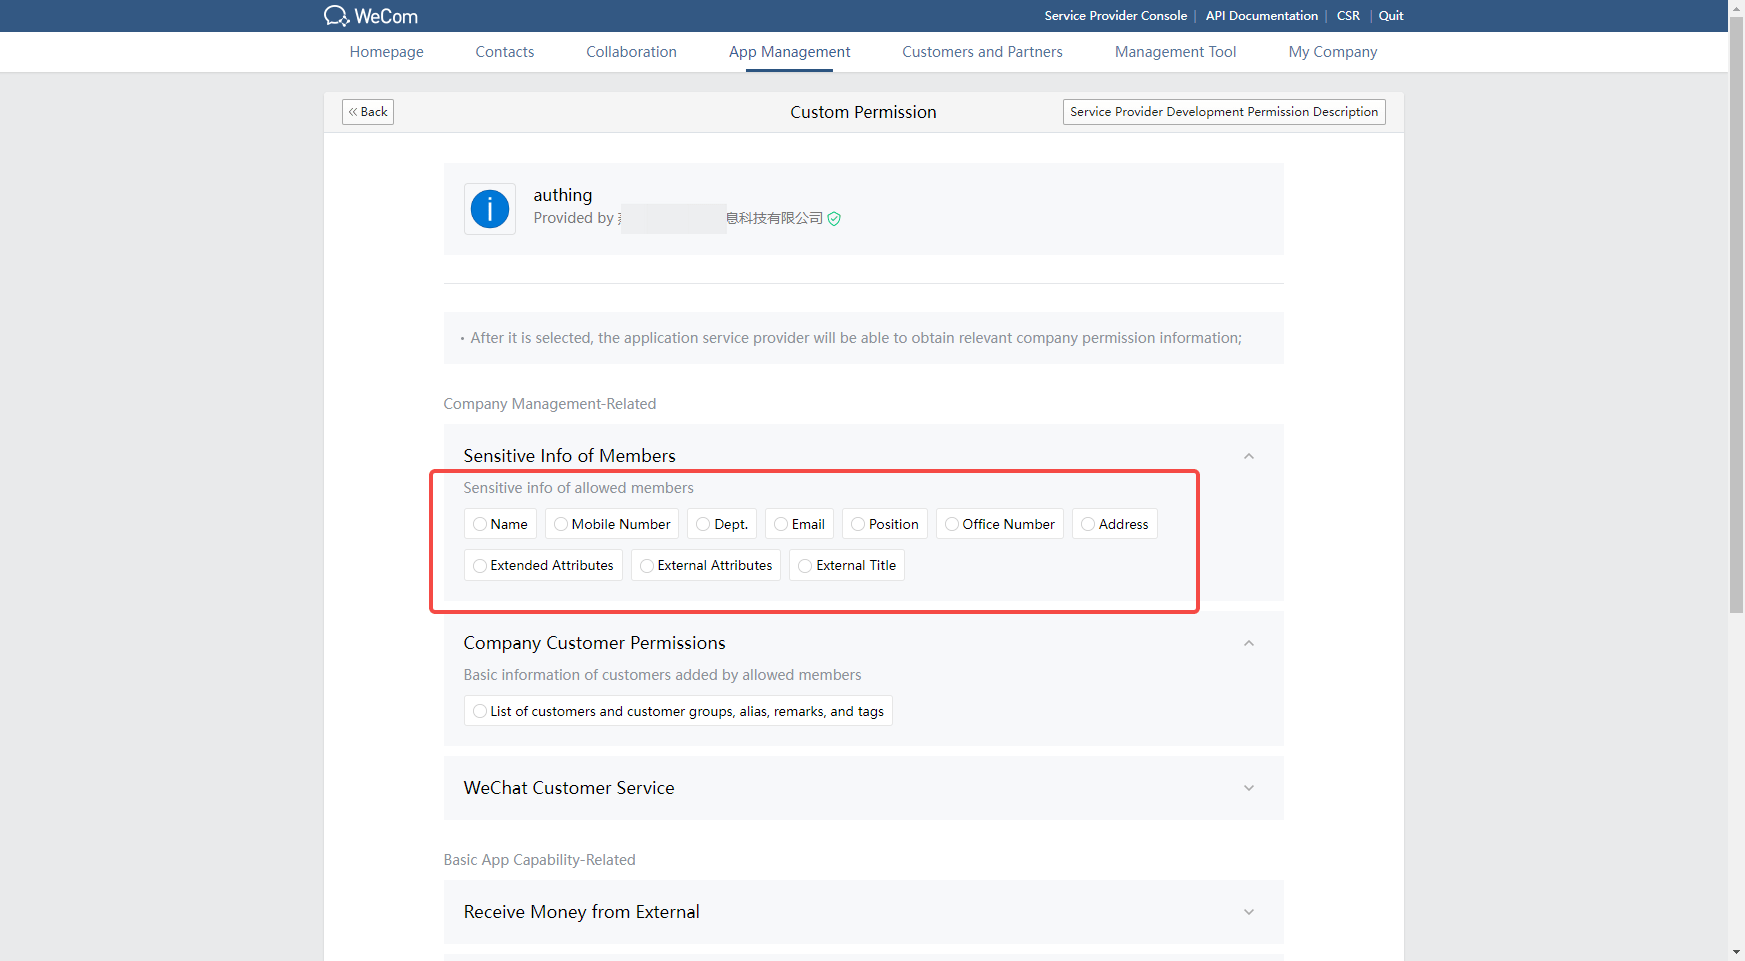
Click Authorization Information, select Custom Permissions, and add sensitive information about the allowed members
¶ Step 3: Development Access
Recommended Development Access Method: Using a hosted login page
Description of advantages and disadvantages: Simple operation and maintenance by Authing. Each user pool has a separate secondary domain; if you need to embed it in your application, you need to use the popup mode login, i.e.: after clicking the login button, a window will pop up with Authing hosted login page, or redirect the browser to Authing to the hosted login page.
Detailed access method.
3.1 Create an app in the Authing console, for details see: [How to create an app in Authing](https://docs.authing.cn/v2/guides/app/create- app.html)
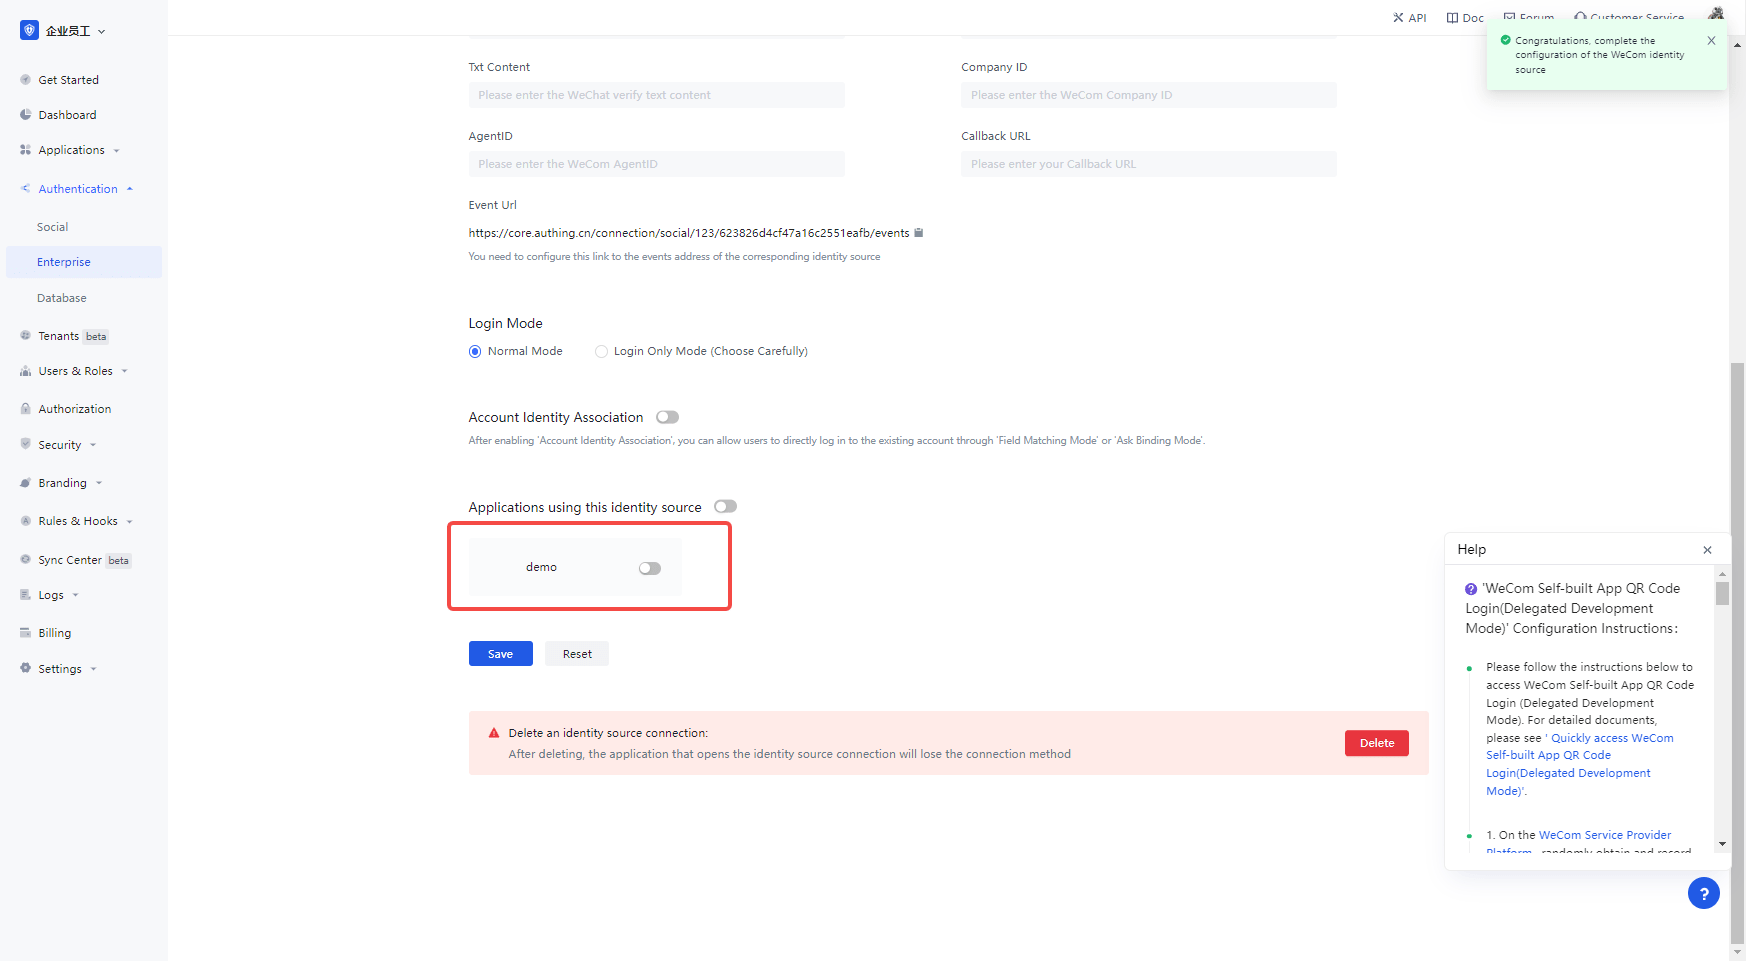
3.2 In the createdWeCom Self-built App QR Code Login(Delegated Development Mode) identity source connection details page, open and associate an app created in the Authing console
3.3 Experience the WeCom internal app swipe login on the login page (proxy development mode) Third-party login
